Quick and Easy Easter Greeting Card in under 10 minutes

Okay, so it’s Easter tomorrow. If you celebrate Easter, I hope you’re all set with your baskets, food prep, and all things beautiful. Amazingly, I am not hosting this year. Still, I’ve been busy, you’ve been busy… I missed my Mugshot Monday this week. Boo.

Last Saturday, I had a chance to play around with washi tape and my pals at the Iannelli Studio. This is what we made, and now you can make it too. You can also seeĀ  card in last week’s cookie recipe post.

Quick DIY Easter Greeting card

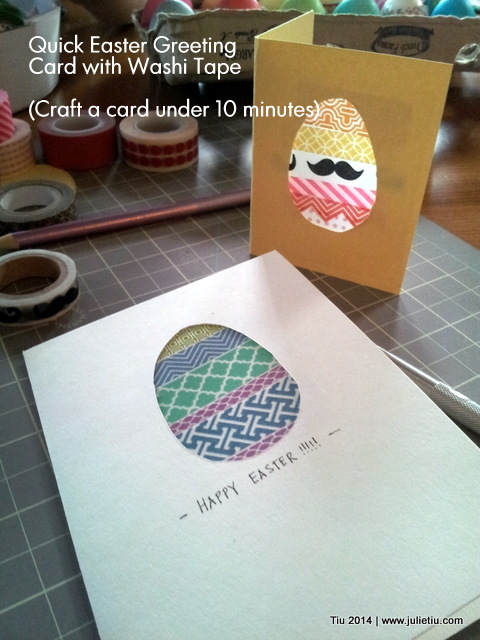
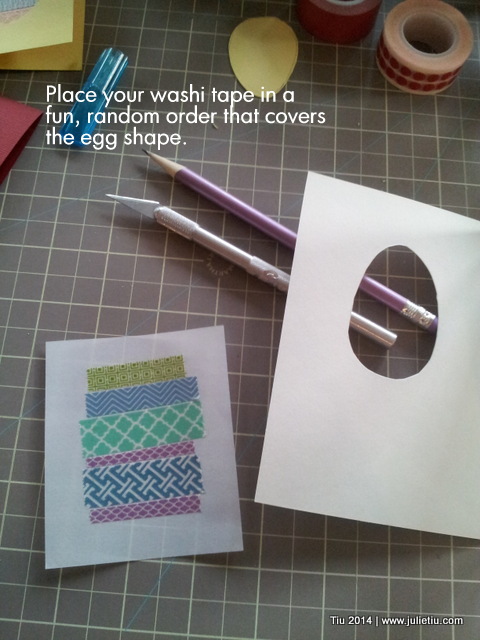
Washi Tape makes greeting cards easy and fun

What you need:

  • Cardstock or pre-cut cards
  • Vellum or thin white paper (Vellum gives that see-through, stained-glass effect)
  • A variety of washi tape
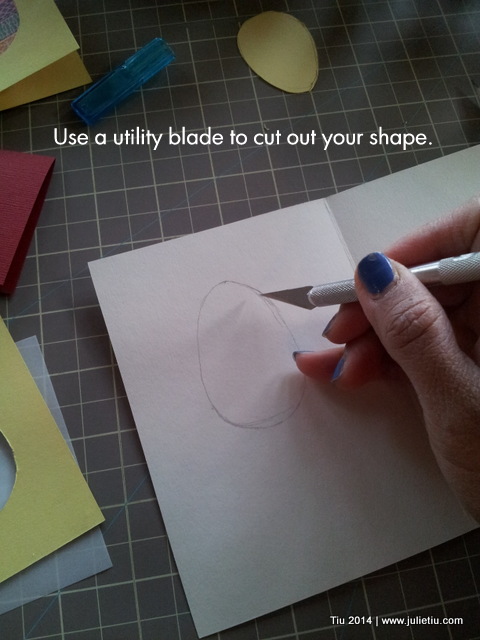
  • X-Acto knife (or utility blade)

Washi tape Easter egg greeting cards

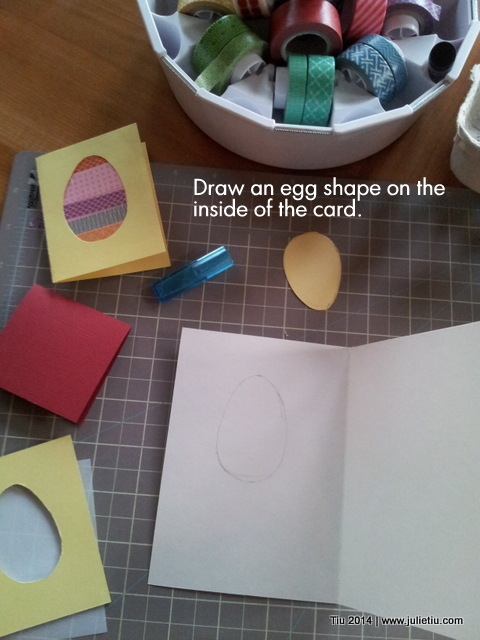
I just draw my eggs freehand. It’s totally cool with me to be all wonky and imperfect.

Washi tape Easter egg greeting cards

So, I learned this last weekend from my friend, Vicky, that by drawing inside, you don’t see the pencil lines on the front of the card. Again, if you don’t mind erasing lines, by all means draw on the front. And save your egg shape.

Washi tape Easter egg greeting cards

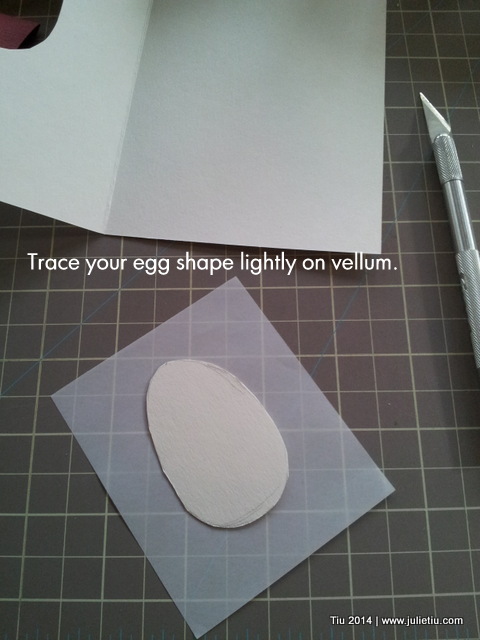
If you trace your shape on your paper, you’ll know exactly where your tape will need to go. Another “Vicky tip”.

Washi tape Easter egg greeting cards

Check this out… use the shapes on the washi tape and cut around them to get cool effects.

Washi tape Easter egg greeting cards

Last part, stick the taped-up paper onto your card!

Washi tape Easter egg greeting cards

For more quick Easter crafts, check out articles at GeekMom.com! You can see how I dress up some plastic eggs with a permanent marker and rub-on letters.

Decorate plastic Easter eggs featured on GeekMom.com

Monogrammed plastic Easter eggs

Enjoy your Easter, friends!

Mugshot Monday: If my mug could talk

Mugshot Monday: If my mug could talk

Yes, I should sit…

I could sit at my sewing machine, at the desk to finish our taxes, at the table with my kids, at the tea bar, on the couch to watch a few shows on the DVR (anyone watching Dallas?!).

… but yesterday, I sat for a few minutes with my leftovers from a wonderful Easter weekend.

Mugshot Monday: Spring Break

Creativity without rest, and productivity without renewal, leads to an exhaustion of our inner resources. -J. Philip Newell

Mugshot Monday: Casi Cielo and soy milk creamer

Everyone’s home this week… so for today’s mugshot, I offer “My afternoon coffee with the hubby”. We’re enjoying Casi Cielo with soy milk creamer. Can I tell you, I’ve had far less stomach issues now that we’ve switched to soy?! (Yes, I’m a lactaid-carrying, lactose-intolerant person. Okay, too much?)

We aren’t traveling anywhere this year. But that’s not to say we won’t be enjoying our very welcome time off. Kids and hubby are enjoying sleeping in, and so am I. We’ll head to a museum, check out some new restaurants and play games. Easter lunch/dinner will be at our home, too. So I’ll have plenty of things to do before the weekend.

I leave you with these pics from the dining room… hope to have some more finished projects next week.

Plastic Easter eggs

Coral pink tulips blossoming

Check out some more pictures at Instagram.

30 Days of Creativity: Day 10 with Crepe Paper Flower Tutorial

Day 10: Create something today inspired by nature!

We had a few days of fantastic weather, but over the last few days, it’s been cold, damp and gloomy. April showers bring May flowers, right? Well, I thought I’d make my own with some party streamers from our stash of supplies. They’re easy and fairly quick to make!

Supplies: Party streamers, pair of scissors and/or Martha Stewart fringe scissors

  1. Cut 6″ lengths of one color for the center of the flower, then cut 36″-40″ lengths for the main color of the flower.
  2. Using your fringe scissors or regular scissor, cut fringe about 2/3 of the streamer width. Crepe paper is delicate and difficult to work with. I found using regular scissors was quicker than the fringe scissors, but I like the texture of the fringe scissor cut better. If you cut the streamer from bottom up, you may have an easier time.
  3. After cutting the fringe, roll the inner section then add the outer section. Keep rolling until complete.

For a little variation, I like layering two colors.

To finish them off, use floral tape or a little glue. You can either make into flowers with thick floral wire or even bamboo skewers. I strung them on some covered wire…

Happy crepe paper flowers from party streamers

Happy Spring!

Related Posts with Thumbnails