12 Days of Gift Wrapping: Paper Medallions, Paper Bows and Pinwheels

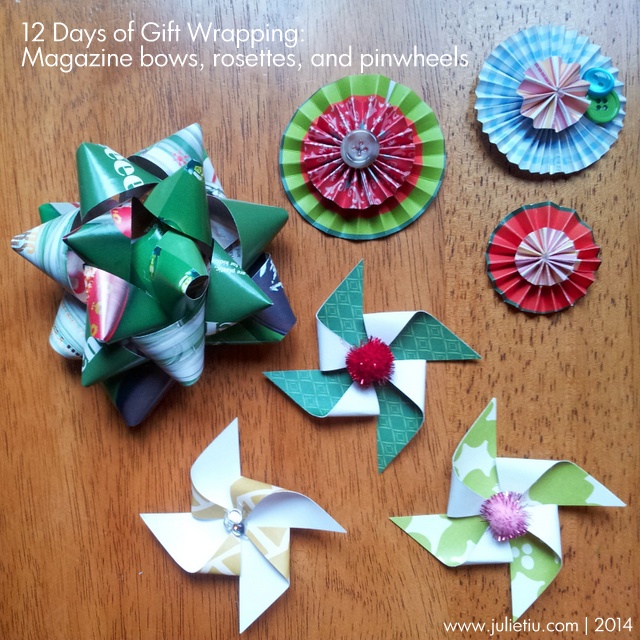
Once in a while, I run out of gift bows (and I don’t feel like running out to the store for the bag o’ bows). I’m probably not the only one… and what’s a gift without a bow or something fun? If you need a gift topper, check out some really cool tutorials and make your own!

Gift wrapping paper scraps, papercrafting scraps, and magazines are great resources for making your own gift toppers!

Gift wrapping paper scraps, papercrafting scraps, and magazines are great resources for making your own gift toppers!

A paper bow tutorial can be found at the end of this linked post.

Rosettes, or paper medallions, are so fun too! I make mine like this paper medallion tutorial on Craftaholics Anonymous.

Pinwheels are timeless… check out the pinwheel tutorial on instructables.com. I make my pinwheels with 3″ to 5″ squares, and then use a pom pom, stickers, buttons, or rhinestones in the center. Use a variety of sizes as gift toppers.

12 Days of Gift Wrapping: Scrap Fabric

Here’s how you could use some scrap fabric in gift wrapping!

Gift wrapping with fabric as ribbon

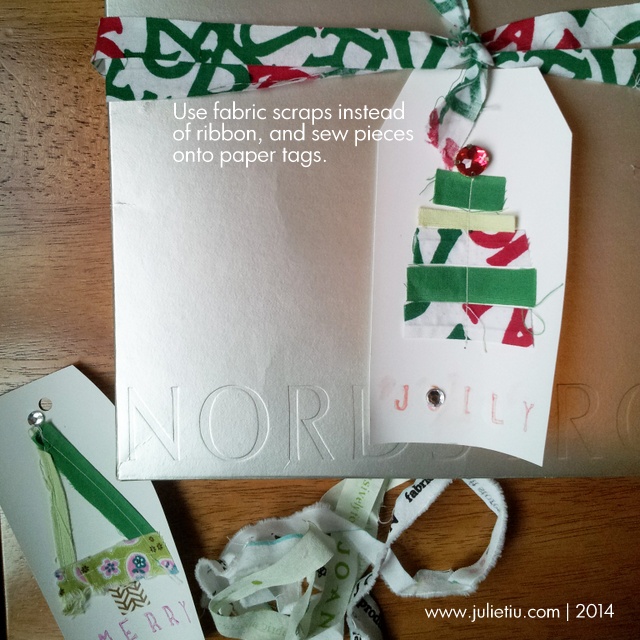
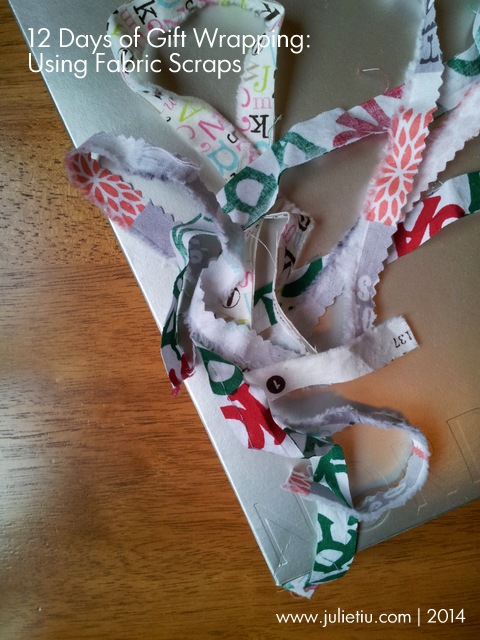
Selvedges make a cool ribbon substitute.

Julie-Tiu-fabric-scrap-wrap-2

Instead of ribbon, maybe you have some left over selvedges (the edges of a bolt, or cut, of fabric). Or you can take scraps and sew them directly onto paper tags in the shape of a tree, star, stack of presents… anything seasonal.

12 Days of Gift Wrapping: Quick and Easy Gift Tags from Envelopes

Sometimes, I just cut my own. It’s really handy if you only need a few, and it’s fun! We all still receive junk mail and bills, but before you throw the envelopes away, check the security envelopes. You might be surprised!

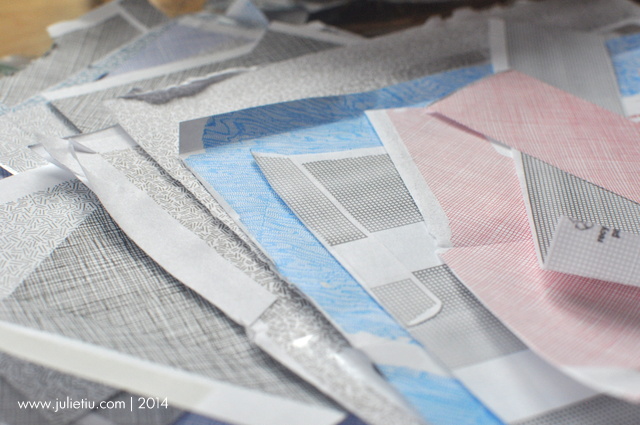
Security envelopes turn into scrap paper

Find really cool patterned paper by just looking inside security envelopes!

Lots of pretty patterns!

DSC_0716

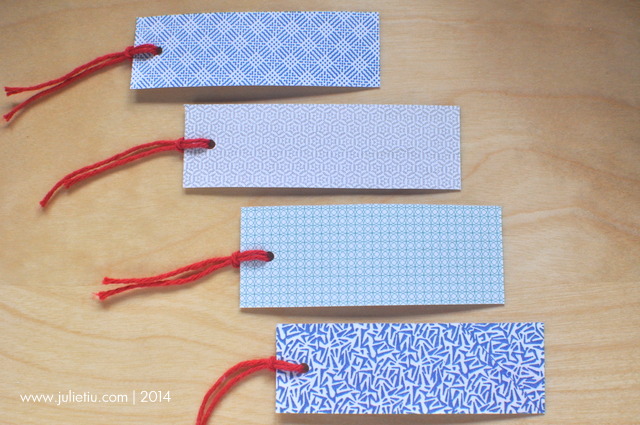
Take plain cardstock (or index cards) and cut them into 1″ x 3″ (approximately 25 mm x 75 mm) strips.

Generously apply glue to the cardstock strips with a glue stick, then adhere the patterned paper.

Using an X-Acto knife or crafting blade, trim the excess paper. The just punch a hole and tie some yarn, ribbon, or baker’s twine.

12 Days of Gift Wrapping: Cupcake liners and doilies

12 Days of Gift Wrapping: If you don't have ribbon

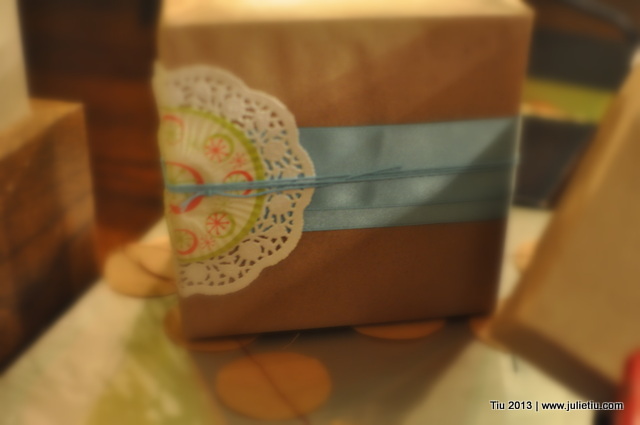
Something useful for those mismatched cupcake liners and extra doilies you might have hanging around in your kitchen drawers. Just wrap your gift with plain, solid paper (I used brown craft paper), wrap some ribbon, layer a doily and cupcake liner, then secure with coordinating bakers twine.

This is super cute used with brown paper bags, too.

12 Days of Gift Wrapping: Basic wrapping

I didn’t realize what a polarizing topic this could be. Do you overlap the “tail” over the box, do you fold the “tail” so it just meets the edge of the box, or do you fold so that the “tail” meets in the middle and you have something that looks like an envelope? There is no right answer – I think it’s all personal preference.
12 Days of Gift Wrapping: Use a store paper bag instead of gift wrap

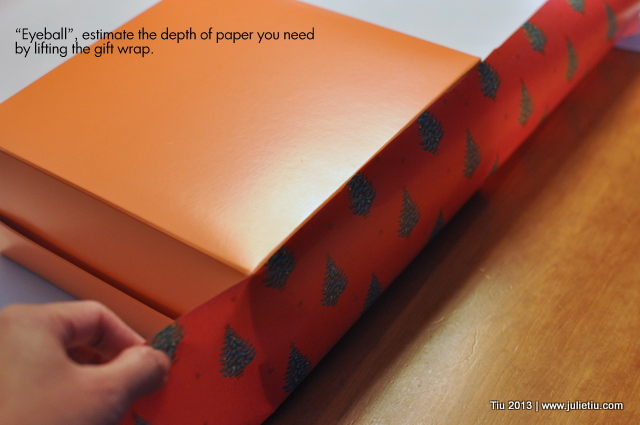
And the other thing about wrapping – how do you cut just enough paper? Well, you can measure your box, all the way around and then the ends or you could eyeball it like everyone does with some freestyle measuring to insure you have enough paper.
12 Days of Gift Wrapping: Basic Wrapping

Here’s how I like to wrap gifts.

12 Days of Gift Wrapping: Basic Wrapping

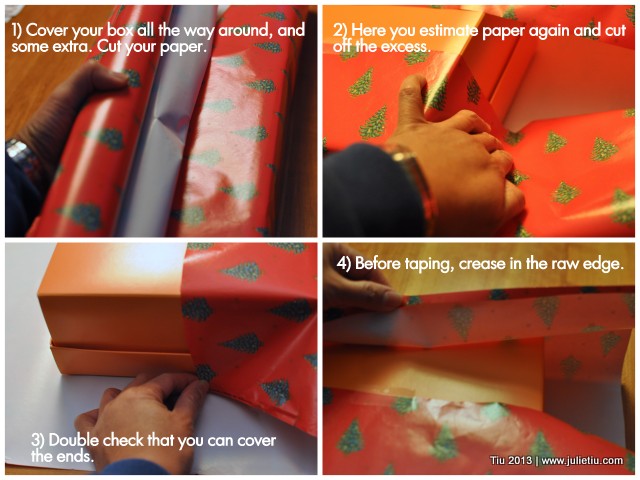
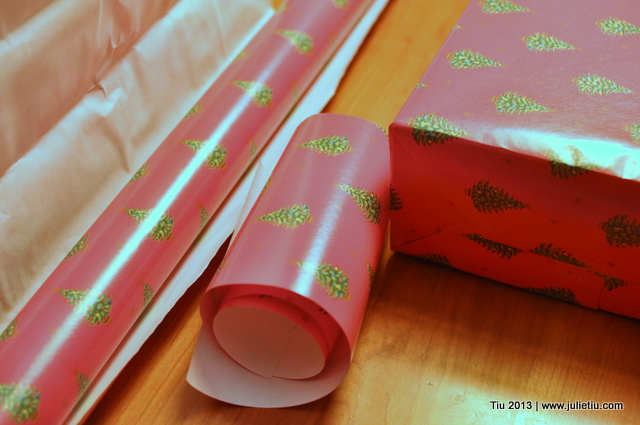
• Lay your box down on your unrolled gift wrap.
• Pull the paper around the box to make sure you have enough to go around plus about an inch. If you don’t, turn your box 90 degrees. You’ll probably have enough that way.
• Before you cut, check for end coverage, and crease lightly with your fingers.
• Cut the paper where you made a crease. If you happen to have a grid on the backside of your paper, you’ll have an easy time cutting straight. Otherwise, follow parallel to the roll and you’ll be pretty straight.
• Tape one edge of the wrapping paper to the box. This is the only way I can make my gift wrapping nice and taut. If you have double-stick tape, by all means use that.
• Wrap around the gift and before you tape your paper down, crease along the raw cut edge. You’ll have a nice finished edge. Tape it down in the center.
12 Days of Gift Wrapping: Basic Wrapping

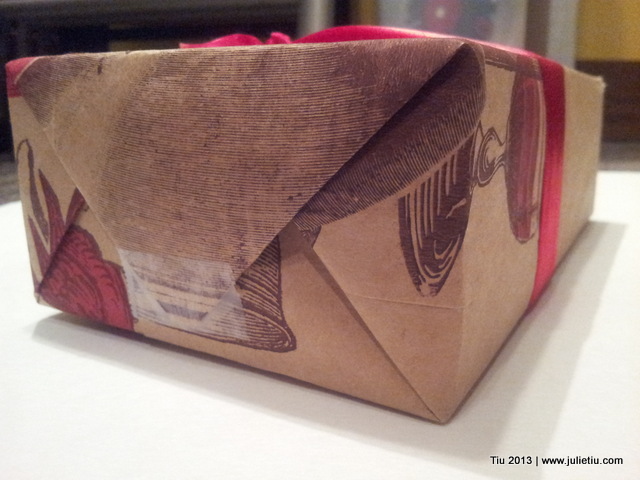
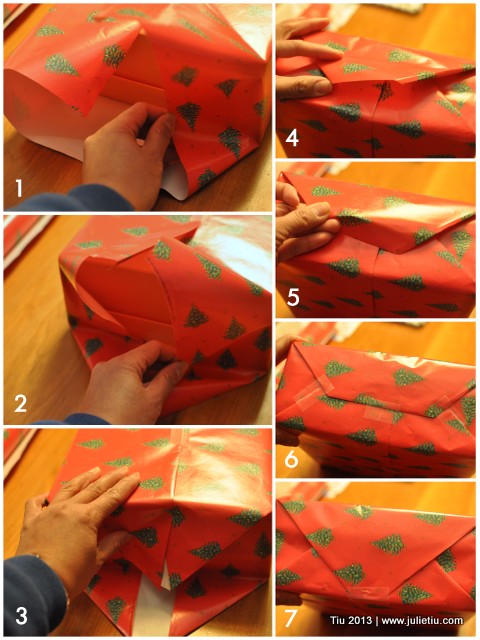
• Ends – fold in the sides and when you press inward, you’ll find that the upper and lower flaps will start looking triangular at the ends. Make sharp folds for neater edges. Fold the bottom flap up and then the upper to close up the gift end. Tape in three spots, and repeat on the other side. (Or tape in the just one spot, at the tail.)
12 Days of Gift Wrapping: Basic Wrapping

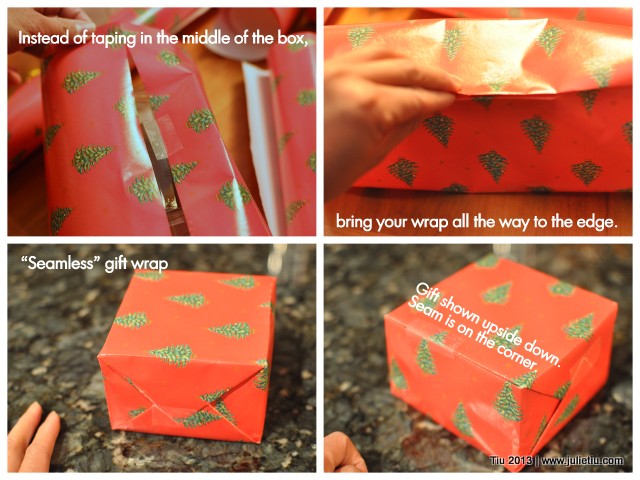
You could also make your wrapping look seamless just by taking your wrapping paper all the way over and then taping. Fancy, right? My kids don’t like this method because they can’t find a good spot to start ripping (in their opinion).

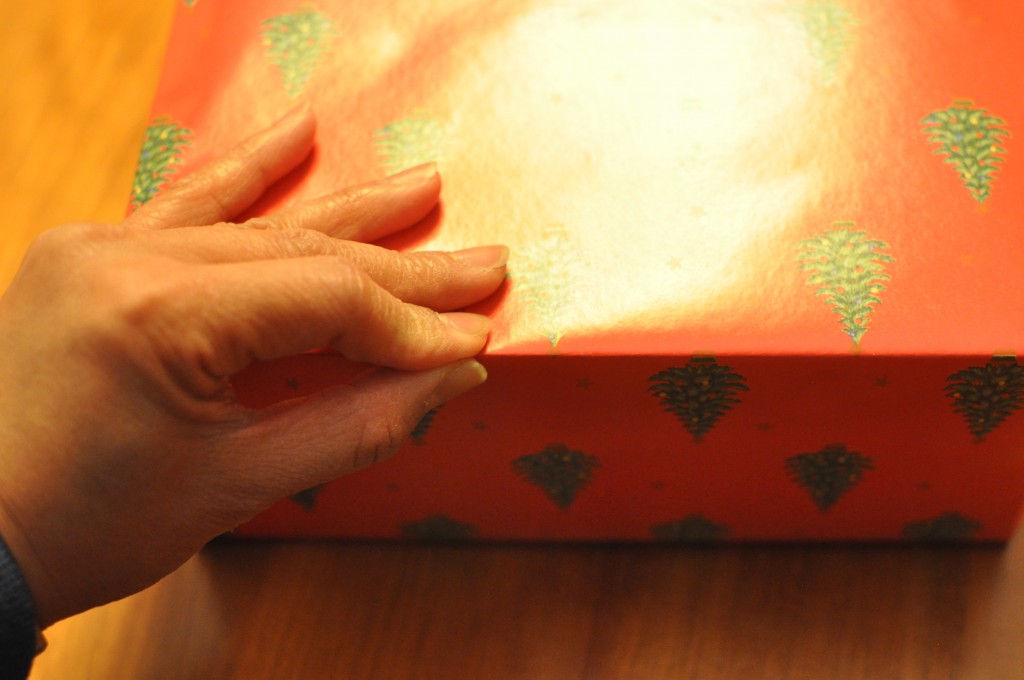
Lastly, give all the edges of your gift wrapped box a nice pinch. Just put your thumb and pointer finger together and run along all the edges. Makes for crisp corners.
12 Days of Gift Wrapping: Basic Wrapping

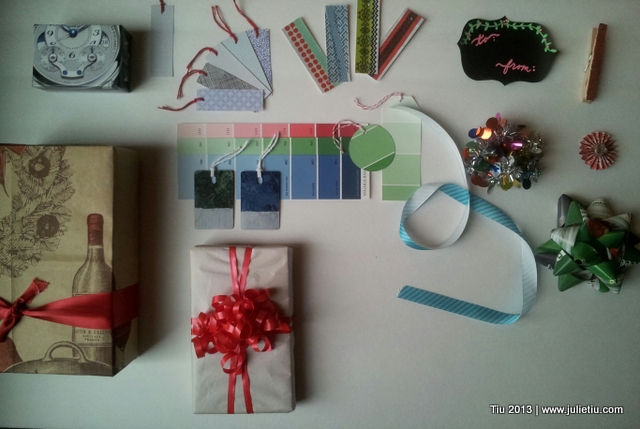
If I happen to run out of gift wrap (unlikely, but it happens), I like to use paper bags, craft paper, magazines, newspaper, old phone book pages (yellow, of course), etc. There are some fine looking magazine pages that really serve themed-gift wrapping well (like that small box in the upper left hand corner in the picture – watch ad from a magazine).
12 Days of Gift Wrapping: Use other paper instead of gift wrap

Endless gift wrapping possibilities…

12 Days of Gift Wrapping: Basic Wrapping

Don’t throw away the small cut pieces of gift wrap, either. You can wrap a small gift, or it can become a curly topper (you’ll see in another post)!
12 Days of Gift Wrapping: Tinsel

12 Days of Gift Wrapping: Tinsel as a gift topper

Tinsel doesn’t have to stay on your Christmas tree, or hang from the mantel or pine garland. Snip off sections of fluffy, fuzzy tinsel and use it to top off your packages. Cut several pieces and tie in the center to make a puff if the tinsel isn’t as puffy as you’d like it to be.

I bought this particular garland at a local drugstore/convenient store for $2.00… for several yards! It’ll last me years. I’m never running out of toppers, hee hee.

Related Posts with Thumbnails