Completed Project: the hexie pillow

Hexie Pillow tutorial

Here it is! My pillow evolved from practicing and messing around with hexie shapes. (I posted yesterday how I cut my hexies.) Maybe it should be called “Molecule pillow” or “The Game Board pillow”, because that’s what I think of when I look at it. And, I’m not a gamer by any means, but I know that hex shapes are found in a lot of board games.

By the way, if you’ve played Settlers of Catan (or other similar games), then you know what I’m talking about. Check it out if you haven’t.

Hexie shapes for pillow

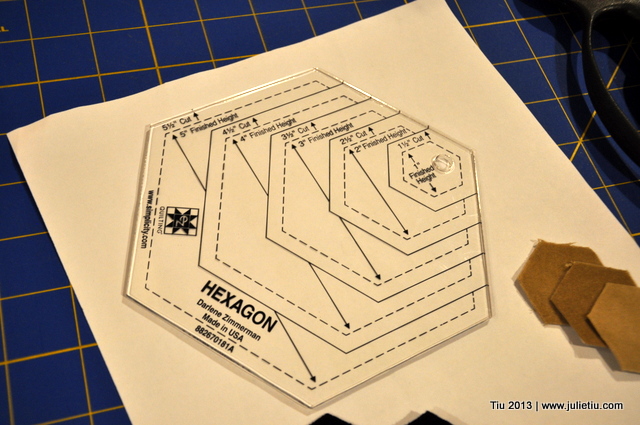
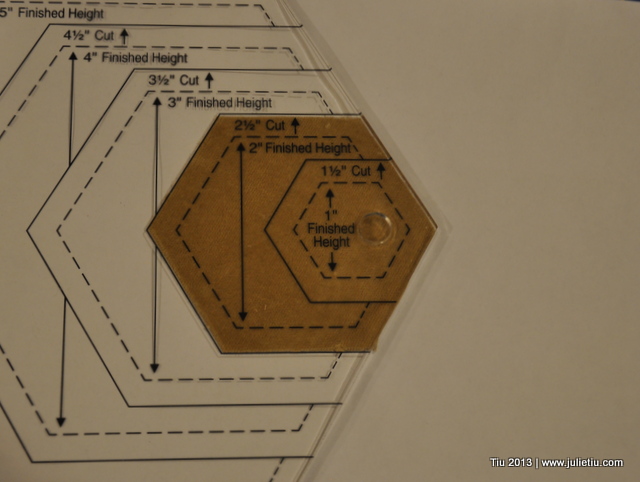
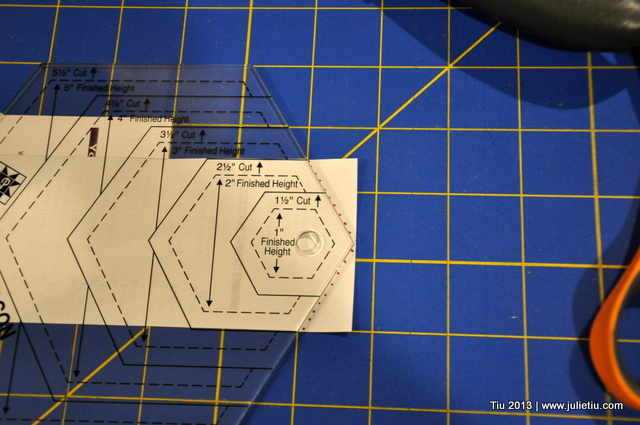
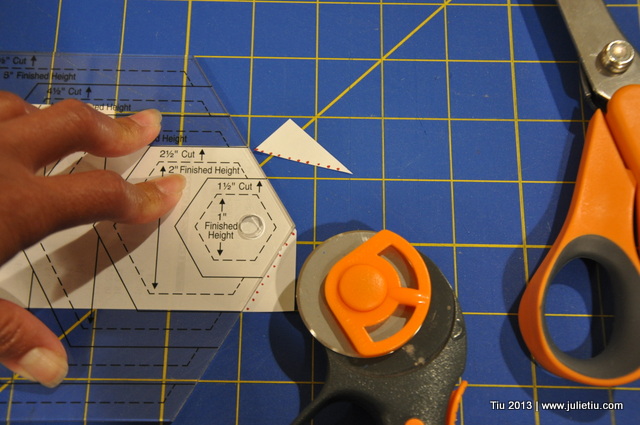
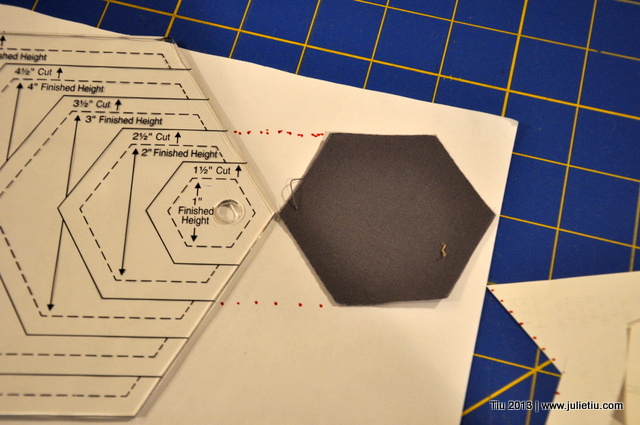
So… how are hexies put together anyway? I researched on Google for some answers. It all boiled down to : By hand, and carefully.

I found a few websites that show machine-pieced hexagons. Then I found a lot of information about paper piecing techniques, but I was looking for something that wouldn’t require cutting paper shapes for each fabric hex. Finally, I stumbled upon a tutorial for piecing hex shapes without paper. It worked for me, even if I didn’t print on my fabric. I’m pretty good at eyeballing distance and level lines.

I kept with neutral colors so I could gift the pillow to anyone – male, female, kid, adult. (In the middle of sewing the hexies together, I learned about some fabric printed with grass and rock graphics. Could be so awesome for a “Settlers of Catan” inspired project.)< Continue for what you need to make this pillow!

How to use an easy hexagon cutting template for fabric shapes

I’m smitten with hexies, fabric cut in the shape of a hexagon. They have been a big trend in the sewing and quilting world for probably four years now. You can even buy precut fabric hex shapes at the fabric store, in-person and online. People are using hexies in their sewing projects like crazy! Just do a Google image search or Instagram search and you’ll see. So, I bought this cool template to try my hand at hexie shapes – an EZ Quilting Tool 5″ Hexagon acrylic tool by Simplicity.

DSC_0011-002

Let’s try cutting a 2″ finished hexagon. I’ll use paper to demonstrate.

DSC_0013-001

1) Cut your fabric in a strip to the width you want. (1/2″ is added for your seam allowance.) Place the template over your strip of fabric, all the way to the edge, and using a rotary cutter, make cuts at the edge as shown by my dotted lines.

DSC_0015-001

Note: I’ve heard that the smaller rotary cutter is much easier to use. Guess I’ll have to run out and get one of those too.

DSC_0017-001

2) Flip your fabric over, and line up your cut edge with the template at the desired size. Now cut the other side of your hex shape.

DSC_0018-001

3) You’re done! You can continue cutting down the fabric strip by just lining up your template edge with the corner…

DSC_0019

…You’ll have cute triangular pieces to add to your scrap bin. (And I’m sure all the avid sewists have scrap bins.)

DSC_0020

Short of owning my own die-cutting machine, I can make all sorts of sizes with this simple tool. *grin* And, it stores very easily.

DSC_0009-001

Stay tuned for a pillow project that uses the hex shapes in an applique. THANKS!

Related Posts with Thumbnails