30 Days of Creativity: Day 10 with Crepe Paper Flower Tutorial

Day 10: Create something today inspired by nature!

We had a few days of fantastic weather, but over the last few days, it’s been cold, damp and gloomy. April showers bring May flowers, right? Well, I thought I’d make my own with some party streamers from our stash of supplies. They’re easy and fairly quick to make!

Supplies: Party streamers, pair of scissors and/or Martha Stewart fringe scissors

  1. Cut 6″ lengths of one color for the center of the flower, then cut 36″-40″ lengths for the main color of the flower.
  2. Using your fringe scissors or regular scissor, cut fringe about 2/3 of the streamer width. Crepe paper is delicate and difficult to work with. I found using regular scissors was quicker than the fringe scissors, but I like the texture of the fringe scissor cut better. If you cut the streamer from bottom up, you may have an easier time.
  3. After cutting the fringe, roll the inner section then add the outer section. Keep rolling until complete.

For a little variation, I like layering two colors.

To finish them off, use floral tape or a little glue. You can either make into flowers with thick floral wire or even bamboo skewers. I strung them on some covered wire…

Happy crepe paper flowers from party streamers

Happy Spring!

Celebrating National Craft Month

Who knew, March is National Craft Month, and of course, there’s Martha Stewart kicking it off with her Craft Show and lots of giveaways at her Craft Department blog and also at Craft Critique.

So, here’s the craft-along I mentioned. We’re all busy, we all have those days, but maybe, just maybe this can bring all of us crafters together. I won’t promise 30 consecutive days of Creativity, but this looks like a lot of fun while doing some soul-searching. “30 day” posts will be intermingled with others… that’s what I’m thinking.

And, don’t worry, I’m still cooking away at home. I just have another outlet for my food adventures at Niles Patch.

A Sparkly Wreath

I was inspired by the glittery garland wreaths in the Holiday issue of Martha Stewart Living magazine. My version is quick, easy and afforable: $3.50, courtesy of the bargain bins at Target. $1.00 for the garland, and $2.50 for the wreath. No need for glue guns or scissors, either!

At the store, I found red and green wreaths, and silver and gold garland. Choose the combination you prefer… I liked the green and gold which incidentally are my high school colors. (Shhh… my husband thinks I have a ridiculous amount of high school pride.) Red and gold would have been nice, too, for a bit of an Asian flair.

The How-To

  1. First, the wreath will be completely packed down. You will need to “fluff” or gently pull out the branches.
  2. Find the end of your garland and keep it on the cardboard (much easier this way).
  3. Wind the garland around the wreath, in between branches.
  4. When you reach the end, just tuck the end into the wire base or around a branch. It will be secure.
  5. Hang and enjoy!

This wreath is going on my son’s bedroom door since his big sister has a wreath on hers. I might use some ribbon and hang the wreath a little lower. Did I mention, they each have their own little tabletop Christmas trees in their rooms, too?

Food and Gift Packaging

I was super excited to get these goodies from the offices of Martha Stewart Living via Craft Critique. If you’re getting ready for the holidays and looking for ways to wrap or package your baked goods, please take a look at my review on Craft Critique! Leave a comment at their site and you just might win your own set of treat bags and boxes!

Trying to Bake Bread… again

Since we’ve been talking about food, what is it about fresh-baked bread that makes the house smell so good? There’s a grocery store two blocks away, and it’s just as easy for me to pick up their fresh-baked goods (they’re still warm, too). I think I’m pretty good at baking (quick breads, especially) but I’ve had no luck in the past with making anything that starts with yeast. Let me recap my epic failures.

About 8 years ago, I attempted to make a coffee cake. The “Rosy Red Coffee Cake” was a recipe from my “Great American Home Baking” binder cookbook. You know, the sort of cookbook that grows because you’re paying a few bucks a month and in return you receive myriads of recipe cards to fill your binder. I had such high expectations before I got married that I would try all the recipes. No such luck. But this recipe seemed so easy… yeast bread, cranberries, sugar, orange juice in a beautiful wreath. My wreath was all deflated, looked melted, and the bread itself… hard. Clearly, I must have killed the yeast.

About 4 years later, I tried to make cinnamon rolls from my aunt’s recipe. This recipe didn’t seem hard. I had a few years of quick bread recipes under my belt, so I thought, maybe my technique would be better this time. Pucks, hockey pucks, 12 of them.

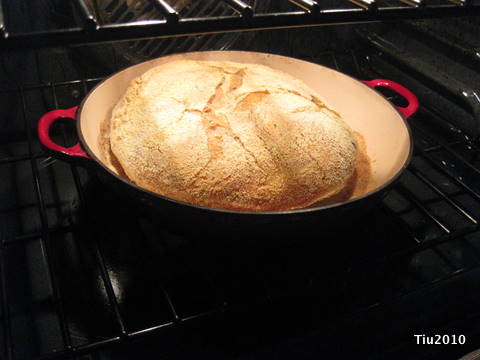
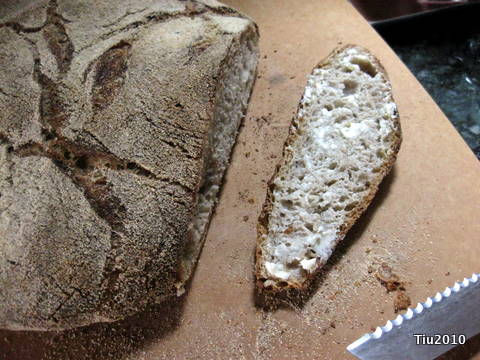
Fast forward, April 2010. This time, this time I think I may have found a recipe I can count on. A recipe that has restored my faith in cooking with yeast… a No-Knead bread. (Aaaaah… the angels are singing for me.) You knead, I mean, NEED time – time for the dough to rise on its own. Don’t do this if you want your bread the same day. And where did I get this recipe? Actually, I saw Jim Lahey on Martha Stewart and heard him say “no knead bread”. I watched, and then thought, “Hmph, cool,” end of story. (Not like when I watched Good Eats with Alton Brown and he cut up a whole chicken, and did a southern fried chicken recipe. I ran to the store the next day, cut up my own chicken and made… fried chicken. Another story for another time.)

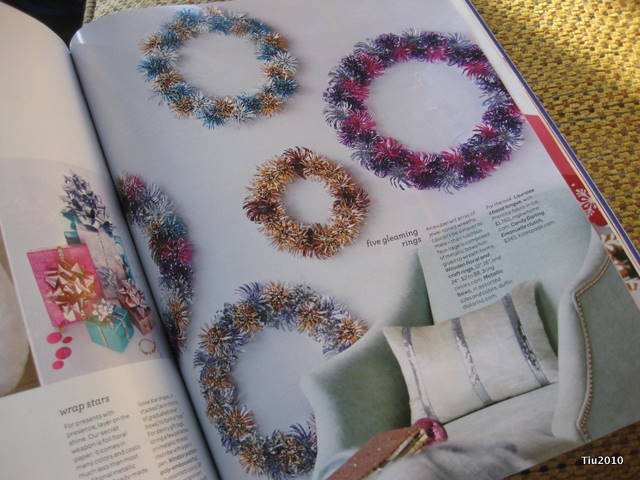
Actually, it was in the April 2010 Living magazine that they showed the no-knead bread (Pane Integrale) recipe and some step-by-step pictures. My one mistake: I used all-purpose flour instead of bread flour. In the magazine, they call for bread flour. In the television recipe, they call for either; I didn’t remember this. Everything else in the recipe was the same. I only realized I used AP flour after I had mixed everything and the dough was sitting to rise. Seriously, I thought, NOT AGAIN. I messed it up AGAIN! Well, let’s see how it turns out. Not to worry, though, because as you see from my pictures, I think everything turned out okay. Not a lot of fuss. I couldn’t have been happier about baking bread. It was really rustic, crusty on the outside and chewy on the inside. Lovely. I’ll try it again with bread flour next time.

Click here for some more of Jim Lahey’s recipes from the Martha show.

Oatmeal cookie vs. oatmeal cookie

Smitten Kitchen versus Martha Stewart. Can’t go wrong really. Just depends on what you’re looking for. I like a hearty, chewy oatmeal cookie where the oatmeal is the star. My husband likes a thin oatmeal cookie – not sure if he likes crispy or chewy. In either recipe I needed to omit any nuts for the little guy and myself. We didn’t really miss it.

What I enjoyed about the Smitten Kitchen recipe: good chew, good body and texture. I chilled the batter, as recommended, for about one hour before baking (much easier to handle). I did need to substitute dried cranberries for raisins since I didn’t have any raisins on hand in the pantry.

As for the Martha Stewart oatmeal toffee cookie, the toffee makes the cookie. The “nut (toffee) free” version has no depth of flavor to me. We did not need to chill the batter prior to baking, but I’m wondering how that might change the recipe, if at all. We didn’t roll the dough into logs and cut as written because we were lazy. We just used our little cookie/ice cream scoop. This may be why our cookie looks nothing like the picture on Martha’s website. Pretty sure all our ingredients were fresh and measured correctly, too, but I found the cookie to be a little too dry and crumbly for my taste.

Regardless, the kids enjoyed taste testing… Ollie said, “MOM! Can I take a picture, too?” Sure, buddy.

Related Posts with Thumbnails