One Way to Recycle Glass Jars into a Fun Party Favor

So I’ve established that I’m sort of a hoarder, and my poor husband was so nice turning the other cheek when he saw I had a crazy amount of glass jars stashed away… in the basement, under the stairs. I explained to him that I had every intention to use up the glass jars – well, I thought I had a craft for them. I just hadn’t gotten around to it. I’ve seen a lot of recycled glass jar projects around Pinterest, some of them leading to non-English tutorials, but pretty easy to figure out.

Recycle Glass Jars Fun Party Favor

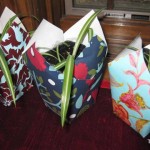
Friends, grab your glue gun (Note: Super Glue did not work well), miscellaneous plastic animals from the party store (or your kid’s collection from the dentist’s treasure box), and clean, empty glass jars. Get a can of spray paint. I have metallic silver, so that’s what I used.

Wash the lids well. After your lids are clean, you can swipe them with some rubbing alcohol on a cotton ball to make sure they’re really clean. Using your glue gun, adhere your little critters of choice to the lids. They should all be secure after a minute. If you’re a good crafter, you’ll wipe away the hot glue “strings” before painting, I didn’t bother since it didn’t look too bad.

Recycle Glass Jars Fun Party Favor Spray Paint

Now for spray paint… Make sure you have good ventilation and a spray box (optional). If you can head outside and spray them, kudos to you. It’s freezing here, so I ended up spraying them in my (heated) garage. I gave the lids and animals three coats, 15-20 minutes in between. And, I still have a little touch-up to do.

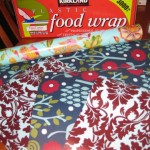
You could wash all the glass jars while you’re waiting for the lids to dry. I took the labels off the same way I take off wine bottle or beer labels. And if the label adhesive doesn’t come off easily, grab some Goo Gone (Just follow manufacturer’s directions on the bottle.).

Recycle Glass Jars Fun Party Favor Plastic Animals Recycle Glass Jars Fun Party Favor

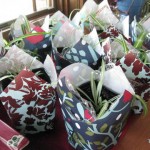
I let them dry overnight, and now my daughter will fill them up candy for her buddies.

Recycle Glass Jars Fun Party Favor Plastic Animals

I’d love to know if you end up making this project!

Click for more party ideas!

Candied Orange Peels (Revisited)

Been sick as a dog for about one week… thought this might be a good time to look back at some favorite recipes like the time I made candied orange and lemon peels. I think I may do this for a baby shower favor next month – a cellophane bag, scrapbook paper in the party colors, some twine or raffia. Perfect.

(First posted March 26, 2009)

Lemon and Orange Peels Drying

Over the weekend, a friend brought over the most beautiful lemons from her parents’ lemon tree. Note, we’re in Illinois. Her parents’ tree is in Arizona. She was sharing because her folks had a bumper crop this spring. My friend was greeted by 3 dozen lemons… what to do, but share! She mentioned juicing the lemons and freezing the juice in ice cube trays. Then she mentioned saving the peels to candy them. Aha! Lemon, citrus, orange, citrus… helloooo?! I thought it’d be delicious, AND I was planning on making some candied orange peel this week. I’m experimenting with frozen peels; thawing them first and then continuing with the typical recipe.

Just type “candied orange peel” in your favorite search engine and there are tons! They’re all basically the same. Mine isn’t that different.

  • Peels from 4 – 6 oranges (this time around, I also had 2 lemons): The peels were in sliced sections and the pith (white) was already trimmed. You want very little pith, but I still leave a bit. I sliced these into 1/4″ strips. The lemon peels were smaller.

After 1st blanch

Using a 3-1/2 qt. pot, I filled it with about 4 cups of water. This should be enough to cover the peels. Heat until boiling, then add the peels. Blanch the peels for about 3-4 minutes. Turn off heat, drain/remove the peels (I just used a slotted spoon not a colander), discard water and repeat. You will blanch the peels 3 or 4 times. This is to soften the peels, but more importantly, to remove the bitterness. It sort of cooks out, cooks down any pith, too.

  • 4 cups water
  • 3 cups granulated sugar
  • Extra granulated sugar in a separate container for dipping

In your clean, empty pot, combine the water and sugar. Heat until you get a rolling boil. You can use a candy thermometer, and heat until 210 degrees. Add peels, boil for a couple minutes, and then lower heat to a simmer. Continue to simmer peels for 45-60 minutes, or until peels are translucent. (I’ve read recipes where they only simmer for 30 min.)

Newly candied, before sugared

Remove peels after they are to your liking and dry on a cooling rack. While still warm, dip the peels in sugar and lay out on the racks to dry. I like to leave them out overnight. The next day you can take the dry candied peels and dip or drizzle with chocolate!

The workbench

After sugar dip

I love the blast of citrus flavor (not to mention the sugar), and it doesn’t take but just a couple pieces to satisfy your taste buds. This sweet treat is also gluten free, a big plus for friends with allergies!

Celebrating Earth Day

Happy Earth Day! We try to do our part in our home to be kind to Mother Earth, but I know we can do more. It’s not like we’re the Begley family, hehe, but we’re learning. Conserving water and recycling are considered typical now. Last year, I brought the little ones to our local Earth Day celebration, but this year we missed it since we were celebrating First Communion.

So to combine efforts, I transplanted spider plants for last Saturday’s favors. Spider plants are so easy to take care of and have been known to actually help purify the air! I’ve started plantlets by rooting them in water and had good luck with planting them direct into soil which it what I did this time around. To dress it up for centerpieces, I used squares of plastic wrap (to keep water from spilling out, not-so-earth-friendly, sorry) and gift wrapping paper to cover up the plastic pots I saved from last year’s gardening. Reusing is good, no? They look like little Chinese take-out boxes, and looked cute on the tables. Even Martha’s doing it – check here.

Other earth-friendly projects to try out can be found below! Check them out! Let me know which ones you’re trying. You know me, I’ll try everything I can.

Earth Day Carnival at Craft Critique (my latest review is also here)

Gift Bow from a magazine at How About Orange

T-shirt necklace from chictopia.com (saw something similar on Martha Stewart recently)

Birthday Favor Ideas

Birthday parties have always been a fun and memorable event growing up. When we were really young, opening presents and goody/loot bags were the best things ever… I remember getting dot candy on paper strips, the fortune fish you’d hold in your hand that curls up, stickers, tattoos and the plastic trinkets and jewelry that my parents hated so. What a treasure it was to us but was so easily forgotten.

After last year’s Webkinz party at home, we went the other way and hosted a few friends outside and went simple on a take-home gift: One of Abby’s favorite things to eat, dark chocolate. She prefers Scharffen Berger (she’s such a foodie already), but also loves Trader Joe’s dark chocolate. So, we bought a few bars and to dress it up, I took some scrapbook paper and die-cut shapes that coordinated with her favor colors and wrapped the bars. Very simple and cute, just like my kid.

Other thoughtful ideas:

  • Giant, decorated sugar cookie that ties into the party theme (i.e. Butterfly cookies from a local bakery for an outdoor or spring themed party or these cookies)
  • Small cellophane bag of a favorite candy (M&M’s), tied with curling ribbon
  • Thank you cards with a picture of the guest of honor along with friends.
  • Picture CD’s of the party
  • Small bud vases with seasonal flowers

Bachelorette Party Cookies

I was inspired by a friend and thought these would be a great addition to my sister-in-law’s bachelorette party. The first pair are probably my favorites. Black patent leather via gel icing, and the pink one is my attempt at funky lace.

Black patent leather set bachelorette party cookiesBachelorette party cookiesVariety of bachelorette party cookiesGlittery bachelorette party cookies

These yellow ones are really fun. Just get creative with royal icing, or ready-made icing and gel icing from the grocery store. I tried to use a few sprinkles here and there, too.

Sisters-in-law partying

Needless to say, they were well received, and they tasted pretty good too!

Related Posts with Thumbnails