Making a Magnetic Pin Holder

20130116_094954

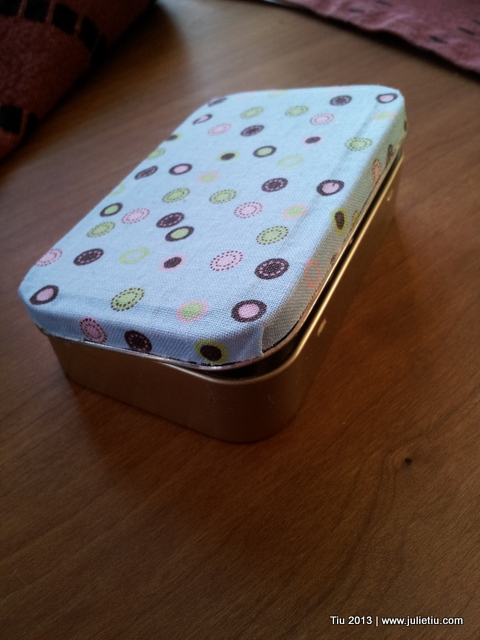
More decoupaging. This Altoids mint tin was stashed in a box waiting for its next life. Yeah, yeah, on the brink of hoarding here, but I LOVE recycling, or upcycling. Maybe this could hold some paper clips, safety pins, or thumbtacks if you’re not into sewing.

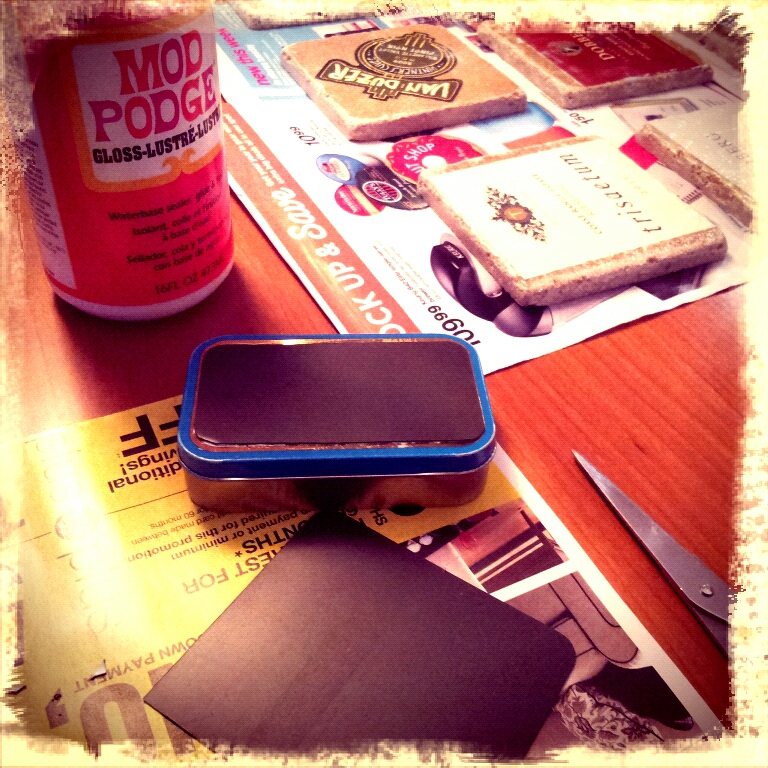
Here’s what I did to make this fun little box. I took an old refrigerator magnet (an out-of-date freebie sheet magnet), cut it to size and stuck it on the tin.

shot_1357944502777

I dug up some scrap fabric and traced around the lid. Then I just cut around my traced line to make sure the fabric would completely cover the lid.

shot_1357945139881

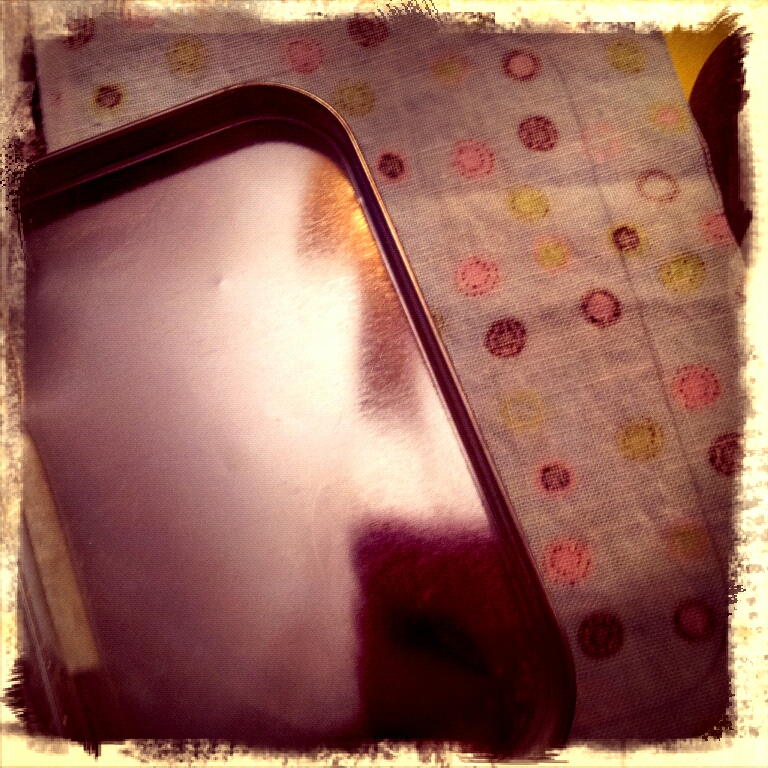
I lightly brushed Mod Podge on the top of the lid and flattened out the fabric. When the lid was dry I decoupaged two opposite sides down to cover the entire lid… like pick the front and back, or the other two sides. It’s the corners that demand your attention. I treated the corners like I would wrapping a gift box lid – nice, neat hospital corners. Then I “Mod Podge-d” the heck out them so they’d stay down.

IMG_20130115_070412

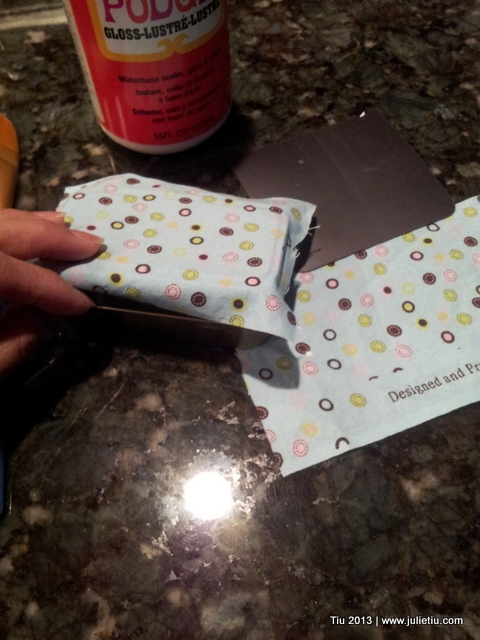
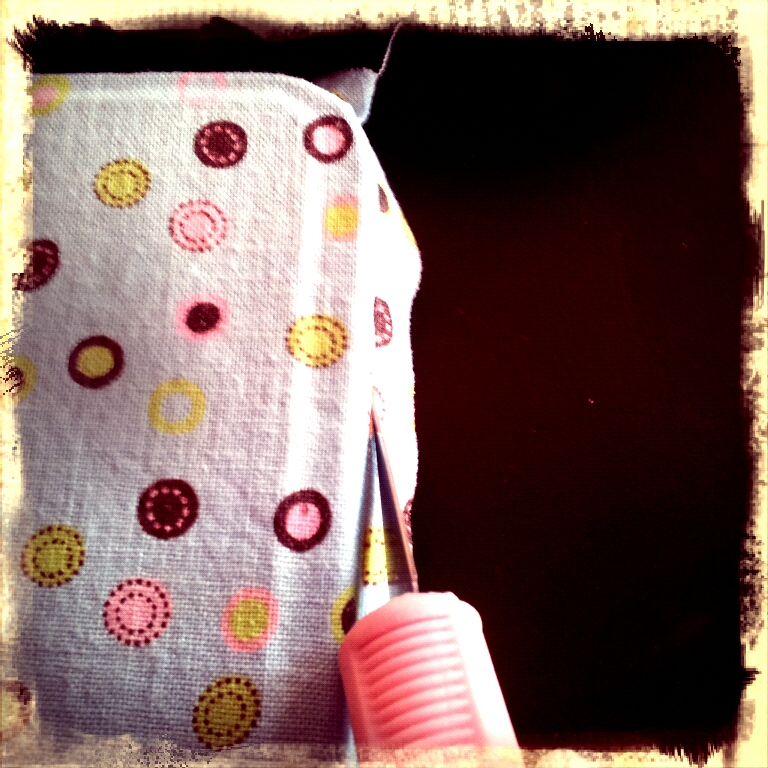
Used my sharpest craft blade (X-Acto knife) and trimmed around the lid when everything was dry. I let it dry for 24 hours (Mod Podge paranoia). Tip: Take your time with the cutting and trimming part. Mod Podge gets all crispy and tough to cut through. PLEASE be careful.

shot_1358348815034

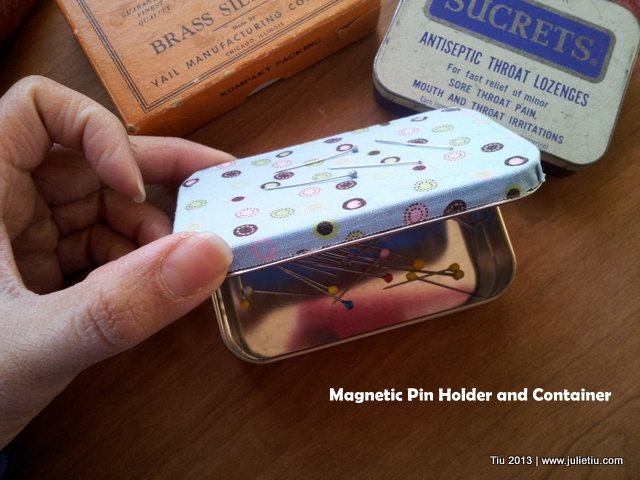
And here it is! My own little magnetic pin holder.

20130116_094255

Look! The pins stick to the top!

20130116_094839

20130116_094922

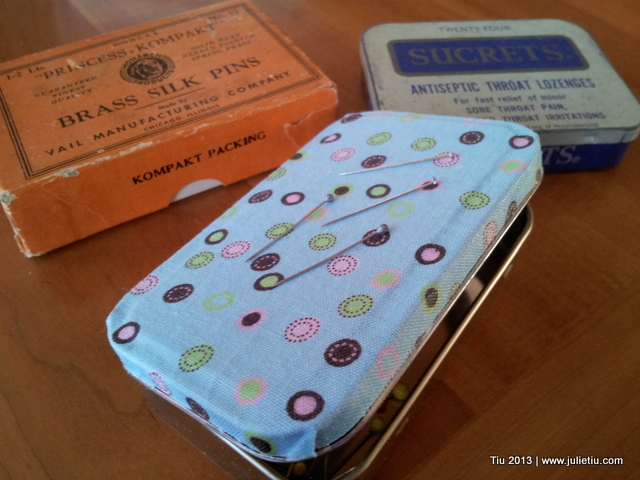
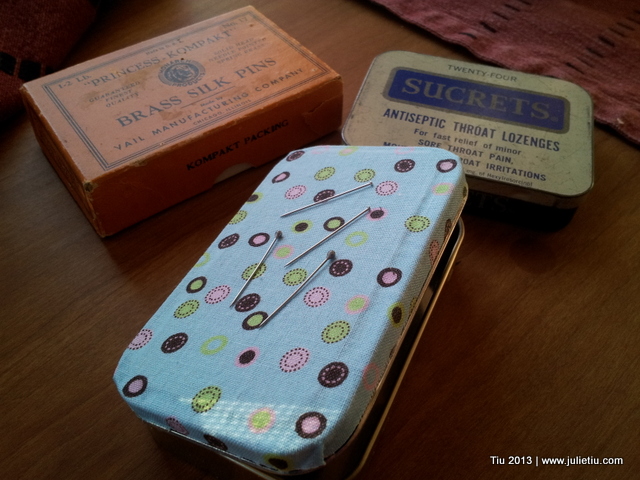
Those are a couple of my other pin holders. Vintage, eh? I’m so looking forward to having the magnetic one next to my sewing machine… pins won’t get away from me so easily now. Maybe this means I have sewing projects coming up?? *grin*

Making Bottle Cap Magnets: a Mini-Tutorial

Last week my daughter and I were having fun on Election Night. Here’s the long version of what we were up to. I only call this a mini-tutorial because there’s not a whole lot of science that goes into this. You can make all sorts of miniature art using regular bottle caps… clearly, you can see how much we’ve been holding onto. Stores carry blank bottle caps and bottle cap kits for art and jewelry, too. We gathered all sorts of supplies like sequins, confetti, rhinestones, glitter, scraps of cardstock and patterned paper, newspaper, glue, Mod Podge and magnets.

Just glue and stick your doo-dads… recycle cards, even newspaper ads! They all start to look like potential mini-magnets. (It’s probably easier cutting out circles with a round punch, but I went old school and used my engineering compass.)

While your art is drying, it’s a good idea to weigh them down if the paper starts curling up. Just use a little plastic wrap and coins or, if you’re nerdy like me, little scale weights.

We let our bottle caps dry overnight, then added some Mod Podge dimensional magic to get them glossy and pretty. Glue your magnets and you’re done! You could package a little set as a gift or party favor… I really like this tutorial on glass magnets for packaging.

DIY Decoupage Beer Label Coasters Tutorial

DIY Beer Label Stone Tile Coasters

These are fancy looking, but oh so easy to do with some simple materials. Again, I feel like I need to mention that there are lots of decoupage coaster tutorials out there. All are very searchable, and use everything from color copied photos, scrapbook paper, scrap fabric, wine bottle labels… my coasters use local beer labels. Great gift idea for a host, or that beverage aficionado in your life!

You need:

  • Water
  • Tub or mixing bowl large enough to submerge your bottles
  • 4″ x 4″ Stone tiles (found at your home improvement store in the flooring section)
  • Foam Brush
  • Mod Podge, or some acrylic decoupage medium
  • Felt (adhesive-backed)
  • Optional (but useful): Safety pin or dressmaker pin, plastic card (i.e. used gift card), very fine sandpaper, clear acrylic spray

**OH, when you’re looking at the tiles, check them for chips and dings before you purchase. People pick through them!**

First, you’ll want to remove your labels. I filled our empty beer bottles with water, then submerged the bottles in hot/warm water in a large mixing bowl. Actually, I left it overnight, and in the morning, the labels were super easy to remove. No rips, no shredding. Lay your labels down to dry. (Now go put your glass bottles in the recycling bin…)

Prep your stone tiles by wiping down with a damp towel. They get pretty dusty at the home improvement store. Assuming your labels are dry… use your foam brush and apply a thin coat of Mod Podge to your tiles, nice and easy. Place your labels where you want them, and then press them down firmly.

You’ll get tiny air bubbles, air pockets, because stone tiles are bumpy and porous. Just work out the bubbles gently with your fingers (or plastic card) from the middle of the tile and outward. This is also when you might find a pin handy. I would gently poke the air bubble then push the air out with my finger. Let the tiles dry for about 15 minutes.

After 15 minutes, check your tiles. They will feel tacky, but you can touch them. Add another coat of Mod Podge, and work out the air bubbles, and let dry. Repeat two or three more times. I painted five layers, each time working out any air bubbles with a pin.

Let your tiles dry completely overnight, or 24 hours. If you don’t like the tacky feeling, which I don’t, you can “wet sand” your tiles with very fine sandpaper. I wet a small piece of sandpaper and just went over the tiles. Your decoupaged skin won’t be messed up at all… it will become smooth. Skip the sanding (or not), then just seal with clear acrylic spray, following the manufacturer’s instructions.

Lastly, cut 3-1/2″ x 3-1/2″ felt squares and glue under the tiles, or if it is adhesive-backed, just press into place.

DIY Decoupage Stone Tile Coasters

Beer Labels decoupaged onto Stone Tiles

Halfway through May: Super Moon, Crafting, Teacher Appreciation

May started with a great Super Moon

Hello, friends. I know I say this all the time – where do the days go?! Seriously, here we are in the middle of May, and it’s been forever since I’ve blogged. Thanks for staying connected with me on Facebook and Twitter. It’s truly appreciated. Those outlets have helped me stay in touch when I’ve come up for air.

Soccer and t-ball practices, class projects, teacher appreciation week, baptism, communions, weddings… Spring is in full swing.

First T-ball practice: my son and his friends from preschool

My daughter's class project - California on a shoebox float

A shoebox float with fringed party streamer

Teacher Appreciation Gift idea: notes in a giant "pill box"

Been busy with envelope calligraphy

Daughter and I are addicted to making bows

The perfect gifts on Mother's Day: handmade with love

More Resources

Super Moon news article

Shoebox Floats

More Teacher Appreciation ideas

Paper Bows, and more Paper Bows

Upcycled paper bag envelopes tutorial

I hope everyone’s doing okay out there… Oh my goodness, so fun and busy around here! Baby shower party for my sister-in-law, trying to ride my bike every day, school and church events. I’ve completely neglected housekeeping, so once again, I have lots of catching up to do on so many levels. Teacher’s Appreciation Week is also coming up! Before you know it – Summer Vacation! EEK!

The other day I ran out of mailing envelopes, so what did I do? Made some of course. Yes, you can buy plain white ones, security envelopes, manila business envelopes – all sorts for so little cash. But, like the crazy girl I am, I had this paper bag in the stash and thought, what a pity to just recycle it. Let’s upcycle it!

Cut your bag open down one side and across the bottom.

Find an envelope shape you like… from your day’s mail, from your recycling bin, from your stationery set. Whatever you have, it’ll work. Also, this way, you’ll know that the shape and size conforms to US Mail regulation. Just carefully open up your envelope which will serve as your template. I like to use a pencil to roll down the seams, opening up the envelope with little tearing. Then if you’re not to particular about the design, just start tracing onto your paper bag.

For this one side, I really wanted the logo to be in the middle of the envelope. After you’re done tracing and cutting, start folding per your envelope template.

Here’s what they look like… use a glue stick to adhere all the sides in place and to later seal your envelope!

Who wouldn’t like getting mail in these envelopes?

Related Posts with Thumbnails