Book Review: The Adventures of Little Mouse

The Adventures of Little Mouse (Williams)


“True friends are the ones you can count on to be there for you…”

The Adventures of Little Mouse: (Life outside the Mouse Hole) by Sherri Williams (AuthorHouse, 2012, 43 pgs.) tells lessons of friendship, listening to your parents, and making good choices. Williams uses a family of mice and short stories in this book to demonstrate decision-making and consequences for young readers.

The Adventures of Little Mouse (Williams)

This is unlike most of the books I review (projects and crafting), but this author is also an avid quilter and has developed quilt designs based on each story. (Her designs are also available online.) I read this book aloud with my 6-year old and felt that it was appropriate for his age group. I’d say it targets kindergarten through third grade.

The Adventures of Little Mouse (Williams)

From Julie Tiu|Picasa Web Album

The twelve short stories cover topics like being a good friend, helping others, being careful, but I feel the overall running theme is that you don’t always appreciate what’s right in front of you (i.e. your home life, family) and parents are just looking out for their kids. A theme of being cautious almost seems too forward in some cases, but definitely a good lesson for little ones.

If you’d like a copy of this book for yourself, The Adventures of Little Mouse: (Life outside the Mouse Hole) retails for $21.00 (softcover) at most bookstores and is also available on Kindle for $3.99.

Leave a comment here for an opportunity to win a copy for yourself. It makes a nice stocking stuffer for your special youngster! I’d love to hear from you and send you this book… Comments welcome until Thursday, Dec. 6, 10 pm CST.

Jolee’s Boutique Stickers Giveaway

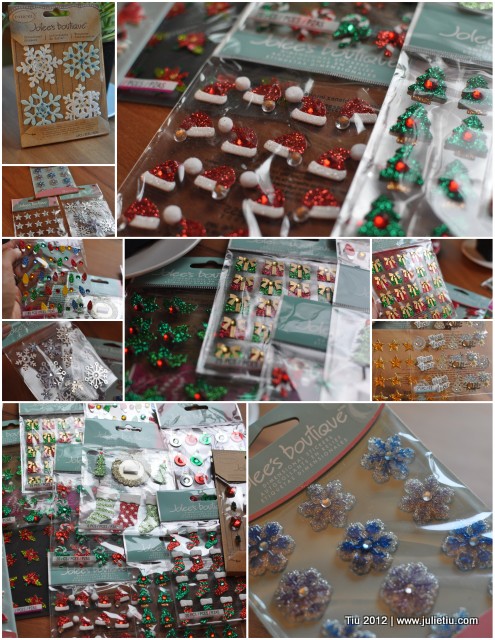
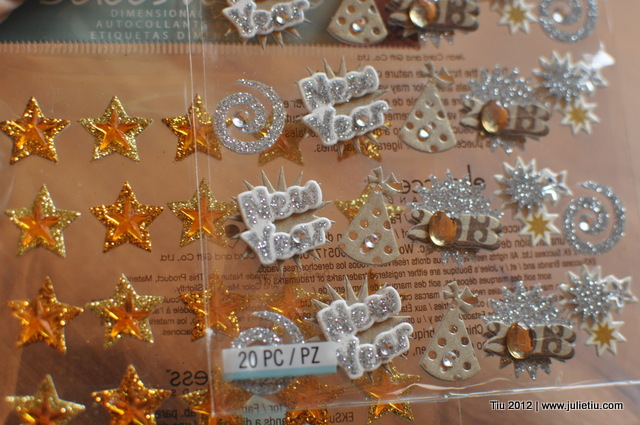
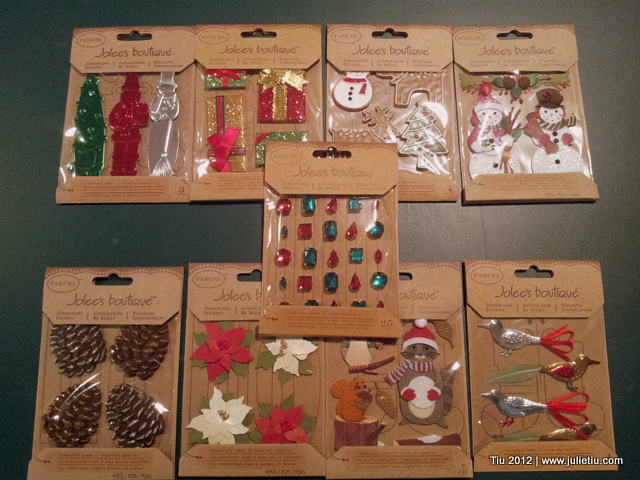
Jolee’s Boutique Christmas dimensional stickers

When I was a little girl, I could not have enough stickers. I would save the stickers off of fruit and produce from the grocery (you know, I’m talking about Chiquita bananas). And, now that I’m all grown up, I still love stickers and they’re also very grown up… Jolee’s Boutique has the cutest and some of the most elaborate stickers I’ve ever seen. They give some great dimension craft and paper projects.

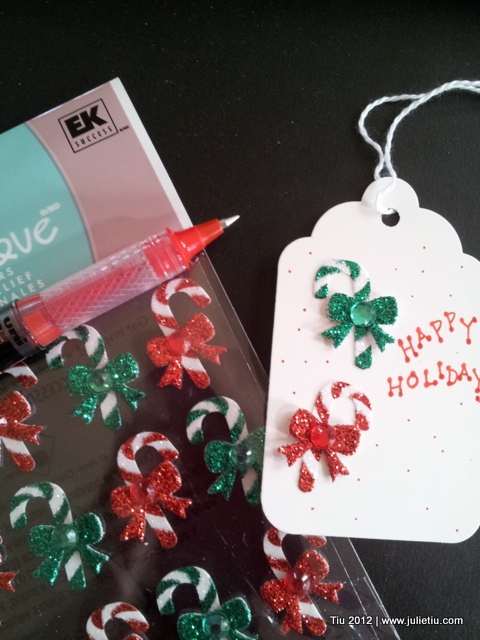
Plain paper tags get dressed up so easily. And, since I’ve been doing some bottle cap art lately, how cute would some of these be in a little bottle cap frame?

So happy to offer three sampler packs, friends… just follow instructions and don’t forget to leave a comment! Good luck!

a Rafflecopter giveaway


  • This giveaway is in no way affiliated, administered or endorsed by Facebook.
  • Please provide your email address so that I can contact you if you win.
  • Three separate winners total, and will not be the same person. No specific sticker or sample requests will be honored.
  • Winner(s) will be notified by email on 11/19/2012 and will need to respond within 48 hours to claim their prize or another winner will be chosen.
  • Winner(s) must be 18 years of age or older and a US citizen in order to win.
  • International shipping charges may apply.
  • Winner(s) are responsible for paying any necessary taxes on winnings.
  • Alternate entry email: jtiu@comcast.net with entry information.
  • All prizes will be mailed by Julie Tiu and eksuccess/Jolee’s Boutique will not be held responsible if the prize is not fulfilled.
  • A list of winners may be requested after the giveaway has ended. Questions and additional information can be requested by emailing: jtiu@comcast.net.

DIY Decoupage Beer Label Coasters Tutorial

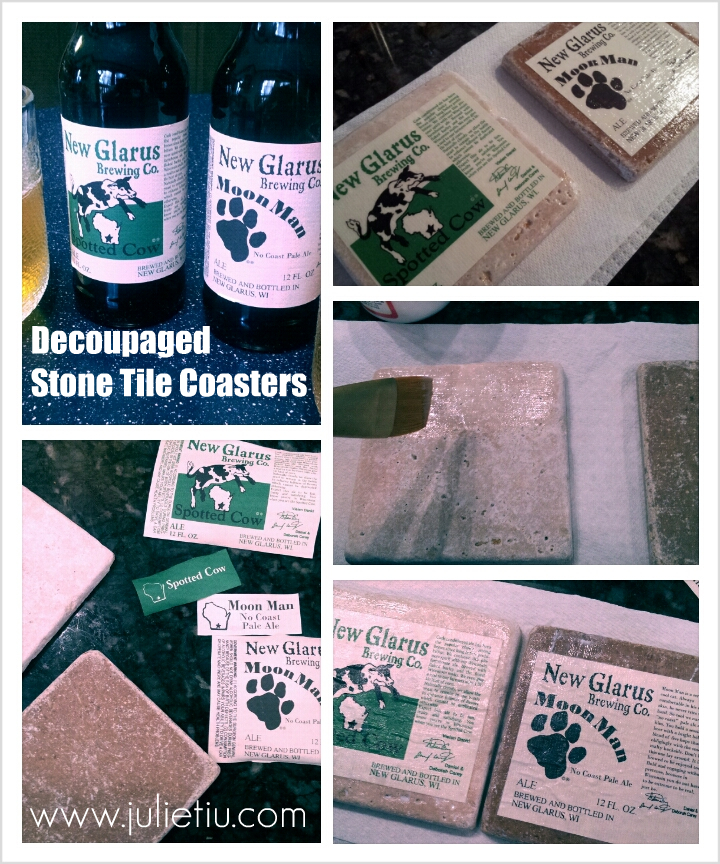
DIY Beer Label Stone Tile Coasters

These are fancy looking, but oh so easy to do with some simple materials. Again, I feel like I need to mention that there are lots of decoupage coaster tutorials out there. All are very searchable, and use everything from color copied photos, scrapbook paper, scrap fabric, wine bottle labels… my coasters use local beer labels. Great gift idea for a host, or that beverage aficionado in your life!

You need:

  • Water
  • Tub or mixing bowl large enough to submerge your bottles
  • 4″ x 4″ Stone tiles (found at your home improvement store in the flooring section)
  • Foam Brush
  • Mod Podge, or some acrylic decoupage medium
  • Felt (adhesive-backed)
  • Optional (but useful): Safety pin or dressmaker pin, plastic card (i.e. used gift card), very fine sandpaper, clear acrylic spray

**OH, when you’re looking at the tiles, check them for chips and dings before you purchase. People pick through them!**

First, you’ll want to remove your labels. I filled our empty beer bottles with water, then submerged the bottles in hot/warm water in a large mixing bowl. Actually, I left it overnight, and in the morning, the labels were super easy to remove. No rips, no shredding. Lay your labels down to dry. (Now go put your glass bottles in the recycling bin…)

Prep your stone tiles by wiping down with a damp towel. They get pretty dusty at the home improvement store. Assuming your labels are dry… use your foam brush and apply a thin coat of Mod Podge to your tiles, nice and easy. Place your labels where you want them, and then press them down firmly.

You’ll get tiny air bubbles, air pockets, because stone tiles are bumpy and porous. Just work out the bubbles gently with your fingers (or plastic card) from the middle of the tile and outward. This is also when you might find a pin handy. I would gently poke the air bubble then push the air out with my finger. Let the tiles dry for about 15 minutes.

After 15 minutes, check your tiles. They will feel tacky, but you can touch them. Add another coat of Mod Podge, and work out the air bubbles, and let dry. Repeat two or three more times. I painted five layers, each time working out any air bubbles with a pin.

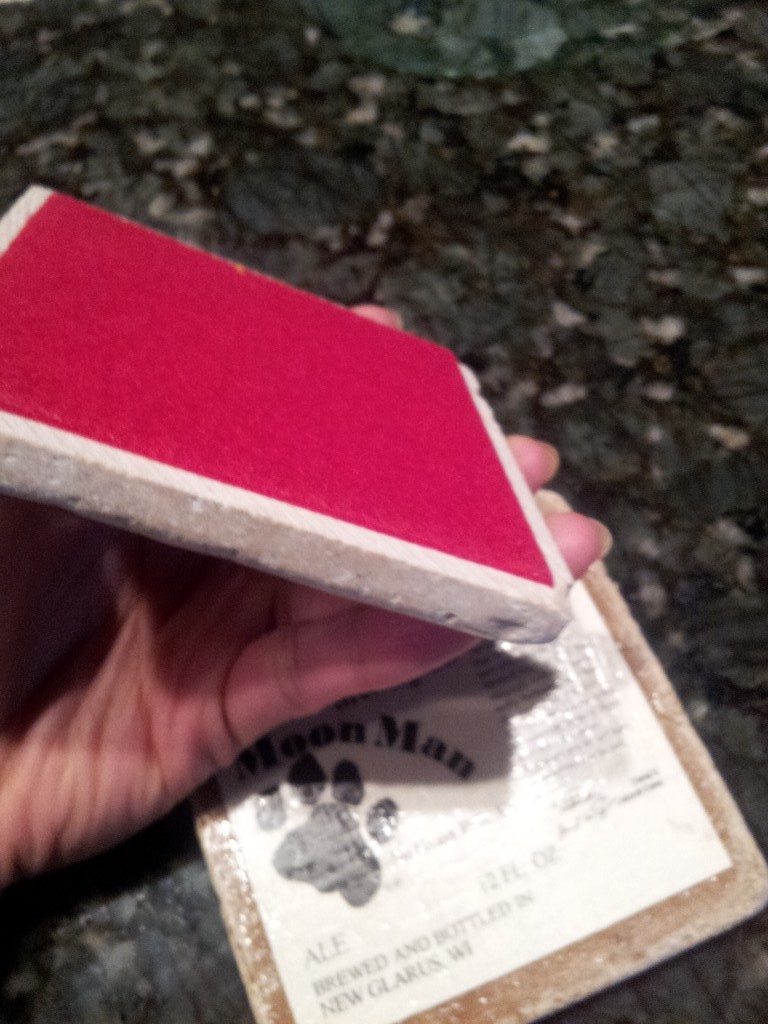
Let your tiles dry completely overnight, or 24 hours. If you don’t like the tacky feeling, which I don’t, you can “wet sand” your tiles with very fine sandpaper. I wet a small piece of sandpaper and just went over the tiles. Your decoupaged skin won’t be messed up at all… it will become smooth. Skip the sanding (or not), then just seal with clear acrylic spray, following the manufacturer’s instructions.

Lastly, cut 3-1/2″ x 3-1/2″ felt squares and glue under the tiles, or if it is adhesive-backed, just press into place.

DIY Decoupage Stone Tile Coasters

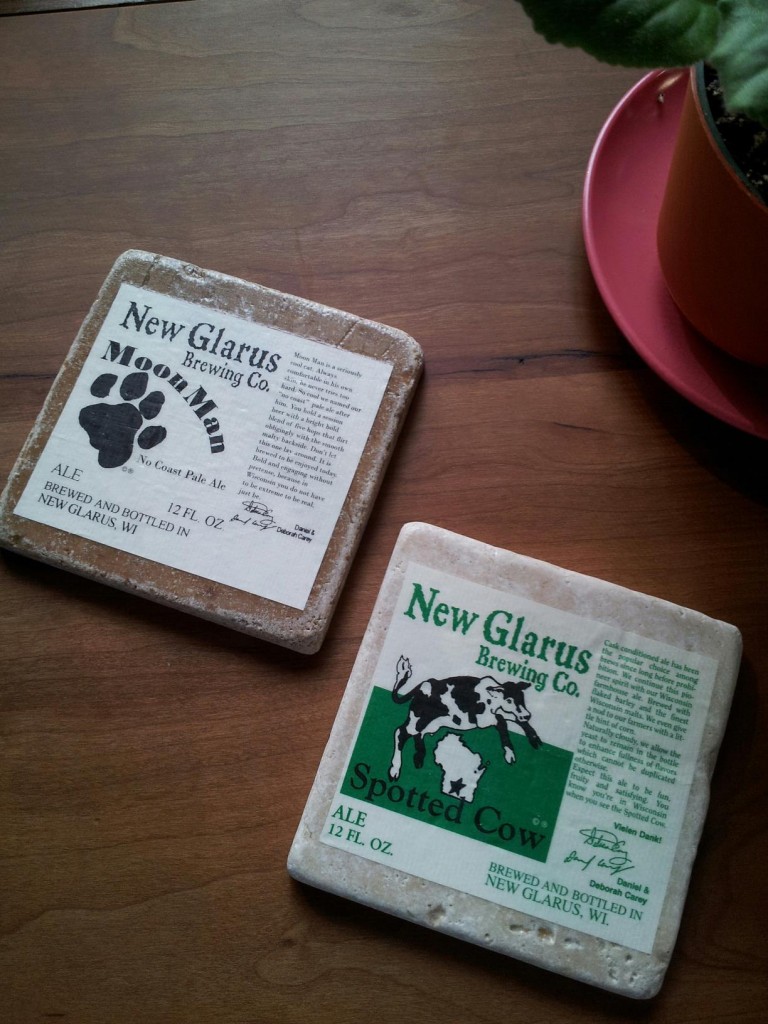
Beer Labels decoupaged onto Stone Tiles

Teacher Appreciation Gift Idea: Daily Dose of Kindness and Free Printable Template

Thoughtful teacher gift idea

Don’t know about you, but once Spring Break ends, school days go by like an out-of-control snowball on a sledding hill. And the parties, picnics and project lists grow and grow. So I like gift ideas that are pretty easy to put together, both in time and materials.

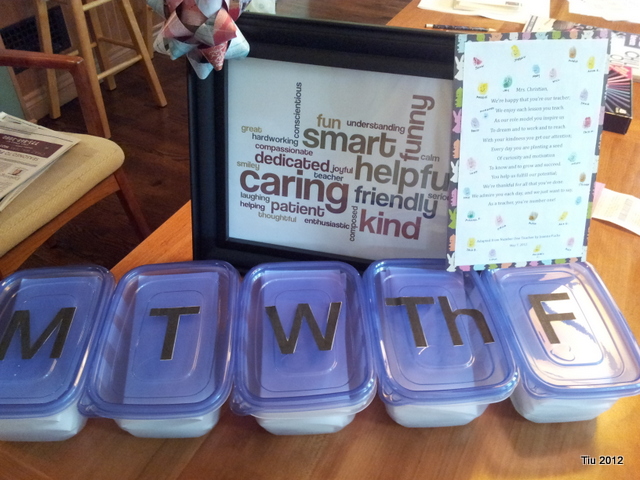
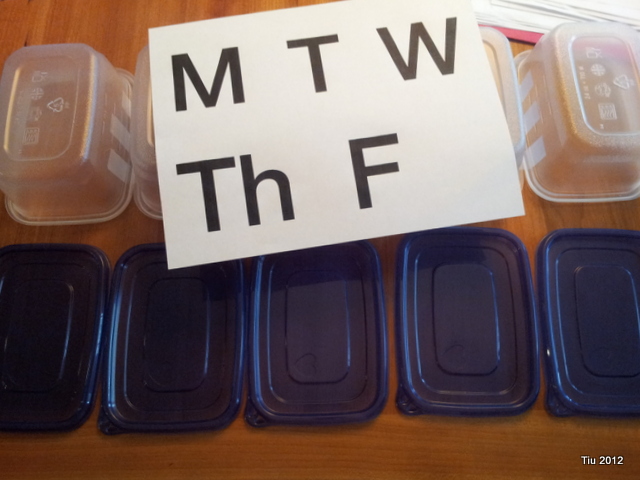
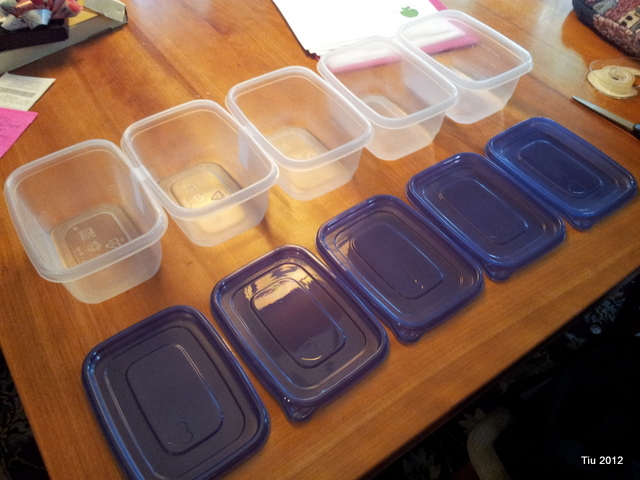
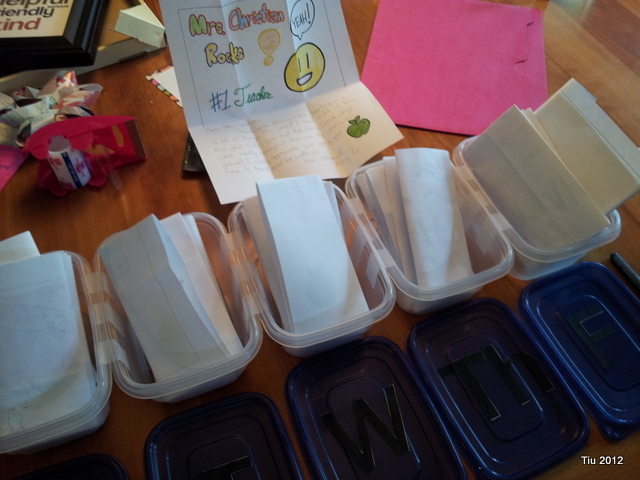
A few weeks ago we celebrated National Teachers Appreciation Week, and I had a nice time putting this together for my daughter’s homeroom teacher: a giant “pill box” with letters of appreciation from her students. It’s thoughtful and heartfelt; an option to candy, flowers or a gift card – which we all know we all do.

Along with the letters, I put together a “word cloud” using wordle.net, printed it out and framed it. All the students listed two or three words that they felt described their teacher.

Materials needed for a giant letter-pill box:

  • (5) plastic containers (2-3 cup capacity)
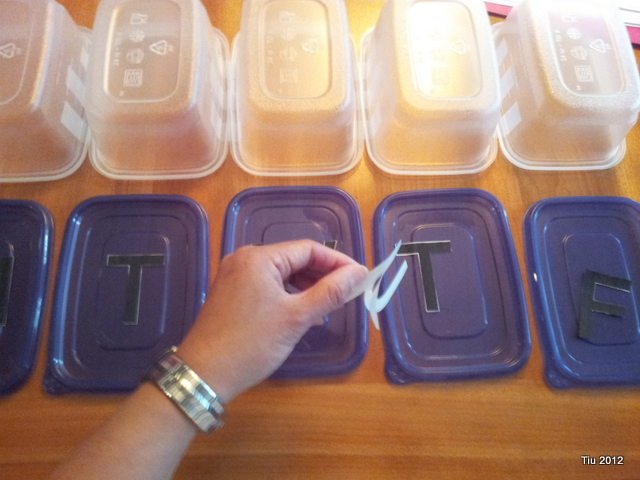
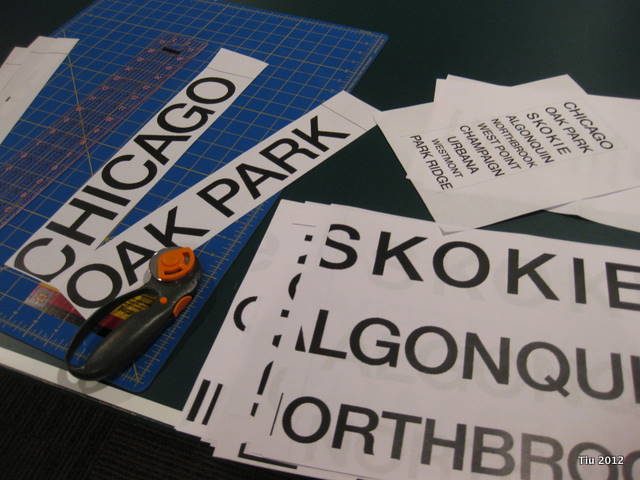
  • Stencils or vinyl stickers for the days of the week. I was able to print out letters and use my Xyron Creatopia machine to make stickers.
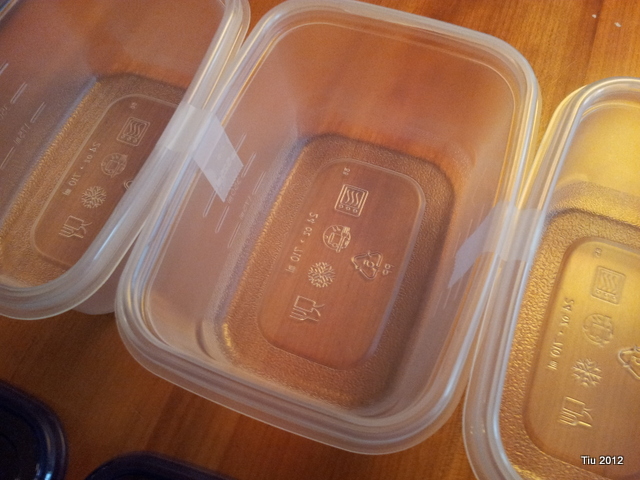
  • Scotch tape or clear packing tape

Giant "pill box" for teacher letters

Adhere days of the week stickers on teacher gift

teacher gift in progress - tape boxes together

Teacher gift in progress - days of the week stickers

Teacher gift: place letters in the boxes

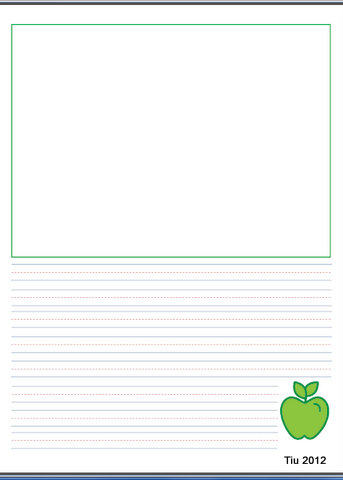
Here’s a Cute template for student letters that I made using Microsoft Publisher. Totally optional, but it’s something easy to print out and have all the students do. They can draw a picture and write their letter… so cute. (If you click on the picture below, you will also be redirected to the printable document.)

Teacher letter template - drawing and writing space

Hope this inspires you to shower your favorite teachers with a dose of kindness!

That Old Sweatshirt – A pillow tutorial

I get sentimental about things that other people would probably not even think twice about throwing away or donating. I have old ticket stubs, concert programs, newspaper clippings – those things I can put in a scrapbook. But I’ve been known to hoard be sentimental about clothes too, and only recently have I been purging all our closets. Sometimes there’s just that one article of clothing you want to keep. See this old collegiate sweatshirt…

Julie Tiu in 2002

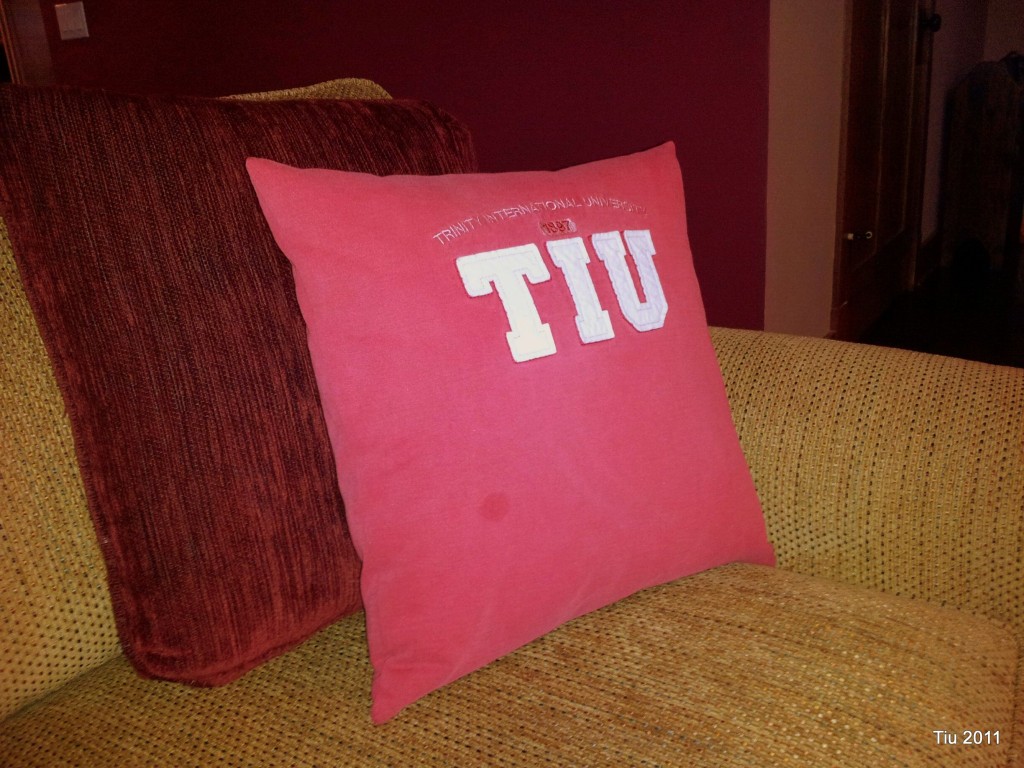
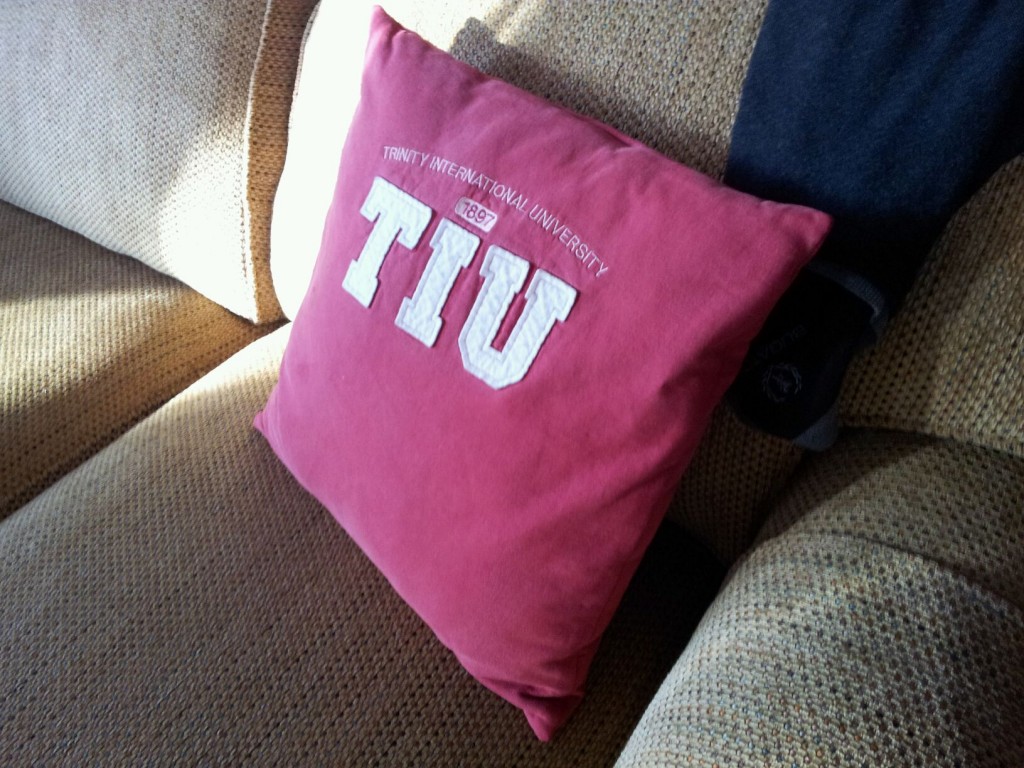
…Became this pillow. (I know, after 10 years, right?)

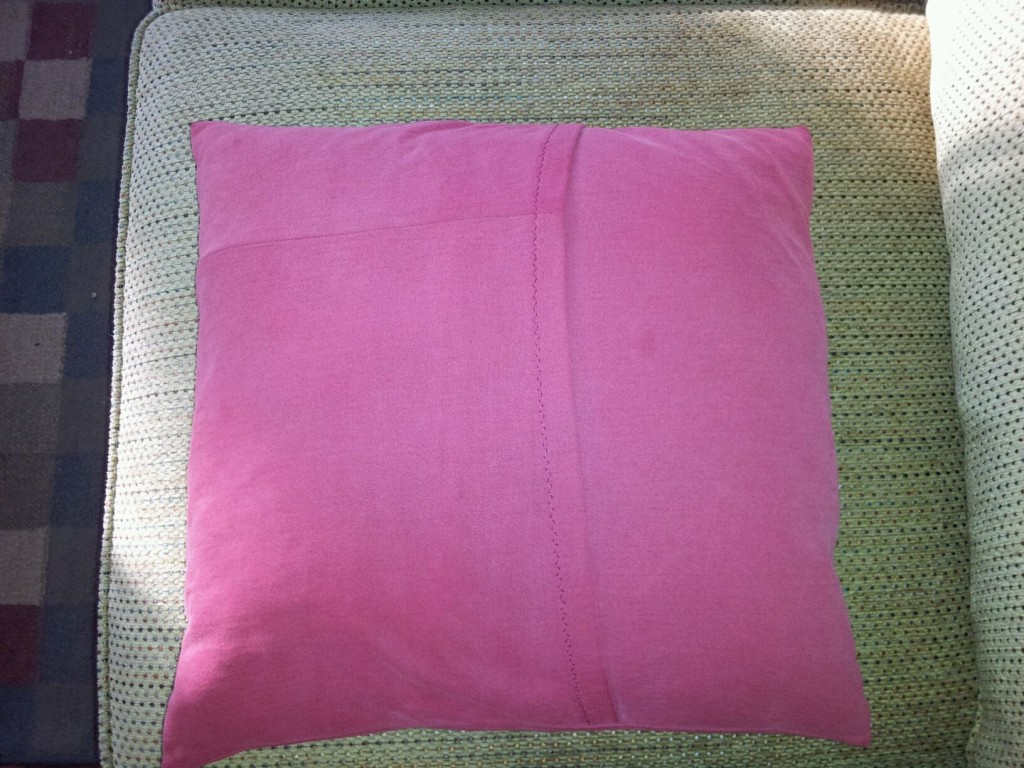
An upcycled sweatshirt made into an envelope pillow – meaning, you can slip the cover on and off. Very easy for washing. Could be a cute gift for Valentine’s Day, too.

Recycle Your Favorite Sweatshirt (I didn't even attend this school. Got the sweatshirt because it had my last name!)

And here’s how I did it.

  1. Take your clean sweatshirt of choice and lay it on a table or on the floor.
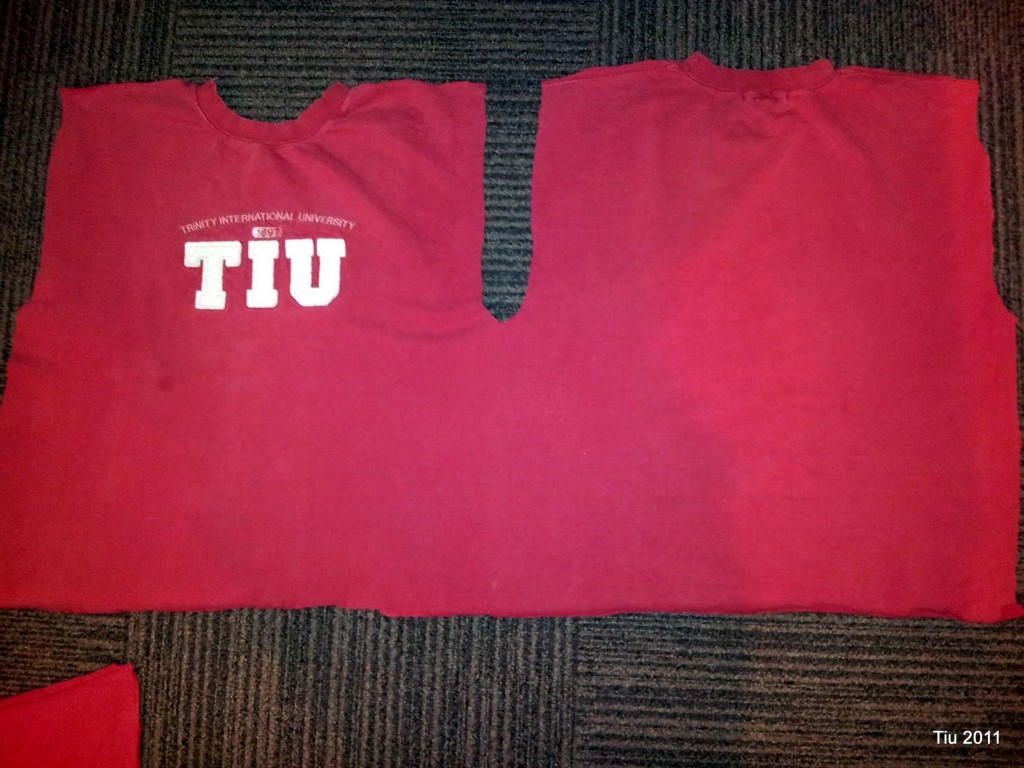
  2. I cut the sleeves off first. Then set aside.
  3. Next cut along one of the side seams of your shirt and along the shoulder seams. This will open everything up. I did it this way to give the largest piece of continuous fabric.
  4. Cut off the bottom hem and collar (cuff material) also. At this point you may need to iron the shirt (highly recommended).

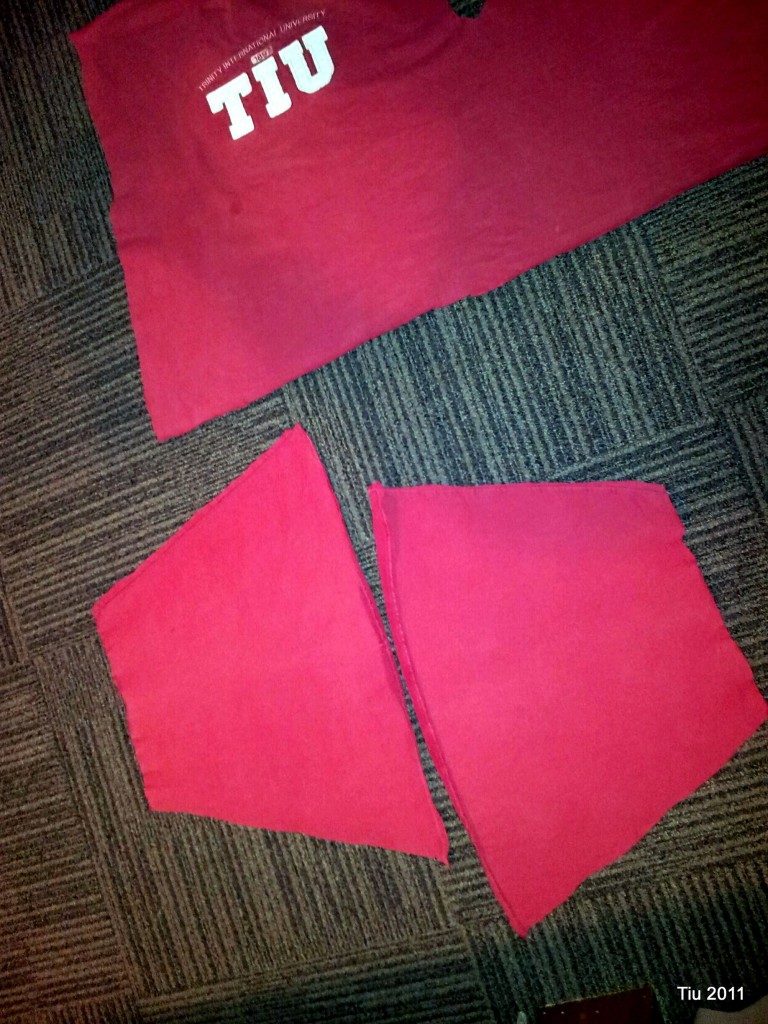
  5. You may need the sleeves for extra fabric. Cut off the cuffs and cut along either side of the seam.

    Sweatshirt sleeves cut open

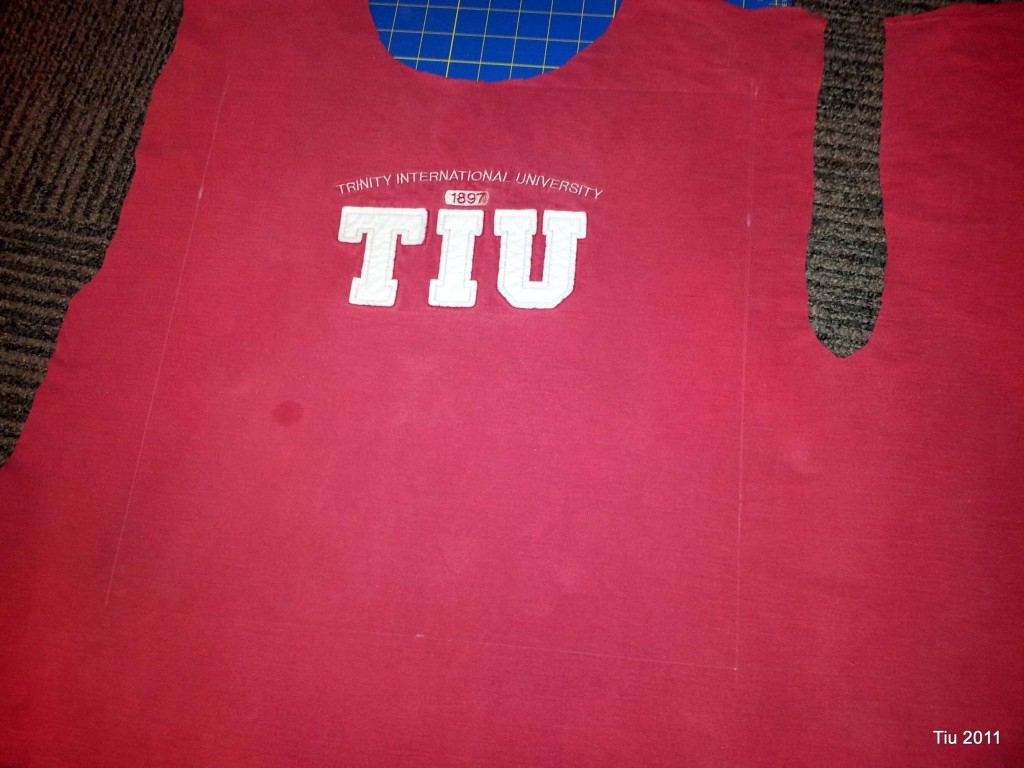
  6. For a 16 x 16 pillow, you will need three pieces of fabric: (1) 16-1/2″ x 16-1/2″ for the front, (2) 12-1/2″ x 16-1/2″ for the back. (See my fancy sketch below.) I needed to use the extra sleeve material for one of the back panels. Just piece together if you need to.
  7. Try to center your focal point. I didn’t have too much choice – just went as high as I could.

  8. Prepare the back pieces first. Fold along the length (16-1/2″) and press 1/2″, then fold 1/2″ again, pin and edgestitch. Do this to the other piece. Press both pieces. Note: I found the zig-zag stitch easier to do with the stretchy sweatshirt material.

  9. Lay the front piece down, right side up. Next lay one of the back pieces, wrong side up, matching the raw edge with your front piece. The finished edge should be somewhere in the center area. Lay the other back piece with its raw edge along the other side of the front piece. Now the finished edges of your back pieces should be overlapping one another.
  10. Stitch around the perimeter with a 1/2″ allowance. Backstitch as you start and finish. When complete, remove and clip your corners, and turn rightside out.
  11. Stuff your pillowcase!

So here’s the thing – you can adjust the size of your fabric for any size pillow by just adding 1/2″ to your finished size. The back pieces take a little math.

16″ x 16″ pillow – cut 16-1/2″ x 16-1/2″ (front) and 16-1/2″ x 11-1/4″ (two pieces for the back)

14″ x 14″ – cut 14-1/2″ x 14-1/2″ (front) and 14-1/2″ x 9-1/4″ (two pieces for the back)

12″ x 16″ pillow – cut 12-1/2″ x 16-1/2(front) and 12-1/2″ x 11-1/4″ (two pieces for the back)

12″ x 12″ pillow – cut 12-1/2″ x 12-1/2(front) and 12-1/2″ x 7-1/4″ (two pieces for the back)

Related Posts with Thumbnails