Making mini cards and a printable template

I made some mini cards just in time for Chinese New Year and Valentine’s Day. (Well, almost in time for Chinese New Year – it’s Sunday and I want to mail a couple out.)

Making mini-cards

Mini Valentine Cards with scrap paper and stickers

Rubber stamping for Chinese New Year cards: Year of the Snake

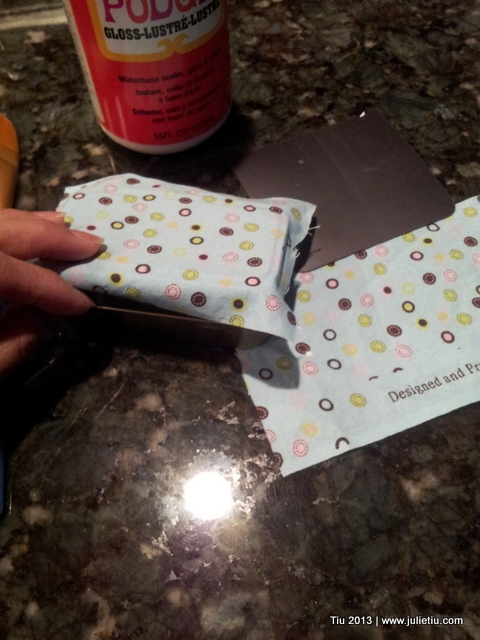
For that old-fashioned handcrafted card, just use what you have around your home, stickers, ribbon, glue. To make mini-cards, I took an 8-1/2” x 11” sheet of cardstock (this is Bazzill Pomegranate) and cut it in this manner to make six little blank cards. Just click on the picture below to print your own. From one sheet you can make (2) 3″ x 3″ cards, (2) 2-1/2″ x 2-1/2″ cards and (2) 2-1/2″ x 3″ cards. There’s a little 1″ scrap if you want to keep that for tags or tiny, homemade “Moo cards” (not a sponsor, just letting you know about them).

You’ll need to make your own envelopes. I think I have some doilies somewhere around here. Or maybe just tuck your cards with your gift, in lunchboxes, on the dining table… I’ll try to post a picture of the finished cards!

mini card template

Mugshot Monday: Finally Snow

A Year in the Life of an Art Journal

Overnight snow means shoveling before my husband leaves for work. I often joke about the idea of a snow plow attachment for his wheelchair. Probably not going to happen.

So this was yesterday morning, a hot cup after clearing 3″-4″ of powder along the walks and driveway.

By the way, I’ve added a link below to the website that started this Monday prompt… just in case you feel like joining along. 🙂

One YearJournal

Easy DIY Photo Card Stationery

DIY Photo Card Stationery

How are we in February already? And, how am I so behind in sending out thank you notes from the holidays? Am I the only one who falls behind? (Probably, because I’m the nutty girl who wants to make everything herself.) But these… these are way cool. I’ve thought about doing this for a while now.

The possibilities are endless with your camera, willing family members (i.e. children), blank white boards or cardboard, Sharpies and blank cards. I took about 10-15 pictures of the kids and picked my favorites. Uploaded and printed them out at the photo center for very little cost. If you print them glossy, you get the coolest effect.

Use Sharpies on glossy photos

I love my Sharpies. Use them and turn these blanks…

Use blank white boards or cardboard in picture

… into any card you want! For 4″ x 6″ pictures, you could purchase empty photo card frames. I have extra cardstock laying around so I just cut it to size for my blank cards. (See first picture.)  They measure at 4-3/4″ x 6-3/4″.  I get weird when it comes to the borders… I don’t like them too wide.
And to stick them on the card, use double stick tape or glue dots. If you want to get fancy, use photo corners or with an X-acto knife, cut slits on a diagonal at each corner and feed the corners of the photo through.

DIY Photo Card Stationery: Use permanent marker to customize picture

Don’t limit yourself to just saying “Thank you.” You can split it up like, “Cool! Thanks a bunch!” Or “Happy / Birthday”.

DIY Photo Card Stationery: Use permanent marker to customize picture

My daughter thought the pictures “freakishly” looked like the words were already printed on the boards.

DIY Photo Card Stationery: Use permanent marker to customize picture

Yes, I could’ve printed the cards out at the photo center as folded cards (for a whole lot more money), but what’s the fun in that? Enjoy… let me know if you’ve done this or if you might try it!

Mugshot Monday: Distractions

Mugshot Monday: Waiting for the Car

Weekend was good – hope yours was too. Sorry this mugshot comes late today. Definitely no crafting or creating was had. And sometimes you need those days. But…

Brought our car in for service. You hope it’s an easy fix, you think it’s a slam dunk-I’m gonna be out of here in an hour- sort of thing. Nope, nope, nope. *sigh* Money hemorrhage day. Life happens.

I think some therapeutic sewing or drawing is necessary.

Mugshot Monday: Catching My Breath

Mugshot Monday Catching Up

I’m joining this art journal collaboration and the leaders of this journal come up with prompts. You can either share pictures or your art journal book entries. Pictures are easier for me… let’s face it, not enough time to pull out my paint and supplies. So, while I’ve shown this mug before, it was perfect for their prompt today of “ONE WORD”.

I use this mug often. It was a Christmas gift from my brother-in-law (and probably with some help from my sis-in-law, ha.) Love, love the design; there’s a stamped picture of a tandem bicycle on the other side. It’s wonky, it feels like a handformed vessel, it’s imperfect and I dig that. The stamped letters that spell “BREATHE” are indented in and it makes me think of the artist who took the time to push each letter in. There are three other mugs in this set – one says TREK, the other says PEDAL and the last one, CYCLE. But, BREATHE… that’s a good word for me this year. So when you look it up in the dictionary you find:

To inhale and exhale freely.
To pause and rest before continuing.
To feel free of restraint.
(of wine) To develop flavor and bouquet by exposure to air.
To take in.

We should all try to breathe a little more deeply and relax, breathe and stay focused, breathe and enjoy.

Other stuff
At the top of the site, I’ve included a couple new pages for easier navigation. Now there are curated lists of projects, recipes and reviews. No need to be poking around and wandering aimlessly about the website. (Unless you want to. Don’t let me stop you.) I’ll post a list of “on location” entries in the next few weeks. Have a great week everyone!

So This is Julie screenshot

Making a Magnetic Pin Holder

20130116_094954

More decoupaging. This Altoids mint tin was stashed in a box waiting for its next life. Yeah, yeah, on the brink of hoarding here, but I LOVE recycling, or upcycling. Maybe this could hold some paper clips, safety pins, or thumbtacks if you’re not into sewing.

Here’s what I did to make this fun little box. I took an old refrigerator magnet (an out-of-date freebie sheet magnet), cut it to size and stuck it on the tin.

shot_1357944502777

I dug up some scrap fabric and traced around the lid. Then I just cut around my traced line to make sure the fabric would completely cover the lid.

shot_1357945139881

I lightly brushed Mod Podge on the top of the lid and flattened out the fabric. When the lid was dry I decoupaged two opposite sides down to cover the entire lid… like pick the front and back, or the other two sides. It’s the corners that demand your attention. I treated the corners like I would wrapping a gift box lid – nice, neat hospital corners. Then I “Mod Podge-d” the heck out them so they’d stay down.

IMG_20130115_070412

Used my sharpest craft blade (X-Acto knife) and trimmed around the lid when everything was dry. I let it dry for 24 hours (Mod Podge paranoia). Tip: Take your time with the cutting and trimming part. Mod Podge gets all crispy and tough to cut through. PLEASE be careful.

shot_1358348815034

And here it is! My own little magnetic pin holder.

20130116_094255

Look! The pins stick to the top!

20130116_094839

20130116_094922

Those are a couple of my other pin holders. Vintage, eh? I’m so looking forward to having the magnetic one next to my sewing machine… pins won’t get away from me so easily now. Maybe this means I have sewing projects coming up?? *grin*

Related Posts with Thumbnails