Making Birthday Invitations

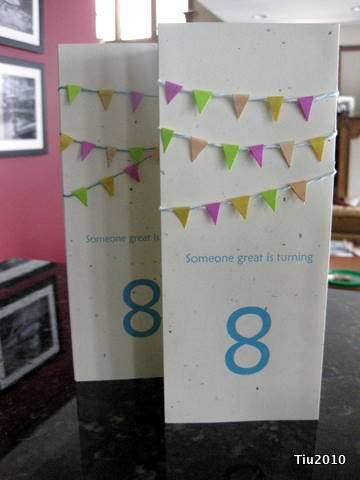
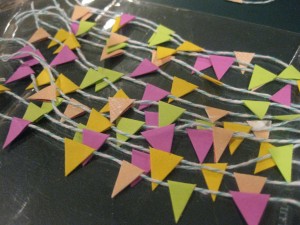
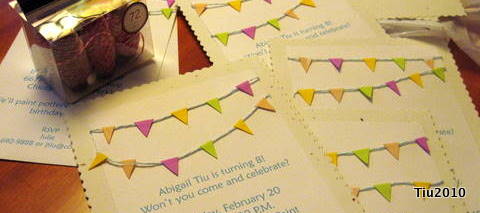
The inspiration for this design comes from Jessica Jones at one of my all-time favorite blogs, How About Orange. I had the pleasure of meeting her at the Chicago Craft Social last year – such a nice person.

Her tutorial is here. I just made it work for Abby’s birthday party invitations, both of them. One for a small gathering of school friends, and one for the family. Thanks, Jessica, for your inspiration!

Craft and Hobby Association Trade Show

My head might explode if I ever attend this trade show. The Craft and Hobby Association (CHA) Trade Show just finished up in Anaheim, California. Many designers and crafters I follow were in full force. I wonder if I’ll attend some day – crafter or otherwise.

Here are a few links to some of the captured moments.

Donna Downey’s Simply Me

CraftCritique

CHA Trade Show Home Page

Designing gift tags and Chinese New Year cards

Color, pattern, texture, shine…So simple and brilliant. It’s my favorite design rule, and I’m still learning (since I’m not even close to having studied art design). The best part is it works for putting together an outfit, a room, a gift tag?! Actually, it didn’t start out that way, but when I looked at the final products it sort of jumped out at me: red, lots of patterns that give off lots of texture and the tag is shiny. Last week, I was scribbling and working on the last of this series of five when I accidentally spilled my tea on them. Ugh. After some quick blots and a night sandwiched in paper towel and phone book pages, they survived with little water scarring. Sharpies are awesome.
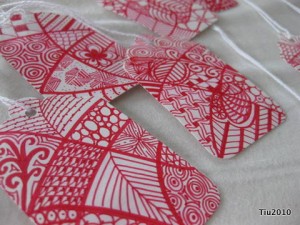
More scribble art

These tags were meant to be maybe a first offering on Etsy… maybe…with Valentine’s Day and all. But, with the slight water damage, I wouldn’t feel right about selling them. So, I started on some other ones. The third from the left isn’t quite done. Then I tried one with the new Copic Multiliners; that one smudged.
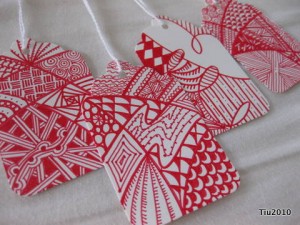
Scribble art turned gift tags
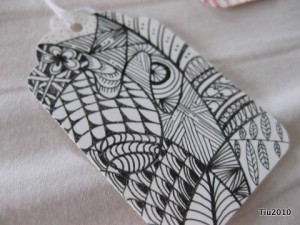
Shiny paper and Copic markers don't work as well

While I took a small break from putting away Christmas decorations, I started thinking about Chinese New Year, the next holiday we’ll be celebrating in this house. (I have Holiday A.D.D.) There are these Chinese zodiac rubber stamps and a variety of Asian themed stamps I want to use.
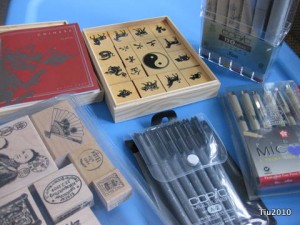

Let’s see how this pans out over the next week or so. I should have some time to work on them with the big snowstorm and freezing temperatures coming our way.
Recycled Cardboard Box Notebooks

Recycled Cereal and Product Boxes

This is too much fun and too easy. I love making little gifts for little friends. These recycled cereal box (snack box, pasta box) notebook is just too cute. They’re all drying right now in my kitchen because my basement crafting table is completely cluttered with other projects in progress. (This is why I think I have crafting A.D.D. but that’s for another time.)

So… I was cutting and breaking down all these boxes and saving them in a container (not cluttered). I’m sure my husband thought I was nuts, becoming a hoarder. (See honey, I’m using them!!) I took all the scrap paper I was using for computer printer paper (like backs of school notes, school homework, junk mail with blank sides, etc.) and cut them down to the sizes I needed. I tried to stay with either half sheets (5-1/2″ x 8-1/2″) or quarter-size (4-1/4″ x 5-1/2″).

My dilemma was figuring out how I wanted to bind the books. I actually tried handsewing one book. There are tons of how-to’s online (like here or here), but in the end, it just didn’t look the way I wanted it to. I could have (COULD HAVE) just gone to the office copy place to have them bind the books with a comb, but I really wanted to stick with an all-recycled type of project and, dare I say, I’m frugal. Here’s how I chose to bind.

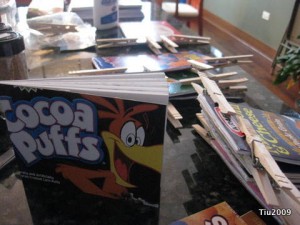
Just pick your covers, take your sheets of paper and clamp together. I kept these to 25-30 sheets each so clothespins are perfect. White glue is an amazing thing. Just squeeze some down the side you want as a spine, let dry a little, and then do a second application. The book is practically done at this point, and that’s where I am in the picture. What I have left to do is to make a nice, skinny spine cover with solid colored paper like craft paper or maybe even brown paper bag? We’ll see what I have in my paper bin.

Happy recycling.

Christmas Card Display idea

Christmas Card Display Idea

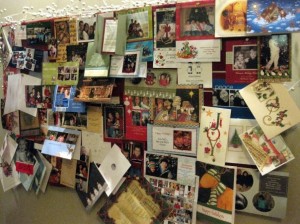
Maybe you tape cards to the back of the door. Maybe you string them up along the top of the wall, or maybe line the cards up along your fireplace mantle. Here is a fun way to display your holiday greeting cards if you want to try something new.

Supplies: 2 x 4 ceiling tile, fabric, ribbon, light duty staple gun, picture screw hooks, heavy twine or rope, push pins

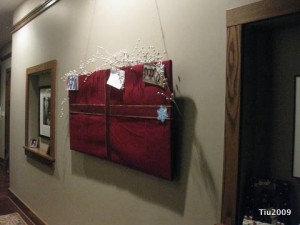
Make sure you have enough fabric to cover your board. Place your fabric on the floor, right side down, and then the ceiling tile, also right side down. Wrap the fabric around the edges, and staple to the board. Turn right side up, and place ribbon horizontally and vertically to make board look like a present. I also stapled these to the board.  On the back side, I screwed hooks into the board a few inches in from the edges and then strung twine through them to create a hanger. I loved how it turned out last year.

Christmas Card Display Idea

Christmas 2008 Card Gallery

Christmas Banner Idea

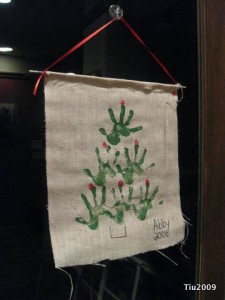
This is one of my favorite projects to come home with Abby. She was a mere four-years old when she made this, and I hang this up every year.

Preschool Christmas Project

Supplies:

canvas or burlap material (approx. 15″ x 19″), red and green tempera paint, sponge brushes (optional), permanent marker, dowel rod (3/16″ x 18″), hot glue gun or craft glue, 1/4″ ribbon (20″ to 21″)

Take your child’s hand and paint it green or dip in green paint that has been poured onto a paper plate. Stamp six handprints in a pyramid form, reloading paint on the hand as needed. Then have your child dip or paint one finger with red paint and “dot” the top of the third finger of each handprint. Let dry. Draw a little tree base and add your artist’s name and year, too.

After your banner is dry, place the dowel rod at the top of the banner and fold over the top 1/2″ inch (or whatever is appropriate) so that the dowel rod is within a “casing”. Using a hot glue gun or craft glue, glue down the canvas to secure the casing. If using craft glue, you may want to use clips or clamps to hold down the canvas as it’s drying. Tie your ribbon to the dowel rod on both ends, hang and enjoy!

Related Posts with Thumbnails