Making Birthday Invitations

The inspiration for this design comes from Jessica Jones at one of my all-time favorite blogs, How About Orange. I had the pleasure of meeting her at the Chicago Craft Social last year – such a nice person.

Her tutorial is here. I just made it work for Abby’s birthday party invitations, both of them. One for a small gathering of school friends, and one for the family. Thanks, Jessica, for your inspiration!

Welcoming Winter 2010

Late last week we were greeted by some snow… like 12 inches of snow. So, I got out like a good wife and shoveled the driveway with a little help.

At first he just wanted to stamp rectangles all over the place…

but then he insisted on driving his car instead of shoveling or making snowballs (it wasn’t very good packing snow anyway).

Hey, Mom!

He said, “Mom, move the snow in fw-ont of mine car so I can roll it!” Then he’d call me for help because his car was stuck and he wanted to “go to work”.

Time to “come home”…

I had a quick minute in between pleas for getting inside for hot chocolate to take a couple of pictures of the rose bushes I neglected to cut down in the fall. Actually, I’m pretty happy that I didn’t. The color is beautiful…

Recycled Cardboard Box Notebooks

Recycled Cereal and Product Boxes

This is too much fun and too easy. I love making little gifts for little friends. These recycled cereal box (snack box, pasta box) notebook is just too cute. They’re all drying right now in my kitchen because my basement crafting table is completely cluttered with other projects in progress. (This is why I think I have crafting A.D.D. but that’s for another time.)

So… I was cutting and breaking down all these boxes and saving them in a container (not cluttered). I’m sure my husband thought I was nuts, becoming a hoarder. (See honey, I’m using them!!) I took all the scrap paper I was using for computer printer paper (like backs of school notes, school homework, junk mail with blank sides, etc.) and cut them down to the sizes I needed. I tried to stay with either half sheets (5-1/2″ x 8-1/2″) or quarter-size (4-1/4″ x 5-1/2″).

My dilemma was figuring out how I wanted to bind the books. I actually tried handsewing one book. There are tons of how-to’s online (like here or here), but in the end, it just didn’t look the way I wanted it to. I could have (COULD HAVE) just gone to the office copy place to have them bind the books with a comb, but I really wanted to stick with an all-recycled type of project and, dare I say, I’m frugal. Here’s how I chose to bind.

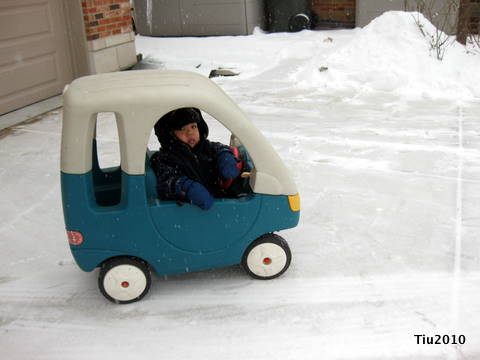
Just pick your covers, take your sheets of paper and clamp together. I kept these to 25-30 sheets each so clothespins are perfect. White glue is an amazing thing. Just squeeze some down the side you want as a spine, let dry a little, and then do a second application. The book is practically done at this point, and that’s where I am in the picture. What I have left to do is to make a nice, skinny spine cover with solid colored paper like craft paper or maybe even brown paper bag? We’ll see what I have in my paper bin.

Happy recycling.

Reconciliation, Glass Blowing and Friends

What a nice weekend. We celebrated Abby’s First Reconciliation at our church. The big celebration will be in April with First Holy Communion.

At Church with Abby

Ollie and Grandpa

Then we visited our friend and glass artist, Robert Fritz. Bob (sitting) and Eastman used to work together, but now, Bob is a retired high school art teacher, and he can do what he loves. Bob hosts a holiday open house at his studio and home to showcase his work as well as other artists. We’re fortunate to have a few pieces by Bob; one was commissioned by Eastman for Christmas right before Abby was born. Talk about an emotion-evoking gift! Breathtaking work, really. Check out Bob’s gallery on his website. The highlight of the day is learning a little about pulling or blowing glass and being able to pull our own cane ornaments. We must have at least a dozen now.

Robert Fritz Freeblown Glass Holiday Open House

Eastman pulling latticino glass ornament

Pulling Hot Glass

Julie's turn to work with hot glass

Looking a little wonky?!

Bored Kids at Holiday Glass Blowing Open House

Bob's Assistant grinding glassGreg Colombe pottery

We were excited to see Greg Colombe again and his beautiful pottery work (he’s in the background in the red shirt). He’s doubled his color palate just by adding porcelain to his materials. We have a stoneware pillar candle holder and lidded jar. This year we bought a soap dish with the most amazing glaze, and Abby and Ollie both came home with the prettiest magnets our refrigerator will see. You just might fall in love with Greg’s work if you go to his site and check out his gallery.

So, to continue the “visiting friends” theme of the day… we ventured a little further and met with some long time friends, one I haven’t seen since high school! I don’t know who had more fun, the kids or the grown-ups?

Kids TableOld Friends coming together

I couldn’t have asked for a better weekend to help me get out of my winter doldrum funkiness. I’m so blessed with amazing friends and family.

Christmas Card Display idea

Christmas Card Display Idea

Maybe you tape cards to the back of the door. Maybe you string them up along the top of the wall, or maybe line the cards up along your fireplace mantle. Here is a fun way to display your holiday greeting cards if you want to try something new.

Supplies: 2 x 4 ceiling tile, fabric, ribbon, light duty staple gun, picture screw hooks, heavy twine or rope, push pins

Make sure you have enough fabric to cover your board. Place your fabric on the floor, right side down, and then the ceiling tile, also right side down. Wrap the fabric around the edges, and staple to the board. Turn right side up, and place ribbon horizontally and vertically to make board look like a present. I also stapled these to the board.  On the back side, I screwed hooks into the board a few inches in from the edges and then strung twine through them to create a hanger. I loved how it turned out last year.

Christmas Card Display Idea

Christmas 2008 Card Gallery

Christmas Banner Idea

This is one of my favorite projects to come home with Abby. She was a mere four-years old when she made this, and I hang this up every year.

Preschool Christmas Project

Supplies:

canvas or burlap material (approx. 15″ x 19″), red and green tempera paint, sponge brushes (optional), permanent marker, dowel rod (3/16″ x 18″), hot glue gun or craft glue, 1/4″ ribbon (20″ to 21″)

Take your child’s hand and paint it green or dip in green paint that has been poured onto a paper plate. Stamp six handprints in a pyramid form, reloading paint on the hand as needed. Then have your child dip or paint one finger with red paint and “dot” the top of the third finger of each handprint. Let dry. Draw a little tree base and add your artist’s name and year, too.

After your banner is dry, place the dowel rod at the top of the banner and fold over the top 1/2″ inch (or whatever is appropriate) so that the dowel rod is within a “casing”. Using a hot glue gun or craft glue, glue down the canvas to secure the casing. If using craft glue, you may want to use clips or clamps to hold down the canvas as it’s drying. Tie your ribbon to the dowel rod on both ends, hang and enjoy!

Related Posts with Thumbnails