** NOTE ** In an effort to get this posted quickly, I may not have all the dimensions, products or resources listed as I would like to. I’ll come back and update. I promise!
In trying to be more “green” at home, I finally finished putting our compost barrel together. Of all the recycling-earth friendly things we’ve started to do here, I’m most excited about this, but it probably shouldn’t have taken as long as it did. I started it in March at our local park district. (Embarrassed, yes.) Since I wasn’t able to stay for the whole class (1-1/2 hours), I jsut made sure I had all the pieces that were needed to finish and brought everything home. Of course, there was every intention to get it done on the first nice weekend, but that weekend went by, as did several others… and here we are today.
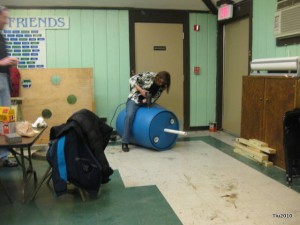
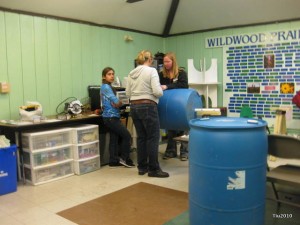
There have been a few inquiries about how to put it together. I was able to take a few pictures at class, which will hopefully be helpful with the instructions.
Materials needed
Legs
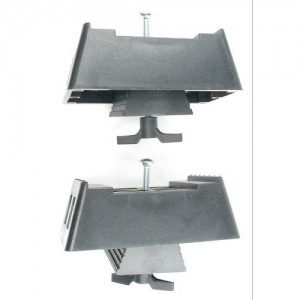
- (2) Plastic sawhorse brackets (hardware included)
- 4 pieces of 2×4 at 31″ to 32″ lengths each for legs
- 2 pieces of 2×4 at 12″ each for pipe surface
Composter
- (1) Food grade plastic barrel
- (2) hinges
- (2) barrel bolts
- (2) pull handles
- (1) 1-1/2″ diameter PVC pipe – 60″ length
- (4) 1-1/4″ EMT/pipe brackets
- several wire nuts to cap off screws
Equipment
- Jigsaw
- Hammer
- Tape measure/ruler
- Hole drill bit
- Power drill (cordless is easier, but not necessary)
- Drill bits
- Permanent marker
Making the stands
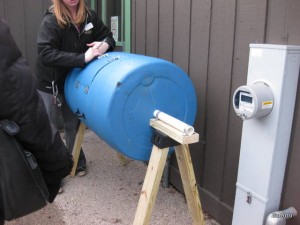
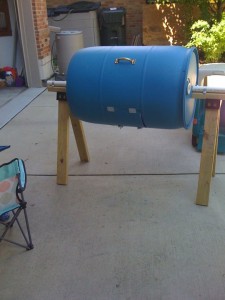
This was essentially like making legs for a sawhorse except I didn’t place a long 2×4 across the legs. Instead I used two small pieces of 2×4. (See the pictures above and below of the finished barrel.)
Find the center of the 12″-2×4 and drill a hole to fit the bracket bolt. Center the sawhorse bracket on hole and hammer it down in place. Take the piece and place it on the sawhorse bracket. Take your assembly and put it on the ground upside down (ready to receive the legs). Insert leg pieces into the bracket/holders, hammer to secure, then place center support piece in the middle and tighten bolt. It may help to have someone steady the legs.
Preparing the barrel
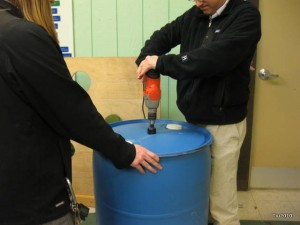
On barrel ends, mark the centers. Drill a hole on both ends large enough for the 60″ PVC pipe.
Cutting the door
The door will be approximately 11″ x 11″. Your barrel may have seams (ribs or lines) that will be helpful for marking. From rib to rib on my barrel, I have 11 inches. I marked a square accordingly.
Before cutting the door, install the hinges and barrel bolts so that the door piece wouldn’t fall in after you cut it. To have the door open up like a trash chute, the barrel bolts are on top and the hinges are on the bottom. Place the pieces in position (no real measurements here) and traces locations and holes. Predrill all your holes with a small bit (5/16″ worked well) – it makes life so much easier!
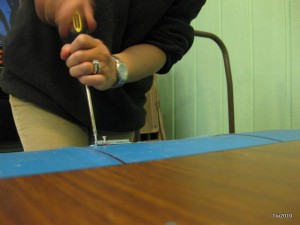
At this point, take the jigsaw and cut ONLY at the hinge and bolt locations (4 cuts). Make sure your cuts go slightly past the hardware so you have somewhere for the jigsaw to start easily when you cut the rest of the square. Then install the hinges and bolts by hand making sure not to strip the screws (that’s actually me in the picture).
Cut out the rest of the square. After it’s finished, open the door to check if everything is cut correctly.
Install the two pull handles the same way, marking its location and predrilling holes. Basically, the pulls go on opposite sides of the barrel, above and below the door.
Using wire nuts, I cover all the screws on the inside.
Lastly, drill a number of random holes all around the barrel… but not through the door (plenty of air space around there).
Mounting the composter on the stands
Place your PVC pipe through the barrel. That’s the easy part.
It helps to have friends around for placing the barrel, but I was able to have my two kids hold the legs/stands upright and in place, while I maneuvered the barrel holding on to the pull handle. Once you get the PVC pipe on the legs, take a couple of pipe brackets and secure to the 2×4. I had to angle the screws in a bit. They were slightly long, and would have gone through the 2×4 had I drilled straight down. As it is, you want to angle the screws in, to make sure the brackets are tight against the pipe when you secure it to the wood.
What to Compost
- Coffee grounds
- Tea leaves/bags
- Eggshells
- Fruit and vegetable scraps (I’ve been told that banana peels, orange peels and peaches have high levels of pesticides, so don’t compost them if you’re going to use your “black gold” to grow food.)
- Shredded newspaper (for carbon)
- Leaves, straw, hay, grass clippings
Do Not Compost
- Deadly weeds
- Diseased plants
- Human or pet waste
- Meat/fish scraps or bones
- Oily/fatty food products
- Dairy products
- Chemically treated wood products

This is exactly what I was looking for! Can’t wait to get started! You did an excellent job of explaining everything. Thank you!
~Linda
Glad it’s helpful, Linda! It’d be great to hear how yours turns out. Happy gardening and composting!
Looks like a great idea: less work, few materials than other models. How stable is it on these legs?
It’s worked out well for me – legs are pretty stable. Have fun putting it together… Thanks for visiting!
Another kick-*** article my friend! thanks again.
Instead of screws you have to cover the end using wire nuts, use 1/4-20 stove bolts.
Thanks for comment, Mel! Made me want to run outside to check. I did cover the screws with wire nuts (also listed in the materials). And, yes, stove bolts would work too. Do you find they work better? My composter is four years old and working out great!
Debris hang up potential would be same but it’d be a surprise if you stuck your hand in only to find that a wire nut had come off. I don’t like finding surprise things like that. I bleed too easy.
Good design, thanks.
Mel
I’m gonna’ use a olive barrel with a 1 foot diameter screw on cover.
Finis!! Where can I send photo? Please e-mail me as I won’t be checking site now that composter’s done!
Thanks again,
Mel