Some Festive Cards for anytime

I was busy last week getting a pack of cards ready for a silent auction. I hope the winner enjoys these and actually uses them. (Click on the picture for a better look.) Now I need to get crackin’ on a few mother’s day cards and one birthday card for a friend’s daughter who turns one this weekend!

StampScrapArt Tour

picture featuring InkyAntics

It was sort of a fluke that I happened across an ad for the StampScrapArtTour in a crafting magazine a month or so ago, and even more a fluke that it wasn’t too far away from my home. So, a few weekends ago with eight-year old daughter in tow, a friend and her daughter, I was off to my very first craft show. Our entrance fee was $6.00… well worth the 2 hours I was able to spend there.

The tour featured 21 vendors at the Clock Tower Conference Center in Rockford, IL, and it was the perfect size to break in my novice-ness. I was FLOORED at the card samples and artwork posted – in amount and creativity! Paper, crafting supplies, embellishments – you name it, it was probably on the floor. And, the amount of rubber stamps in the place was astounding: unmounted, mounted, rubber, acrylic, and designs for every occasion to cover a huge spectrum of individual personal style.

One of our stops was Bugawumps, where Laura Jacobs was holding a demonstration on liquid masking and another demonstration using glass paint. She had these cute glass pebbles you could use for embellishments or maybe a cute magnet. We brought one home.


Actually, I was really impressed with the number of technique and product demonstrations at the show. This one from Darcie showed their Shrink Plastic Project Kits. Passers-by were mesmerized, but who wouldn’t be? It reminded me of the days of “Shrinky Dinks” and my mom burning my permanent marker and plastic creations in the oven because we didn’t have easy-to-use heat guns at back then, but these shrinkies are much prettier than the ones I ever made.

Ruthie from Darcie’s is showing the technique here.


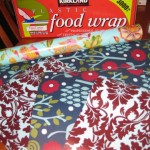
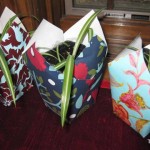
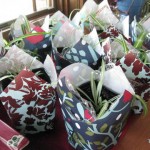
There were plenty of opportunities to purchase wares, too, from markers and inkpads to industrial adhesive rollers. Polkadots and More! from Mukwonago, WI brought displays to inspire easy and thoughtful gift-giving, and brought stamp kits from Unity Stamp Company.

We found this non-stamping demonstration really interesting. Tessler Stamps and Stencils showed how to stencil using daubers with ink pads. Then our demonstrator spackled embossing paste to make the image come to life.

One of our last stops included InkyAntics, a company started in 1997 by Jackie Lewis. InkyAntics features over a dozen artists… trying to make “the world a cuter place”.


And just to mention the other vendors, because it was just such a fun time to meet them all:

Just for Fun and their blog, Rubber Cottage, Peddler’s Den, Repeat Impressions, Seaside Stampin’ Ink, Lost Coast Designs, Pretzel City Paper, Stamp La Jolla, Art Gone Wild, Stamp Camp, Stampers Anonymous, Designs Unlimited, Close to My Heart, Stampit Crazy, Altered Arts and ScrapHD.

Thanks for showing me a little peek into your worlds.

PS: Don’t forget to check Craft Critique for your chance at a Donna Downey giveaway! Tomorrow is the last day to enter!

UPDATE 5/15: Donna Downey giveaway is closed, and this article is also posted at Craft Critique.

Celebrating Earth Day

Happy Earth Day! We try to do our part in our home to be kind to Mother Earth, but I know we can do more. It’s not like we’re the Begley family, hehe, but we’re learning. Conserving water and recycling are considered typical now. Last year, I brought the little ones to our local Earth Day celebration, but this year we missed it since we were celebrating First Communion.

So to combine efforts, I transplanted spider plants for last Saturday’s favors. Spider plants are so easy to take care of and have been known to actually help purify the air! I’ve started plantlets by rooting them in water and had good luck with planting them direct into soil which it what I did this time around. To dress it up for centerpieces, I used squares of plastic wrap (to keep water from spilling out, not-so-earth-friendly, sorry) and gift wrapping paper to cover up the plastic pots I saved from last year’s gardening. Reusing is good, no? They look like little Chinese take-out boxes, and looked cute on the tables. Even Martha’s doing it – check here.

Other earth-friendly projects to try out can be found below! Check them out! Let me know which ones you’re trying. You know me, I’ll try everything I can.

Earth Day Carnival at Craft Critique (my latest review is also here)

Gift Bow from a magazine at How About Orange

T-shirt necklace from chictopia.com (saw something similar on Martha Stewart recently)

Self-Binding Receiving Blanket

I’ve learned another trick – self-binding blanket! I didn’t know it would be as simple as it was. There are plenty of resources around, but I found these to be the most helpful.

Everyday Mom

Piece N Quilt

Getting ready for hosting family and friends to celebrate Abby’s first communion this weekend. I’ll be back next week with the reception, a bunch of recipes and crafts!

Happy Monday!

Baby Shower Card

It’s taken me this long to recover from Easter weekend. I ate too much. I exercised too little. The kids were delirious at the dinner table last Saturday night when we celebrated my uncle’s birthday at an Italian restaurant known for their incredibly generous portions. Then we had brunch Sunday morning after Easter mass. Glorious, isn’t it, especially when it’s good food? I felt okay up until Sunday night… when I put on my pj’s to sleep and felt like a blown-up beach ball about to burst at the seams. Sunday morning should’ve clued me in when I woke up and wasn’t hungry until 11:00 AM.

But, besides birthdays and Easter, it’s baby shower season! We have 11 pregnant friends, and they’re all delivering between May and August of this year. Quite the “Year of the Tiger“! And this card, no stamping needed!

  • 8-1/2″ x 11″ cardstock (Bazzill Basics: Hazel)
  • Four cardstock squares in a contrasting color 3/4″ x 3/4″ (I used black. Brown would have been nice.)
  • 3″ x 11″ piece of coordinating patterned paper (blue skies/so happy together by American Crafts)
  • Rub-on letters (close to 3/4″ tall)
  • Equipment: paper cutter, adhesive

1. Take your solid color cardstock, lay landscape and cut off about 1 centimeter. Save the strip. (Yes, I switched to metric.) Making the paper 27 cm wide makes it easier to measure evenly. Now cut 9 centimeters off. Save that scrap. With the remaining 18 cm, fold in half. The card should be 9 cm x 11″. This fits into a regular business size envelope.

2. From the large scrap, cut four 1″ x 1″ squares (a.k.a. inchies).

3. Use rub-on letters to spell “baby” on contrasting 3/4″ squares. Adhere to the 1″ squares.

4. Cut a 3″ x 11″ piece from the patterned paper. Center and adhere onto card front.

5. Place and adhere “baby” onto the cardfront.

6. Take the tiny strip of cardstock saved from Step 1 and glue that to the cardfront, also. In your own penmanship write the word “Welcome”. I repeated the word, separating it with a dot. (kind of like: welcome • welcome • welcome)

I’m thinking of featuring some bread recipes next week, but I might be a bit busy with Communion activities… only 10 more days!

Some Birthday Card crafting

I’ve been hard at work 1) finishing up a product review, my second one, for Craft Critique, 2) trying to schedule a speaker for the NAWIC Chicago chapter, 3) getting Communion invitations together.

In the meantime, we had a few special birthdays to celebrate. It was really fun experimenting with my Copic markers on the cupcake card (shown above). I don’t even have a full blown set, but enough where I can mess around with the shading. Then I felt compelled to pull out my Lumiere paint and start this:

which turned into this… a sort of Griffin and Sabine-Nick Bantock feel. Perfect for the recipient. It wasn’t intentional, either. I so love my Nick Bantock stamps. Two of them are on the card; the archaeological glyph-ish stamp and compass rose.

And what a difference with the details when I used VersaFine ink! Tried the Copic markers again, and then went over the image with a gloss.

Other updates:

  • I was recommended for appointment to the Historic Preservation Commission. I really need to get started on some reading now.
  • Compost container is almost done. I didn’t finish it in class, but all the pieces and parts are here. Wait until you see it!
  • Exercising took a small setback with Daylight Savings. Seriously, I am having such a hard time getting up in the morning, but I got back on the bike yesterday and today.
  • A HUGE thank you to everyone who answered the survey. I used a name randomizer on www.annabet.com for the Midwest Living magazine subscription winners: Elmin Pittges and Sally Chalex.

And, I’d like to introduce a new interactive scrapbooking community, Club Creating Keepsakes! Please check out this link at Craft Critique to learn more and win giveaways!

Related Posts with Thumbnails