Fruity Mooncakes

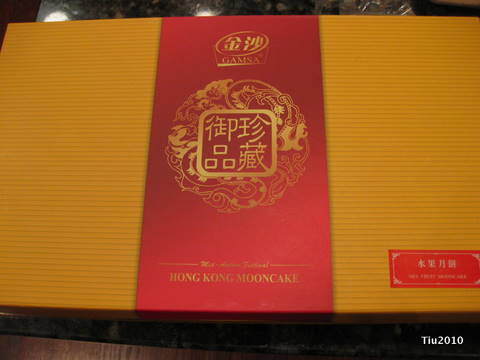
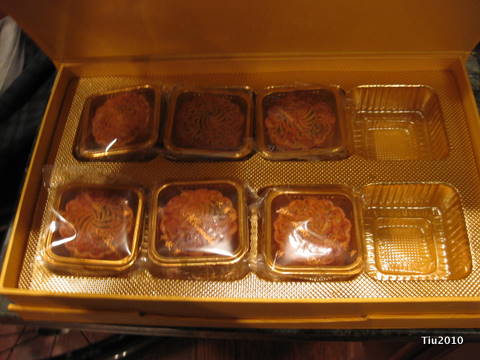
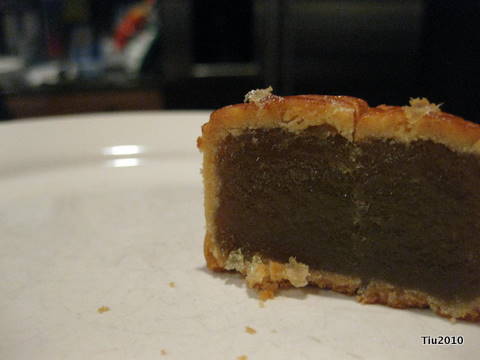
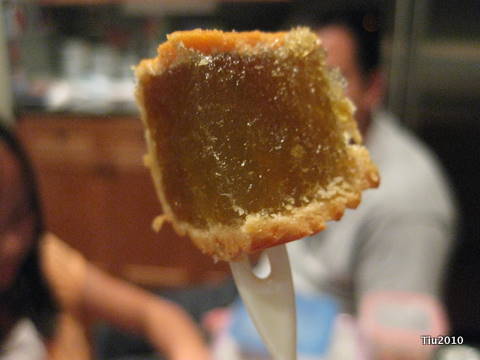
My in-laws received some delicious mid-autumn festival mooncakes from friends and shared them with us. If you aren’t familiar, these are delicious little Chinese pastries (you could even say, filled cookies) filled with red bean, lotus paste or maybe a hard-boiled duck egg. Ours are fruit-filled which bodes well for the kids.

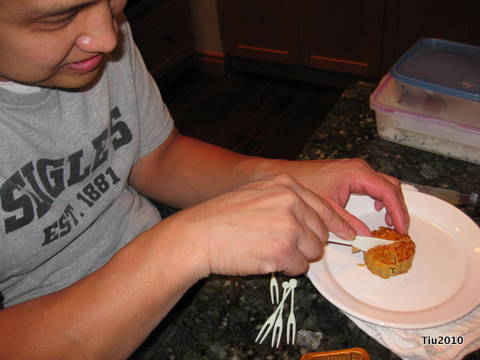
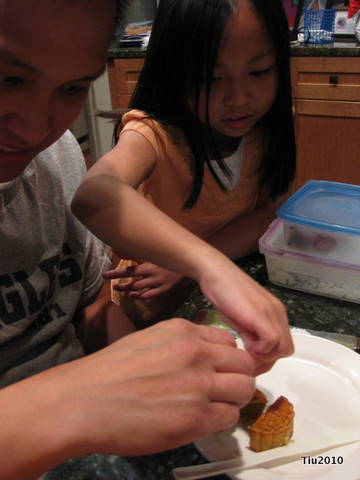
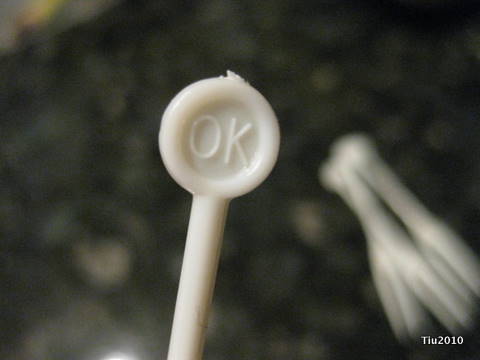
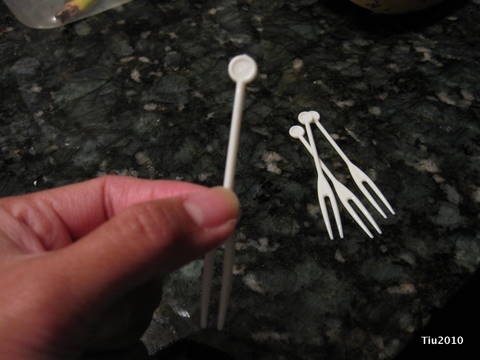
The imprint on the cake is my favorite thing… I wonder if I can find some “stamps” from a Chinese bakery? Wouldn’t those be fun in a craft room display? And the box that the cakes came in, it’s so cute with a magnetic closure. We’re keeping that for something – maybe my craft supplies. Just when you thought there wasn’t anymore, you get plastic knife and tiny little forks that say, “OK”. You know, because waiting to eat the cakes until you get home from the bakery just won’t cut it.

Pillowcases – Another Project to Check Off

I finally finished these pillowcases, and taught myself how to do French seams from the Pretty quick pillowcase tutorial (& bonus french seam instructions) at Film in the Fridge. Think of the possibilities for the holidays?! I may be busy sewing for the next few months.

Notice anything? The design is upside down on the left hand pillow. Yes, lesson learned. Now I know what one of the tutorials meant by “good with non-directional prints”. I didn’t really stop to see how it was going to look. Abby didn’t seem to mind. She said, “That’s okay, Mom.” What a relief. Besides that, I turned the main fabric (apple print) 90 degrees contrary to what most of the tutorials showed. I don’t know if it matters. It’s just that if I didn’t, the apples would be sideways, and that’s not really what my daughter wanted.

Here’s a detail of the cuff from the inside. Nice and clean.

Basically, what you see right-side out is normal. What you see when the pillowcase is turned inside-out is this: the French seam. No raw edges.

Looking to add something to your list of projects? Here are some more sites that I scouted:

Some Website Clean-up, Fun and Giveaway

Funky Monday soup, right? We’ll get to that in a moment. I’ve been toying around with this site layout. I’m no web programmer by any means, just playing around. Some of the additions are:

  • Along the right hand side of the blog, I’ll post some books and products on cooking, crafting, etc. Some books I own, some I’ve borrowed, read at the library, seen at friend’s homes… I just think they’re cool books, and I think you might like them too. I promise not to clutter up with too much advertising. That was never my intention with this site.
  • Further down the right hand side, there is a “Google Friend Connect” box. I don’t know if there are people other than my family who are following my craziness – well, on a regular basis. I sure do appreciate it if you are, and if you feel so inclined to follow along, feel free to sign-in.

So, around 8:00 PM last night, I realized, “OH, it’s Sunday!” It was one of those, “Gee, I thought it was Saturday” moments, and I have to get my head back into the weekday routines.  But no, I was wandering around cyberspace and found this site: Sign Generator from RedKid.net. So much fun to be had. There are lots of images to choose from – pick one and enter your phrase. That’s how the Monday Soup came about.

How about your own Oscar award? Street sign? Magic 8 ball? I would have to shake the ball again if I got this fortune. We all have those days, don’t we? I feel like making a bunch of goofy ones and sending them off to my friends.

Lastly, go by Craft Critique today to see my review on Donna Downey products (there are 3 articles, mine is number 2 or 3), and sign up for the wonderful giveaways! I’m so excited to be able to bring these fun opportunities to readers! Entries are open until Wed., May 5… Happy Cinco de Mayo!

(My Craft Critique legal disclosure that I have to include so I or others don’t get in trouble!)

Self-Binding Receiving Blanket

I’ve learned another trick – self-binding blanket! I didn’t know it would be as simple as it was. There are plenty of resources around, but I found these to be the most helpful.

Everyday Mom

Piece N Quilt

Getting ready for hosting family and friends to celebrate Abby’s first communion this weekend. I’ll be back next week with the reception, a bunch of recipes and crafts!

Happy Monday!

Designing gift tags and Chinese New Year cards

Color, pattern, texture, shine…So simple and brilliant. It’s my favorite design rule, and I’m still learning (since I’m not even close to having studied art design). The best part is it works for putting together an outfit, a room, a gift tag?! Actually, it didn’t start out that way, but when I looked at the final products it sort of jumped out at me: red, lots of patterns that give off lots of texture and the tag is shiny. Last week, I was scribbling and working on the last of this series of five when I accidentally spilled my tea on them. Ugh. After some quick blots and a night sandwiched in paper towel and phone book pages, they survived with little water scarring. Sharpies are awesome.

More scribble art

These tags were meant to be maybe a first offering on Etsy… maybe…with Valentine’s Day and all. But, with the slight water damage, I wouldn’t feel right about selling them. So, I started on some other ones. The third from the left isn’t quite done. Then I tried one with the new Copic Multiliners; that one smudged.

Scribble art turned gift tags

Shiny paper and Copic markers don't work as well

While I took a small break from putting away Christmas decorations, I started thinking about Chinese New Year, the next holiday we’ll be celebrating in this house. (I have Holiday A.D.D.) There are these Chinese zodiac rubber stamps and a variety of Asian themed stamps I want to use.

Let’s see how this pans out over the next week or so. I should have some time to work on them with the big snowstorm and freezing temperatures coming our way.

Recycled Cardboard Box Notebooks

Recycled Cereal and Product Boxes

This is too much fun and too easy. I love making little gifts for little friends. These recycled cereal box (snack box, pasta box) notebook is just too cute. They’re all drying right now in my kitchen because my basement crafting table is completely cluttered with other projects in progress. (This is why I think I have crafting A.D.D. but that’s for another time.)

So… I was cutting and breaking down all these boxes and saving them in a container (not cluttered). I’m sure my husband thought I was nuts, becoming a hoarder. (See honey, I’m using them!!) I took all the scrap paper I was using for computer printer paper (like backs of school notes, school homework, junk mail with blank sides, etc.) and cut them down to the sizes I needed. I tried to stay with either half sheets (5-1/2″ x 8-1/2″) or quarter-size (4-1/4″ x 5-1/2″).

My dilemma was figuring out how I wanted to bind the books. I actually tried handsewing one book. There are tons of how-to’s online (like here or here), but in the end, it just didn’t look the way I wanted it to. I could have (COULD HAVE) just gone to the office copy place to have them bind the books with a comb, but I really wanted to stick with an all-recycled type of project and, dare I say, I’m frugal. Here’s how I chose to bind.

Just pick your covers, take your sheets of paper and clamp together. I kept these to 25-30 sheets each so clothespins are perfect. White glue is an amazing thing. Just squeeze some down the side you want as a spine, let dry a little, and then do a second application. The book is practically done at this point, and that’s where I am in the picture. What I have left to do is to make a nice, skinny spine cover with solid colored paper like craft paper or maybe even brown paper bag? We’ll see what I have in my paper bin.

Happy recycling.

Related Posts with Thumbnails