Doughy and Soft

Last night we made homemade pizza for dinner with homemade dough and sauce, alongside store-bought (We’re not that good) sausage and cheese. I have a horrible track record with baking anything with yeast, so you can imagine my hesitancy about making our own dough. Husband wanted to use a recipe that was in the newspaper and it turned out just fine with a nice bready crust that our daughter ate up like there was no tomorrow. But note to self: store-bought, fresh pizza dough… only 99 cents!

While I was eating my little slice of ‘za, I said, “Huh, this is good. Doughy and Soft”. Husband, not sure what I was referring to, said, “What exactly are you talking about?” And I replied, “My stomach.” You may grimace and wince now. Also you can be thankful I did not post a picture of my stomach.

I will admit, I am not athletic, never have been… and working out regularly has only been a recent activity, only the last two years. Even then it’s only once a week. Here, let me put it this way, and my husband will attest to this. I am soft. This is not an overstatement, and this was before I had two kids by c-section. The c-sections just make it more difficult to get back any strength in my “core”. And, I emphasize the words “ANY strength”.

It’s not that I’m upset about it or freaking out about being overweight… I’m not. I’m just a little less than fit, and there’s a little extra softness around my mid-section. Not my favorite part. So here’s the thing – I’ve been doing sit-ups every day since New Year’s. It innocently started out as a joke with someone asking if I could even do a sit-up, ONE sit-up. Yeah, very funny, but I got down on the floor, Jaunary 1, and did one sit-up. So, to continue the “joke”, I did two sit-ups on January 2. For every day that has gone by this month, I’ve done exactly that number of sit-ups.

Sit-ups may not be a very big deal for a lot of people, but it’s movement in the right direction for me and as much as I despise sit-ups, it’s probably a good example for my daughter to see me do something somewhat active at home. She’s even joined me with my little exercise experiment, so my husband and I told her that once she gets to ten sit-ups a day, she could stay at number of repetitions if she wanted to. (She wants her reps to start over at February 1 with one sit-up.)

I’m planning on continuing this for the rest of the year, so by the end of the year, I’ll hit 365. Crazy? Probably. Possible? Yes. Who’s on a journey with me?

Peace Day Tote Tutorial

My daughter loves the peace sign, ☮. So when I found this fabric at the local JoAnn Fabric store, I knew she’d like it. She asked if I could make it into a tote bag…uh, earlier this winter. *sigh* Fortunately, I made some time over the New Year weekend and was able to finish it.

What you need

1/2 yd cotton or canvas fabric – print
1/2 yd cotton fabric for lining
1/3 yd cotton fabric for handles
Tools: iron, ironing board, sewing machine (unless you’d like to sew by hand *grin*), large safety pin

What to cut

  1. Cut two rectangles, 12″ x 15″, out of the printed fabric
  2. Cut two rectangles, 12″ x 15″, out of the fabric for the lining.
  3. You’ll need (4) straps cut out of the handle fabric, cut 3″ x 34″.

Sew it up

  1. Put your printed fabric right sides together, pin, and sew up the sides at 1/2″ seam allowance. Press.
  2. Pin the bottom edge (12″ side), and sew 1/2″ seam along the pinned edge. Trim your corners at 45 degrees.
  3. Your tote should be looking tote-ish now, except inside out and the top edge is raw. At your ironing board, fold/flip back the top edge by one inch or so, so that the printed side is showing, press. Then tuck the raw edge in toward the fold. Press. You don’t have to edgestitch now.
  4. Repeat steps 1-3 with the fabric for the lining.
  5. For the straps: Pin two handle pieces, right sides together, and sew 1/2″ seam along the long sides. Press seams open and flat on both sides. Turn the straps right side out with the help of a large safety pin, or if you have a loop turner, that works well, too. Finish the other strap the same way. Press both pieces.

Put it together

  1. I attached the handles inside the bag. Take your printed bag, and turn it right side out. Press. Play around with the straps… Once you figure out where you want the handles, pin the bottom raw edge of your handle about 1-1/2″ below the top edge of the printed bag. Stitch in two locations to make sure the straps stay in place (see pictures?). Do this at each of the four ends.
  2. Now take your lining, turned inside out, and drop into the printed bag, so that the wrong sides of each bag are together. Your tote should look just about finished.
  3. Pin the bags together, lined up at the side seams. Be careful with the straps. If you have a free arm on your machine, this would be a good time to use it. Topstitch the bag 1/4″ from the top edge. This will attach the lining, secure the straps and finish the tote. Don’t forget to press to finish.

Back to the Routine


New Year’s Eve and Day feel like blur now. Guests have traveled back home, and the house is empty. It’s been a party for almost two weeks! Kids are back in school, husband is back at work, and in a sense, so am I.

Random thoughts to start the year…

  • The garlic didn’t get in the ground before the cold snap. I wonder if I can just plant them in planters to have them outside?
  • As much as I complain about laundry, there’s something about washing all the linens and blankets from the holidays and folding dry, clean sheets, and putting away fluffy comforters and towels that makes me happy.
  • Anyone catch the start of the Oprah Winfrey Network?
  • I’m happy my fabric hoarding days are in the past… there are some fun projects to be had this year, and some projects yet to be finished from last year.
  • Lots of great things happening with Craft Critique and Niles Patch! I’m happy to be a part of it.
  • Not looking forward to taking all the Christmas decorations down. The house always looks so bare.
  • My son has drained all the make-believe playing out of me with his unlimited energy and love of superheroes. I have now been cast as Scarlet Witch, Batgirl and sometimes mom of Silver Surfer.

I am looking forward to continuing this journal and journey with all you virtual and real friends! Thanks to all the new Blog Frog friends, too!

Happy Holidays

From our home to yours… peace and happiness in the New Year! Thank you to everyone for reading along, and I’m looking forward to more crafting, foodie and family adventures in 2011.

This was the serene scene the night before Christmas in my living room. All was calm, all was bright.

Winter Pillowcases

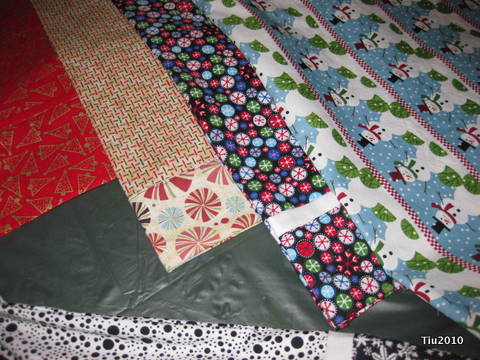
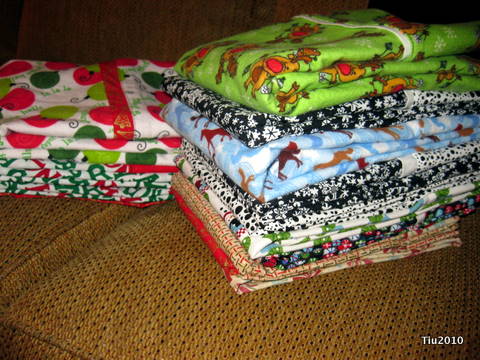
Ever take on a project that you think will be a piece of cake, but then it takes longer than you initially estimated? Happens to almost everyone I know. Happens to me all the time, but it’s always worth it. I’ve been busy crafting for a cause…

I delivered sixteen pillowcases tonight to children at a hospital in Chicago. I met all but three of the patients… a few were very young, others very much teenagers, some needed more help than others. In every patient, I saw a child who didn’t or would not be going home for the holidays. I met parents who spend countless hours by their child’s side.

Not knowing what to expect from my visit, I was overwhelmed exiting the building and a little teary-eyed.  I was happy to have been able to spread a little Christmas cheer, but it was just so humbling.

What’s your small gesture this season, your little random act of kindness?

Cookie Exchange 2010: Too. Much. Food.

Clearly, I’ve fallen off the face of the earth with journaling here. Last week, the house was finally clean and decorated, cookies baked, and menu prepared for our annual cookie exchange party. Nine years running. Amazing. I’ll be back this week after recovering from the sugar coma.

Related Posts with Thumbnails