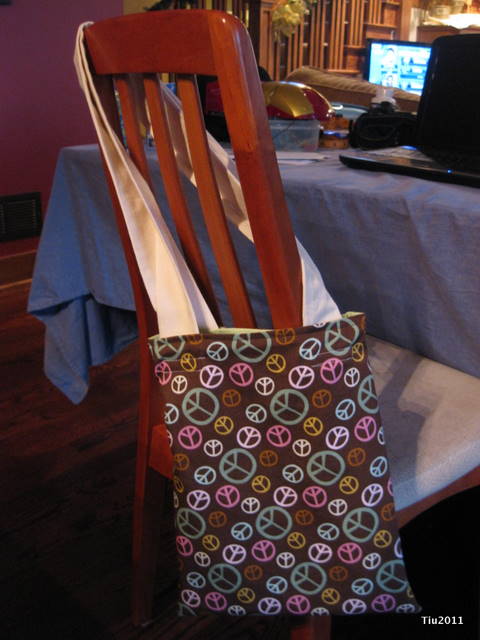
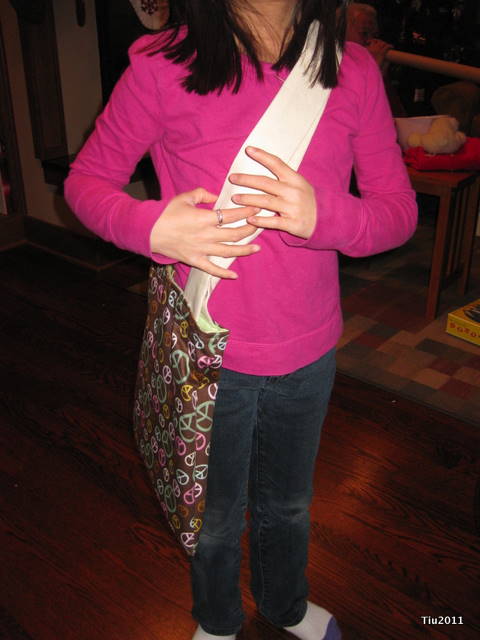
My daughter loves the peace sign, ☮. So when I found this fabric at the local JoAnn Fabric store, I knew she’d like it. She asked if I could make it into a tote bag…uh, earlier this winter. *sigh* Fortunately, I made some time over the New Year weekend and was able to finish it.
What you need
1/2 yd cotton or canvas fabric – print
1/2 yd cotton fabric for lining
1/3 yd cotton fabric for handles
Tools: iron, ironing board, sewing machine (unless you’d like to sew by hand *grin*), large safety pin
What to cut
- Cut two rectangles, 12″ x 15″, out of the printed fabric
- Cut two rectangles, 12″ x 15″, out of the fabric for the lining.
- You’ll need (4) straps cut out of the handle fabric, cut 3″ x 34″.
Sew it up
- Put your printed fabric right sides together, pin, and sew up the sides at 1/2″ seam allowance. Press.
- Pin the bottom edge (12″ side), and sew 1/2″ seam along the pinned edge. Trim your corners at 45 degrees.
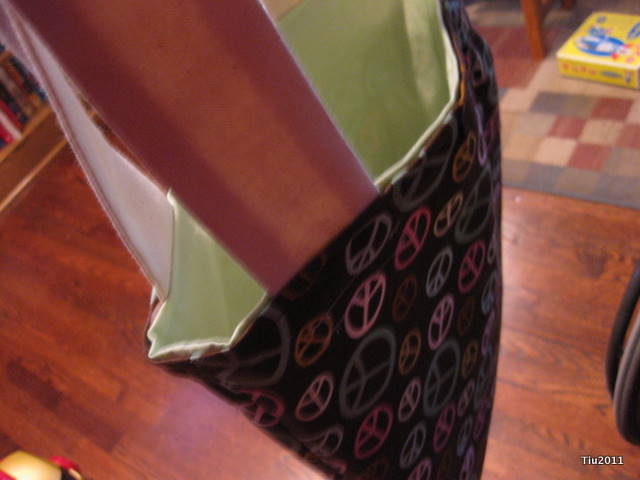
- Your tote should be looking tote-ish now, except inside out and the top edge is raw. At your ironing board, fold/flip back the top edge by one inch or so, so that the printed side is showing, press. Then tuck the raw edge in toward the fold. Press. You don’t have to edgestitch now.
- Repeat steps 1-3 with the fabric for the lining.
- For the straps: Pin two handle pieces, right sides together, and sew 1/2″ seam along the long sides. Press seams open and flat on both sides. Turn the straps right side out with the help of a large safety pin, or if you have a loop turner, that works well, too. Finish the other strap the same way. Press both pieces.
Put it together
- I attached the handles inside the bag. Take your printed bag, and turn it right side out. Press. Play around with the straps… Once you figure out where you want the handles, pin the bottom raw edge of your handle about 1-1/2″ below the top edge of the printed bag. Stitch in two locations to make sure the straps stay in place (see pictures?). Do this at each of the four ends.
- Now take your lining, turned inside out, and drop into the printed bag, so that the wrong sides of each bag are together. Your tote should look just about finished.
- Pin the bags together, lined up at the side seams. Be careful with the straps. If you have a free arm on your machine, this would be a good time to use it. Topstitch the bag 1/4″ from the top edge. This will attach the lining, secure the straps and finish the tote. Don’t forget to press to finish.
