Installing the Pencil Sharpener…Ugh

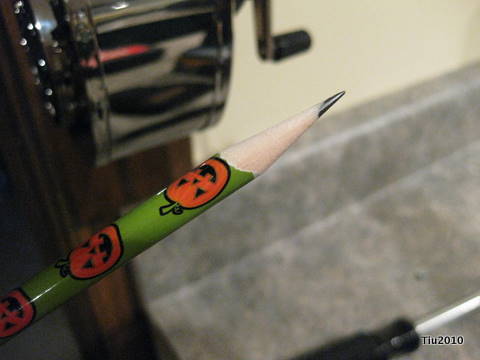
Everyone likes a nice sharpened pencil, right? We used to have an electric pencil sharpener, but either that was a victim of moving four years ago or it’s at my in-laws home somewhere. Then we have all these little pencil sharpeners that come in art kits, school supply kits and the like. Some of them are decent, but most don’t cut it for me. They make for weird sharpening angles and lead (graphite) pieces falling out. Time for a good old-fashioned pencil sharpener. I bought this a while ago, and finally figured out a good location for it.

So here I go again with another DIY installation. Unlike the glass shelves in the kids’ bathroom (thought I wrote about that), this was a little challenging. You wouldn’t think a little ol’ sharpener would bring me a little grief… it looks like it was successful, but I’m lucky that 1) no one was here to witness my running up and down stairs to gather equipment, 2) no one was here to listen to my “potty-mouth” and 3) my 3 year old doesn’t understand when I swear when I get really frustrated.

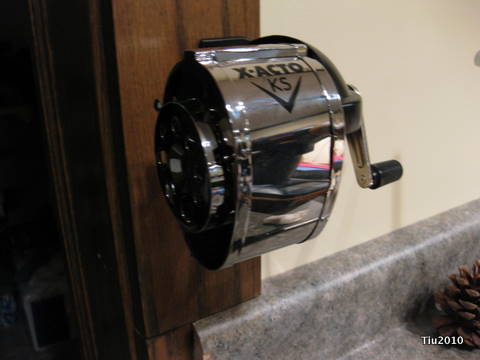
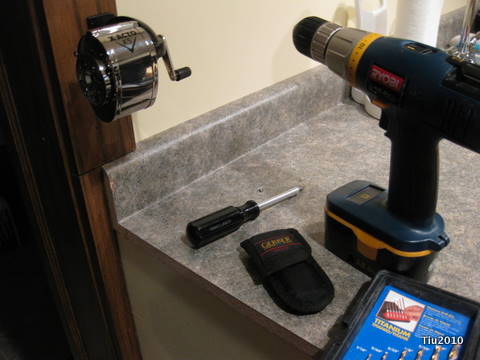
This looks like it was properly installed, right? The sharpener is anchored into the oak door jamb where I predrilled holes, matching the position on the anchor. Solid oak is TOUGH, or maybe my drill bits are crappy. After checking the anchor position, I saw that one of the holes was drilled slightly off. Like enough that I had to drill again. So, that wasn’t too bad. Now for the actual attaching…

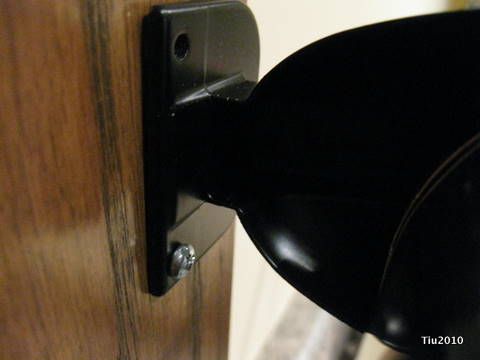
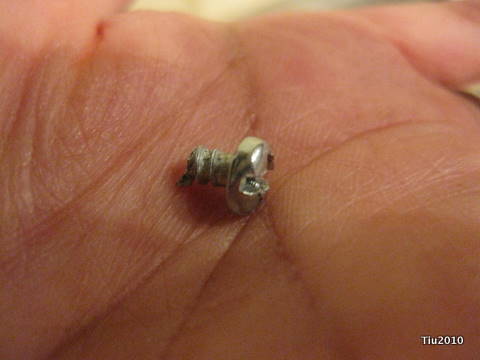
I took apart the sharpening mechanism, so I could get a better angle to put in the screws. At this point, I realized the predrilled holes were too small. It was so hard to manually drive in those screws, so I put down the anchor and screws, took out a larger drill bit and drilled holes again. Grr. I placed the anchor back, put the screws in place, then used the drill to start screwing them in… thinking I would use the manual screwdriver at the end. I didn’t want to break any plastic or crack the oak (which now I realize could be impossible for me). I nearly stripped the heads off two of the screws. Grrr, again. Took out the manual screwdriver, started turning that top screw… it seemed to turn so easily. Too easily. See that hole in the picture? The top part of the screw BROKE off.

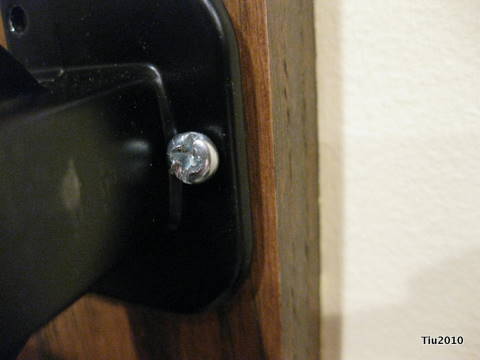
And, here’s the other almost-mangled screwhead.

At least it works, and the sharpener doesn’t seem like it’s going anywhere – for now. The husband just shook his head after I told him…
Hanging Family Pictures Collage Style

We’ve been trying to enjoy the fantastic weather here over the last couple of weeks, so as you might imagine, there hasn’t been much going on inside the house. This includes blogging, writing, house chores and the never-ending list of projects I want to start and those I want (or need) to get done… like fixing a few broken shelves in two closets and hanging up the family pictures.

Why do I find it so difficult to hang pictures? I guess if it’s one frame here, and one frame somewhere else, it’s a little easier, but here I’m trying to compose a nice grouping. Now it’s: how do I center the frames, which picture goes where, how much space do I leave in between the frames, how high do I mount them? I blame this on my type-A, perfectionist, engineering side. So, what to do?

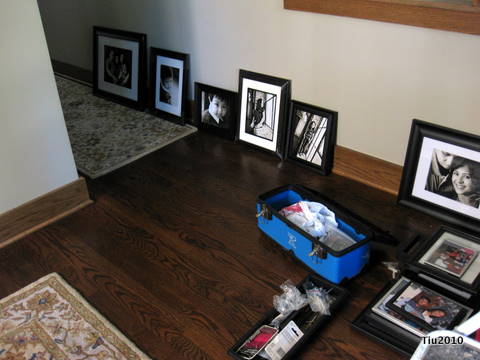
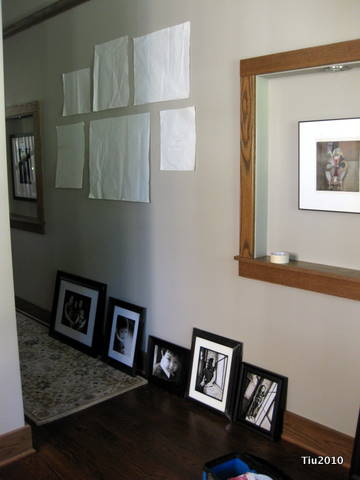
I placed all the framed pictures on the floor and tried to figure out how it might look in different layouts. But, in the end, I broke out some sheets of paper and traced shapes.

I think I’ll be playing with the paper cut-outs for a little while.

Enjoying the Garden

We finally have a break in the weather. From the heat and humidity, we’re enjoying a preview of autumn with highs in the 60s and lows going into the mid-40s in some areas nearby. We’ll be back in the mid-80s in a few days, but for now, I’m loving the crisp, cool air in the morning and early evenings. Then pair that with the earlier sunsets. Ah, late afternoons in the fall… It’s my favorite time of the day. Ask my husband, he might say, “Yes, my wife loves the sun in her eyes when the sun sets.” It’s all about the lighting and how everything looks to me when there’s that slight tint of peach-orange sunset. I could just drink it up.

The other day, the lighting was just beautiful, and I wanted to capture some colors around and in our garden beds. Enjoy and happy Labor Day!

Making Our Own Rotating Barrel Composter

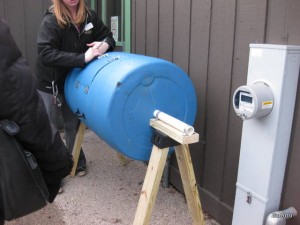
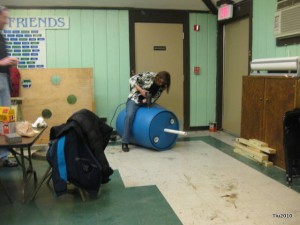
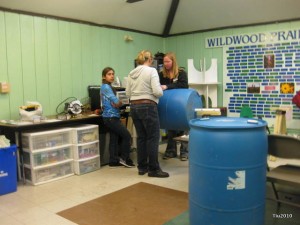
Example barrel composter at class

** NOTE ** In an effort to get this posted quickly, I may not have all the dimensions, products or resources listed as I would like to. I’ll come back and update. I promise!

In trying to be more “green” at home, I finally finished putting our compost barrel together. Of all the recycling-earth friendly things we’ve started to do here, I’m most excited about this, but it probably shouldn’t have taken as long as it did. I started it in March at our local park district. (Embarrassed, yes.) Since I wasn’t able to stay for the whole class (1-1/2 hours), I jsut made sure I had all the pieces that were needed to finish and brought everything home. Of course, there was every intention to get it done on the first nice weekend, but that weekend went by, as did several others… and here we are today.

There have been a few inquiries about how to put it together. I was able to take a few pictures at class, which will hopefully be helpful with the instructions.

Materials needed

Legs

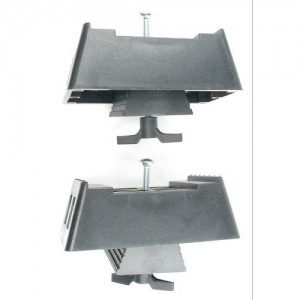
  • (2) Plastic sawhorse brackets (hardware included)
  • 4 pieces of 2×4 at 31″ to 32″ lengths each for legs
  • 2 pieces of 2×4 at 12″ each for pipe surface

Composter

  • (1) Food grade plastic barrel
  • (2) hinges
  • (2) barrel bolts
  • (2) pull handles
  • (1) 1-1/2″ diameter PVC pipe – 60″ length
  • (4) 1-1/4″ EMT/pipe brackets
  • several wire nuts to cap off screws

Equipment

  • Jigsaw
  • Hammer
  • Tape measure/ruler
  • Hole drill bit
  • Power drill (cordless is easier, but not necessary)
  • Drill bits
  • Permanent marker

Making the stands

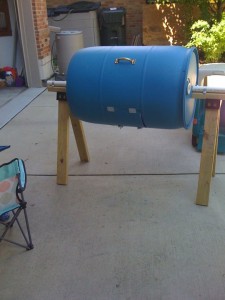
This was essentially like making legs for a sawhorse except I didn’t place a long 2×4 across the legs. Instead I used two small pieces of 2×4. (See the pictures above and below of the finished barrel.)

Find the center of the 12″-2×4 and drill a hole to fit the bracket bolt. Center the sawhorse bracket on hole and hammer it down in place. Take the piece and place it on the sawhorse bracket. Take your assembly and put it on the ground upside down (ready to receive the legs). Insert leg pieces into the bracket/holders, hammer to secure, then place center support piece in the middle and tighten bolt. It may help to have someone steady the legs.

Preparing the barrel

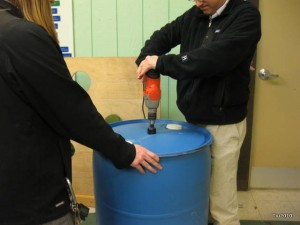
On barrel ends, mark the centers. Drill a hole on both ends large enough for the 60″ PVC pipe.

Cutting the door

The door will be approximately 11″ x 11″. Your barrel may have seams (ribs or lines) that will be helpful for marking. From rib to rib on my barrel, I have 11 inches. I marked a square accordingly.

Before cutting the door, install the hinges and barrel bolts so that the door piece wouldn’t fall in after you cut it. To have the door open up like a trash chute, the barrel bolts are on top and the hinges are on the bottom. Place the pieces in position (no real measurements here) and traces locations and holes. Predrill all your holes with a small bit (5/16″ worked well) – it makes life so much easier!

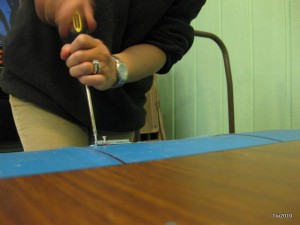
At this point, take the jigsaw and cut ONLY at the hinge and bolt locations (4 cuts). Make sure your cuts go slightly past the hardware so you have somewhere for the jigsaw to start easily when you cut the rest of the square. Then install the hinges and bolts by hand making sure not to strip the screws (that’s actually me in the picture).

Cut out the rest of the square. After it’s finished, open the door to check if everything is cut correctly.

Install the two pull handles the same way, marking its location and predrilling holes. Basically, the pulls go on opposite sides of the barrel, above and below the door.

Using wire nuts, I cover all the screws on the inside.

Lastly, drill a number of random holes all around the barrel… but not through the door (plenty of air space around there).

Mounting the composter on the stands

Place your PVC pipe through the barrel. That’s the easy part.

It helps to have friends around for placing the barrel, but I was able to have my two kids hold the legs/stands upright and in place, while I maneuvered the barrel holding on to the pull handle.  Once you get the PVC pipe on the legs, take a couple of pipe brackets and secure to the 2×4. I had to angle the screws in a bit. They were slightly long, and would have gone through the 2×4 had I drilled straight down. As it is, you want to angle the screws in, to make sure the brackets are tight against the pipe when you secure it to the wood.

What to Compost

  • Coffee grounds
  • Tea leaves/bags
  • Eggshells
  • Fruit and vegetable scraps (I’ve been told that banana peels, orange peels and peaches have high levels of pesticides, so don’t compost them if you’re going to use your “black gold” to grow food.)
  • Shredded newspaper (for carbon)
  • Leaves, straw, hay, grass clippings

Do Not Compost

  • Deadly weeds
  • Diseased plants
  • Human or pet waste
  • Meat/fish scraps or bones
  • Oily/fatty food products
  • Dairy products
  • Chemically treated wood products

Communion Reception: Menu and Black Bean Salsa Recipe

What time do most people eat dinner? Do most people call it “dinner” or “supper”? I suppose there’s a difference, and maybe a subtle one. I never bothered to look up a definition until now. So, what would you do for a reception if a religious service was at 1:30 pm and lasted for 1-1/2 hours? It’s not really a late lunch, but it’s not totally time for dinner either. Essentially, it was supper and it was good.

Here’s what we figured for 25 adults and 11 children (some of whom are light eaters – count 2 kids as 1 adult)

  • To munch on: Banana-chocolate chip bread, Cran-apple-orange bread, Orange-rosemary mini cornbread muffins (breads baked at home), salami and cheese, smoked salmon and crackers, roasted garlic hummus and olive crostinis (store bought).
  • 48 piece tray – Italian subs and Club subs  (approx. 4″, bought at local Italian deli) One tray had 24 pieces, and that wouldn’t have been enough.
  • Tortilla chips and roasted corn-black bean salsa (brought over by family)
  • Shrimp salad (store bought)
  • Cake – split yellow and chocolate cake with custard and strawberries
  • Coffee, tea, assorted soda, and juice boxes for the kids

Notes:

  1. Quick breads can easily be done a few days before and frozen if you want.
  2. The cornbread muffin recipe is from Martha Stewart which was recently reprinted in the Living magazine with the addition of orange peel. True to the recipe, it keeps for 2 days in an airtight container. TWO days. I made it one day too soon. They dried out.
  3. It’s nice to have a good bakery so close to home!

Here’s a favorite recipe for black bean salsa that I’ve made over the years adapted from The Lady & Sons Savannah Country Cookbook by Paula Deen. I visited her restaurant before she was a Food Network celebrity and bought my cookbook there. This salsa is similar to the one we had last Saturday; the difference being roasted corn. It does add a lovely smokiness. Just by frozen roasted corn for ease! Enjoy!

Julie’s Black Bean Salsa

  • 2 (15 oz.) cans black beans, rinsed and drained
  • 1 (17 oz.) pkg. frozen whole kernel corn, thawed
  • 2 lg. tomatoes, seeded and chopped
  • 1 small onion, chopped
  • 1/4 cup. chopped fresh cilantro
  • 4 tbsp. lime juice
  • 1 tbsp. red wine vinegar
  • 1 lg. avocado, peeled and chopped (optional)
  • 1/8 tsp. cumin (optional)
  • 1/8 tsp. garlic powder (optional)
  • salt and pepper to taste

In large bowl, mix all ingredients well. Cover and chill overnight. Before serving, add salt and pepper to taste if necessary. Great with tortilla chips or just as a side to your meal.

Busy February

Picture by G. Feiereisel

Wow, it’s been a while… let’s update.

Holiday/birthday season is over for me (husband’s, father’s, daughter’s and numerous friends), and tomorrow our party-hosting blackout month starts. We may be taking a hosting hiatus, but that doesn’t mean we’re not thinking about it. Amidst the celebrating, we started looking for Holy Communion dresses for Abby and planning a lunch reception. We have a little less than two months, which really translates to, I have a little less than two months to reorganize and pull my house back together again.

In the next month, I’ll begin reporting for Craft Critique where I will rediscover and review some of my own crafting supplies and equipment, and be introduced to new and exciting products in the crafting world. I can’t wait! You might imagine I have quite the array of products, but my craft shed is fairly minimal. You’ll see. To jump start my creative juices and “research” current products, I’ve been visiting the local Archiver’s over the last few weekends to see the “make-and-take” projects and see product demos.

Another love of mine is Chicago history and architecture, so to celebrate that my husband and I attended “Chicago in History and Mystery” at our local library. Fabulous guest speakers, wine and hors d’ouevres, too. (Can I tell you how weird it was eating and walking around the library with a glass of chardonnay? God forbid I spill anything!) Back to the speakers: Authors JA Konrath, Gillian Flynn and Henry Perez; Rick Kogan and Charles Osgood from the Chicago Tribune and WTTW personality, Geoffrey Baer.

I’ve never been to an author panel discussion before; it was eye-opening and fun! These authors write mysteries, and being able to hear them speak about their inspirations, how they got started, how they approach their character development was so fascinating. We came home with Afraid by Konrath, who also writes under Jack Kilborn, but I’m definitely looking forward to reading the others. Have to get through my stack of books by my bed first.

It’s amazing enough to watch Geoffrey Baer’s tours of Chicago on tv, read Rick Kogan’s articles and see Charles’s photography, but listening to them when they’re a few feet away from you… incredibly captivating and entertaining personal stories. Sorry to say I didn’t bring my camera, but then again, not many people did. I might be able to link to the library website if they update their event photos. I wanted to tuck every anecdote away in my head to share with friends, but by the time we left (about 4 hours) I was so overwhelmed with factoids and fun stories. I’ll end with a few Chicago tidbits that stuck.

  • Louis “Studs” Terkel (Chicagoan author, broadcaster, historian) was one of the oldest people to undergo open-heart surgery at the age of 93. In his own words through Rick Kogan, “I’m a medical miracle!”
  • Caldwell Avenue is named for “Billy” Caldwell whose American Indian name was Sauganash which is also the name of the neighborhood that the avenue runs through. I had no idea…
  • Park Ridge is not the highest point in Cook County which many Park Ridgians believe. High point is somewhere around Barrington.
  • Park Ridge was home to many artisans and craftspeople, and included a workshop called Kalo Arts Crafts Community House where many silversmiths and jewelers started their trade.

Such a rich history in the arts… is it a wonder I feel at home here? We’ll see what happens in the next month since I also applied for a seat on the newly formed “Historic Preservation Commission” in town.

Related Posts with Thumbnails