Rice Krispie Sushi Recipe Tutorial

These are more like instructions rather than a recipe since you’re not going to cook a thing! We served these at a party where kids and grown-ups gave us great feedback about the rice krispie sushi. This might be something fun to do for a kids (heck, for adults, too) birthday party, a potluck? If you gave up sweets for Lent, this is a sugary way to break your fast.

What You Need

One batch of prepared Rice Krispie treats
Cooking spray (like Pam)
Candy: Swedish Fish, Fruit Roll-ups (fruit leather, preferably dark in color), cake decoration sprinkles

For the Nigiri (hand-rolled) Sushi

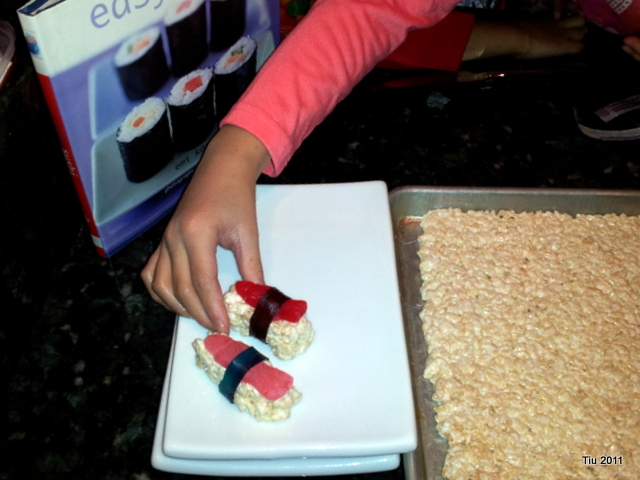
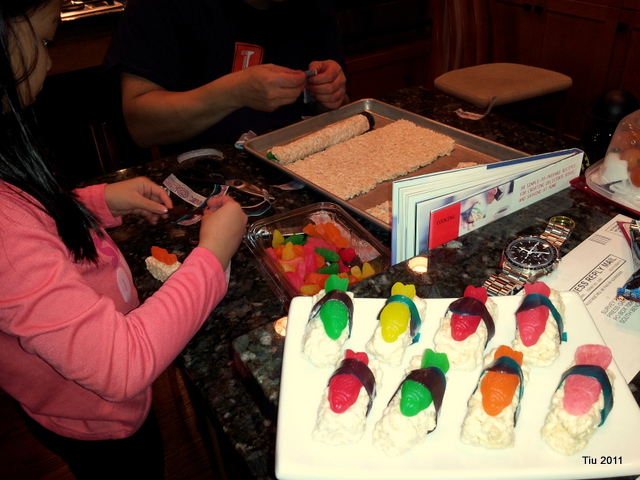
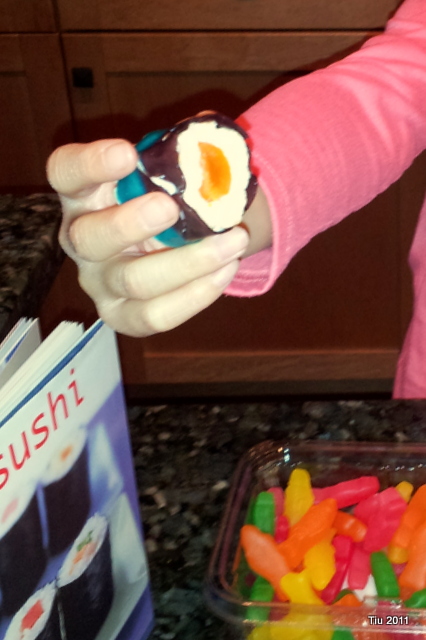
Spray or coat your hands lightly with cooking oil. Butter, magarine works okay too. Create an oblong mound of rice krispies in the palm of your hand. Top with a Swedish fish and wrap with a thin strip of cut fruit leather.

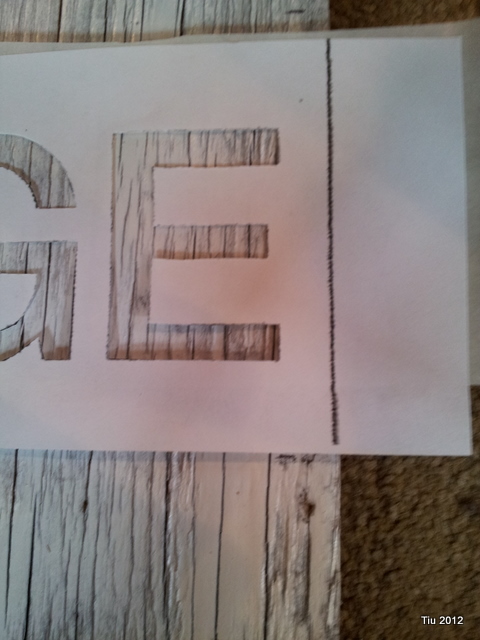
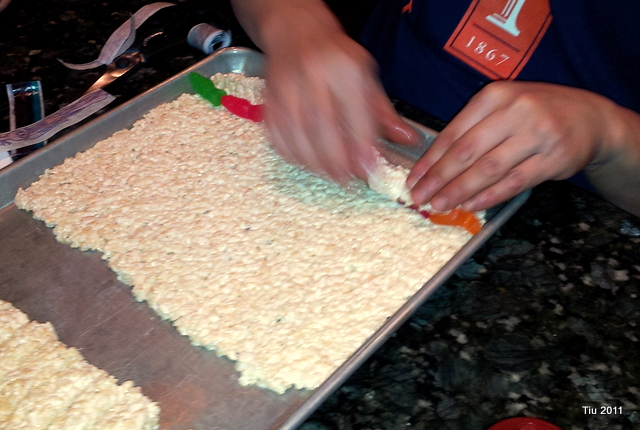
For the Maki (rolled) Sushi :: inside-out roll featured in first picture

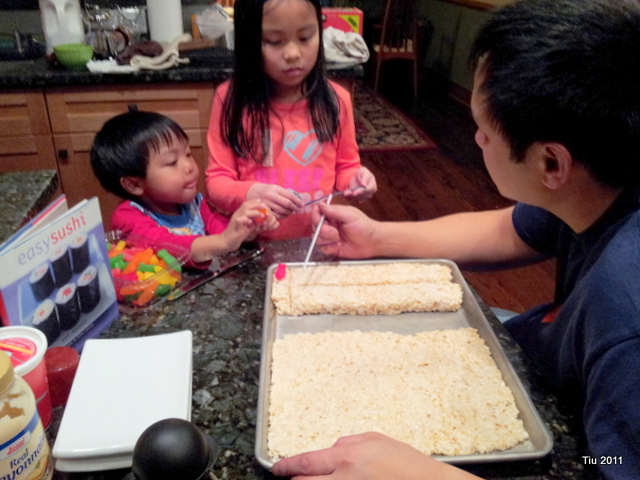
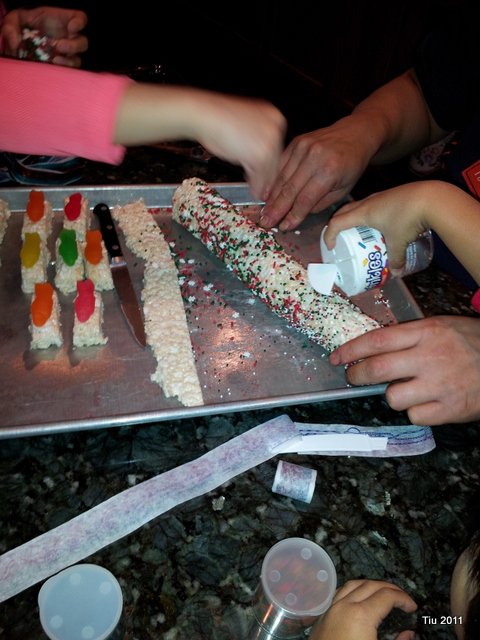
This one is a little trickier. Make sure your hands are well coated. Using your hands or a rolling pin, you will need to press or roll the rice krispie treats to a thin thickness. 1/4″ – 1/3″ inch should work. Swedish Fish in a row along one end of your prepared rice krispie treat. Roll the end of the rice krispie treat up and over the candy fish until they are covered.

(I have to say, at this point, we forgot to add strips of fruit roll-up for the “seaweed”. Lay down some fruit roll-ups before the Swedish fish. You can see it better in the very first picture of this post.)

Trim away from the remainder of the rice krispie treat. Shake some sprinkles on the roll (like sesame seeds), and using a sharp, buttered knife, cut into circles – like you would cut cookies.

For regular maki

You’re going to follow similar directions as above, but save your strips of fruit leather, and roll it around the rice krispie treat after you’ve cut them into shapes.

If you attempt to make these, I love to hear how it turns out! Share your pics and links! Enjoy…

DIY Subway Art Tutorial

Text as art – I love the simplicity. About six months ago, I noticed it was popping up all over the place. Maybe you’ve seen this type of art in home décor stores, or posted on Pinterest. You can find even find pillows. (What kills me is that I used to do all sorts of text/graphic art in college, mid-90s – like using it for wrapping paper and stationary. I must have been ahead of my time. Hehe.)

I like subway art for its historic and vintage feel. What I’d give for some vintage signs… but, I thought, heck, how hard could this be to make my own sign?! I was so looking forward to making this for my husband. and cannot tell you how excited I was when it was finished.

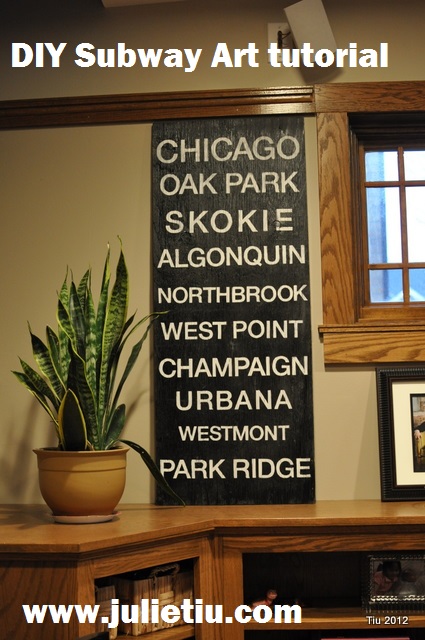
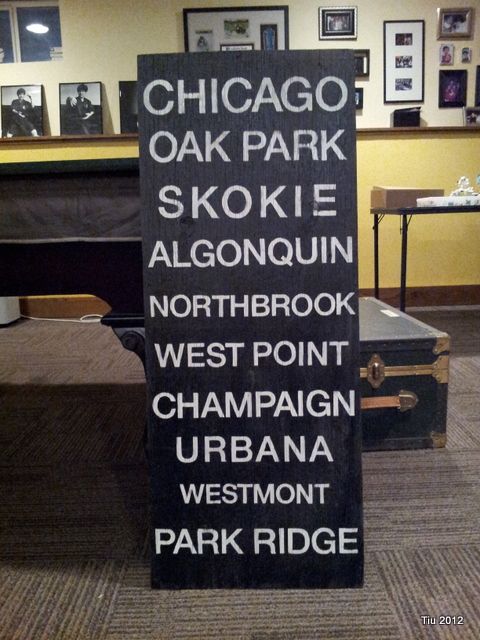
Here’s how I made our own subway art using cities that my husband and I have called home.

Before you start, please note:

  • I stenciled and spray painted. This isn’t the decoupage-type poster.
  • This project also took more time than I thought.
  • This project was AWESOME and I’d do it again. Okay? Still with me? Thanks.

What you need: measuring tape, plywood, pencil, sand paper (optional), spray paint: white primer, white (semi-gloss) and black (semi-gloss), computer, printer, Contact paper or Xyron Creatopia with repositionable adhesive (optional), scissors and/or X-acto knife.

You will need to go to a copy/print center like FedEx Kinko’s, or an office supply store to enlarge your printout.

Let’s start
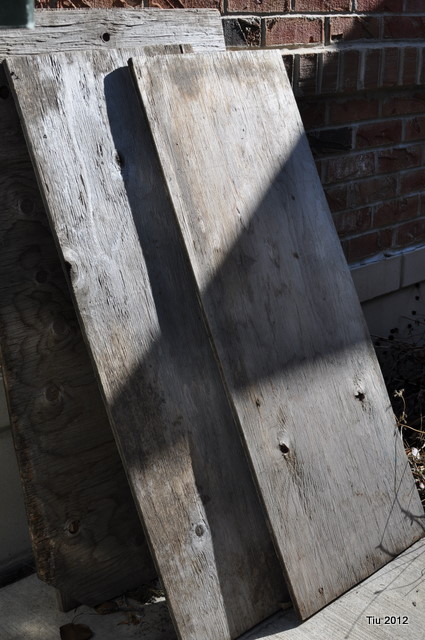
I was fortunate to have plywood lying around. It had been sitting outside for so long that it’s weathered. I like that organic, rustic look – so, I did not sand the boards, not one bit.

1) Measure your plywood. I used a 16” wide x 40” high board. It’s a reasonable size, I think.

2) Spray it with white primer using the manufacturer’s directions. Let dry. When dry, spray with white paint. I did not coat the board until it was completely opaque, just enough to coat. I still like the weathered look. Let it dry overnight, or if you’re in a hurry, follow the manufacturer’s directions. It should be dry to touch in an hour.

Time to prep your text

1) Using your desktop publishing program, you’ll make your text box the same proportions as your board. You’ll want your text box to print out on an 8-1/2″ x 11″ paper. This entails a little math – think lowest common denominator. Since my board is 16” x 40”, I made a text box 4” x 10”. This will allow you to print a good copy from home. (2” x 5” is too small.)

2) In your text box, play with the font (I like Helvetica) and placement of your text. I centered each city. Maybe you want yours centered, justified… wide fonts, tall fonts, etc. My one recommendation is to make most of your text as wide as the text box.

3) When you are pleased with your layout, print a copy. (See my original printout below.)
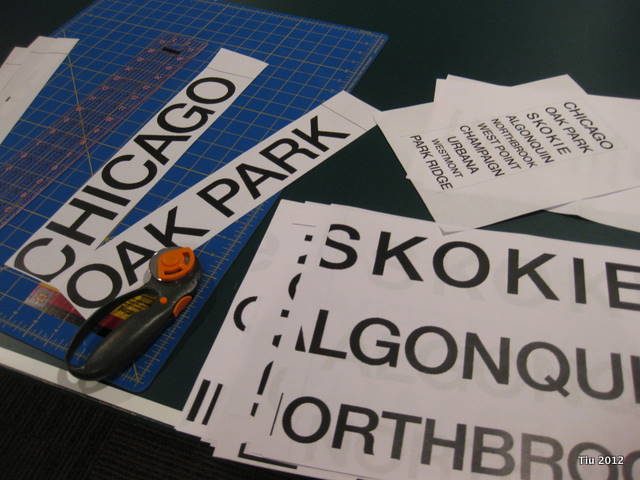
4) Since your copy is proportional to your board, it will be easy to enlarge to size. SO, with that, take your printout to the copy center, and ask to have it blown up 400%. If you’re tech-savvy, you can try this on your own. I spent $4.00, and about 45 minutes doing it myself.

5) Go home and cut apart your text, and play around with the placement. Mark in pencil the approximate locations of each city by marking the top and bottom of each line.
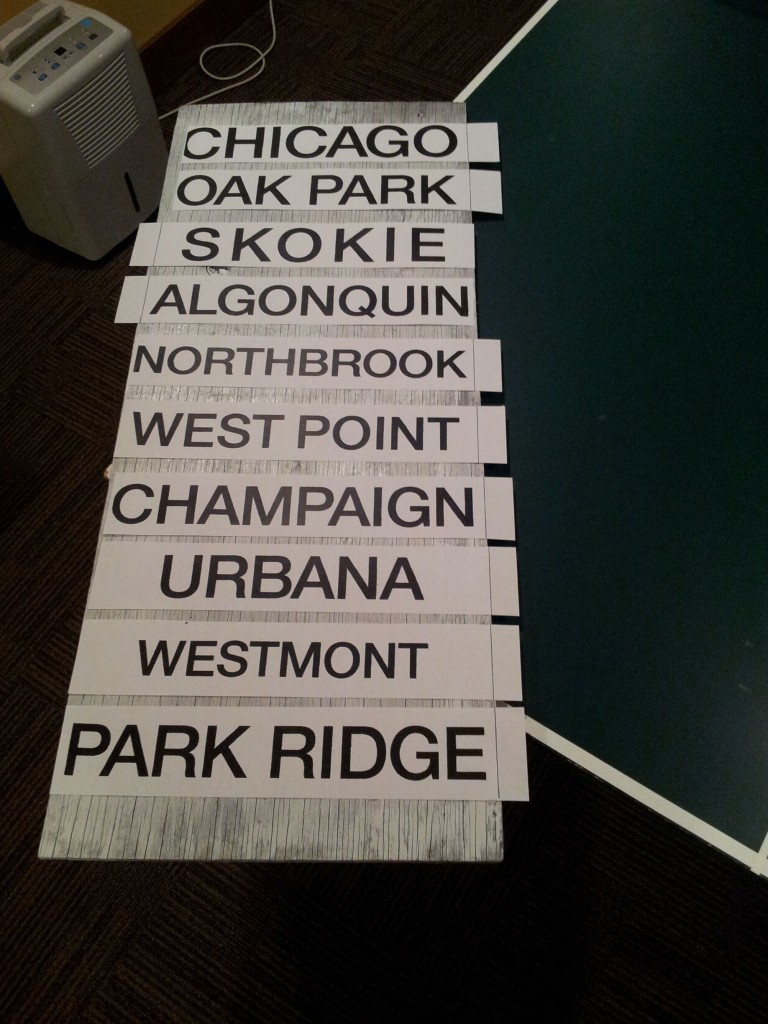
Making your stencils
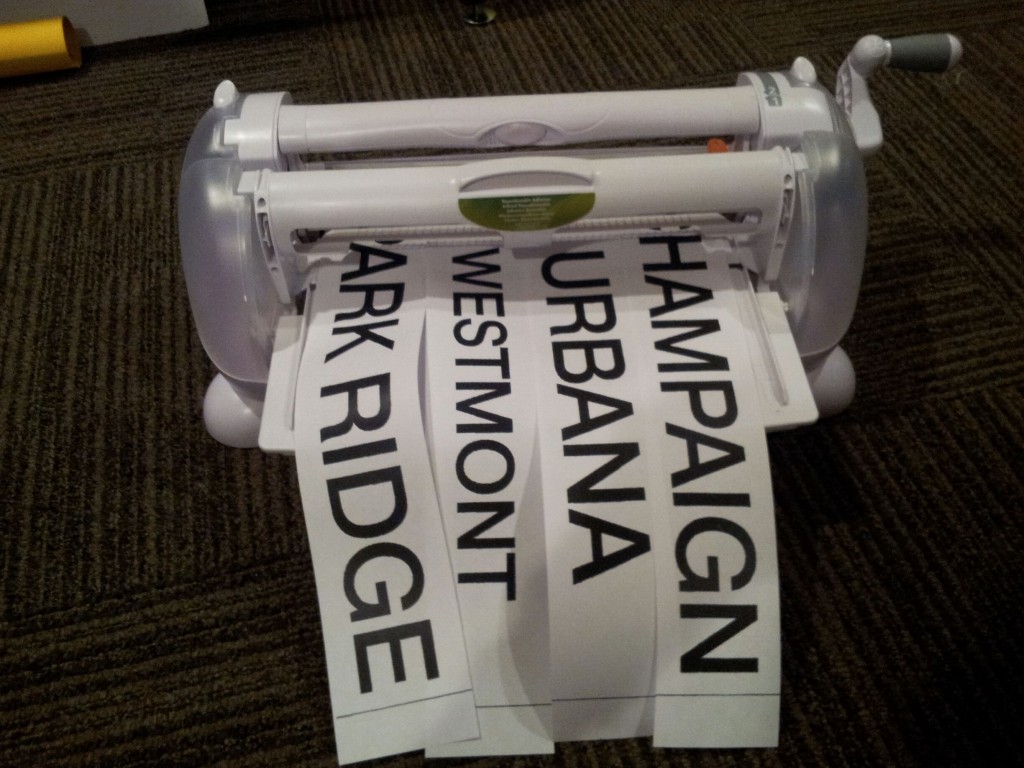
1) I’m fortunate to have a machine to apply adhesive onto anything. So, after cutting apart my text, I ran the pieces through my Xyron Creatopia with repositionable adhesive. Now my letters are like big post-it notes. If you do not own a Xyron, you can use Contact paper in the next step.

2) The tedious part: cut out each letter. I thought I’d only need an X-acto. Scissors will work just fine, and if you have non-stick scissors, even better.
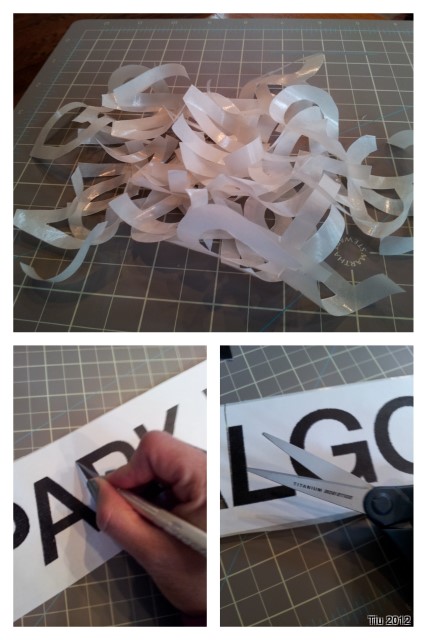
  • If you’re using Contact paper, I’d just layer and cut through your copy and the Contact paper at the same time. You could trace every letter onto the Contact paper first if you’re more comfortable with that.
  • Use your X-acto knife and cut out any opening in the letters (i.e. O, A, B, D, P, etc.)
  • Save the “negatives” of your text. They will help when you’re laying out your words.
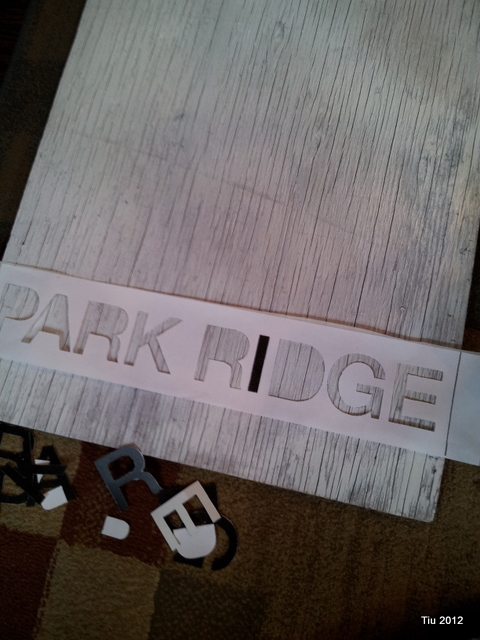
Placement on the boards

1) Remove the protective backing from the letters (one at a time) so you have stickers. Using your “negatives”, place the stickers in their respective spots.
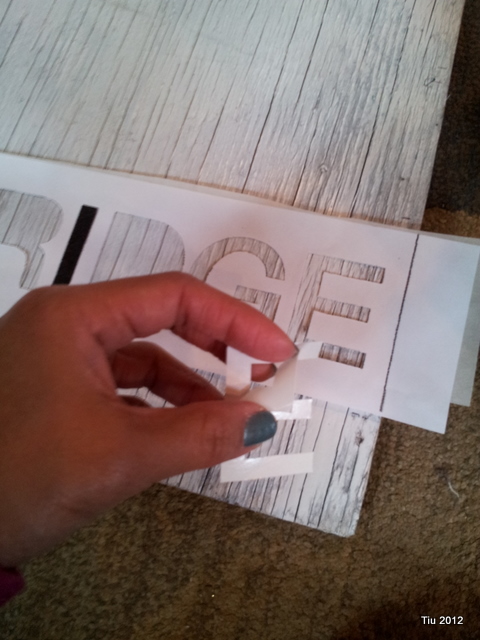
2) Once you’ve completed a word, carefully remove the “negative”.
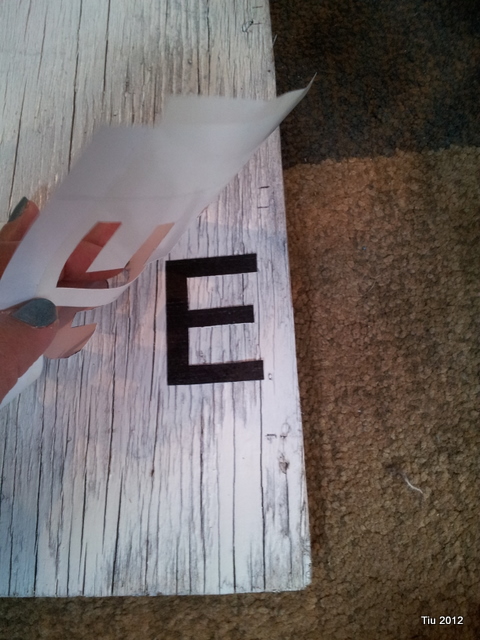
 3) You’re done with one word! Now do it for all your words… take a break and have some coffee. Stretch your back.

4) When you’re finished placing all your words, prop it up and take a look. Do you like the placement? Is it straight? Straight enough? Need to make spacing adjustments? Do it before you rub all the letters down.
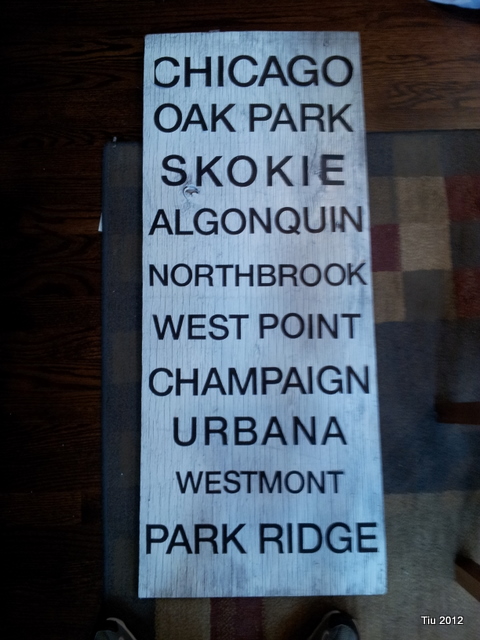
5) Take a blunt end of a dowel rod, or your pencil eraser, or your fingernail if you desire, and rub the letters down as much as you can. This will ensure that the black paint won’t seep under the stencils. And even if it does, it will be minimal.
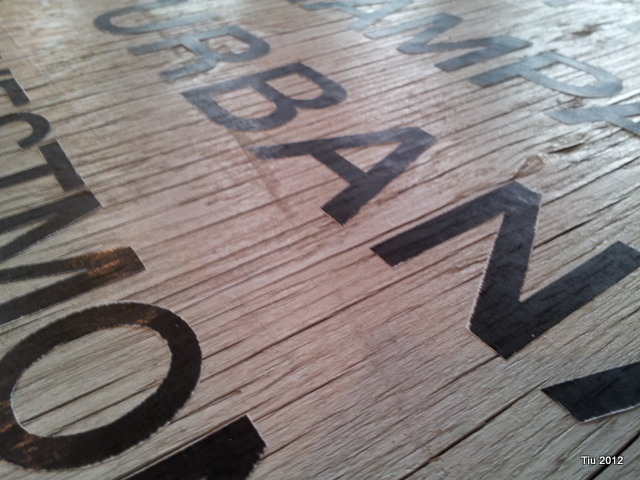
Almost done

1) When you’re happy with the text… get your board and black spray paint. Go outside, spray one coat evenly, let dry according to paint manufacturer’s directions. When dry, spray another coat. Let dry overnight, if you can. I had minimal time, so it was about 4 hours.
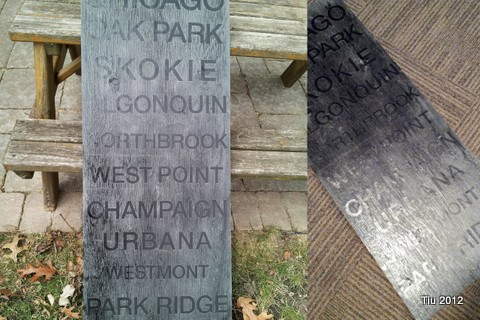
2) The fun part: using your X-acto, peel off the letter stickers carefully. (At this point, I was so excited about how it was turning out!)
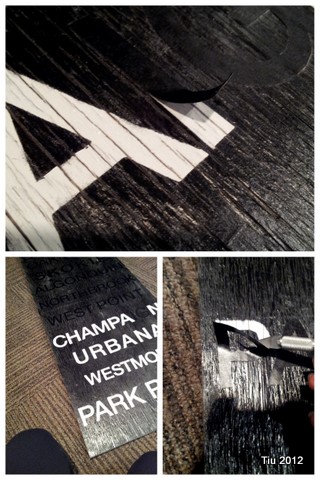
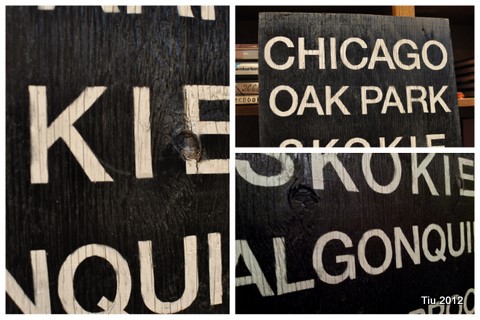
3) You might want to touch up certain areas with paint, or you may want to sand some spots but essentially, YOU’RE DONE! Nice work!


That Old Sweatshirt – A pillow tutorial

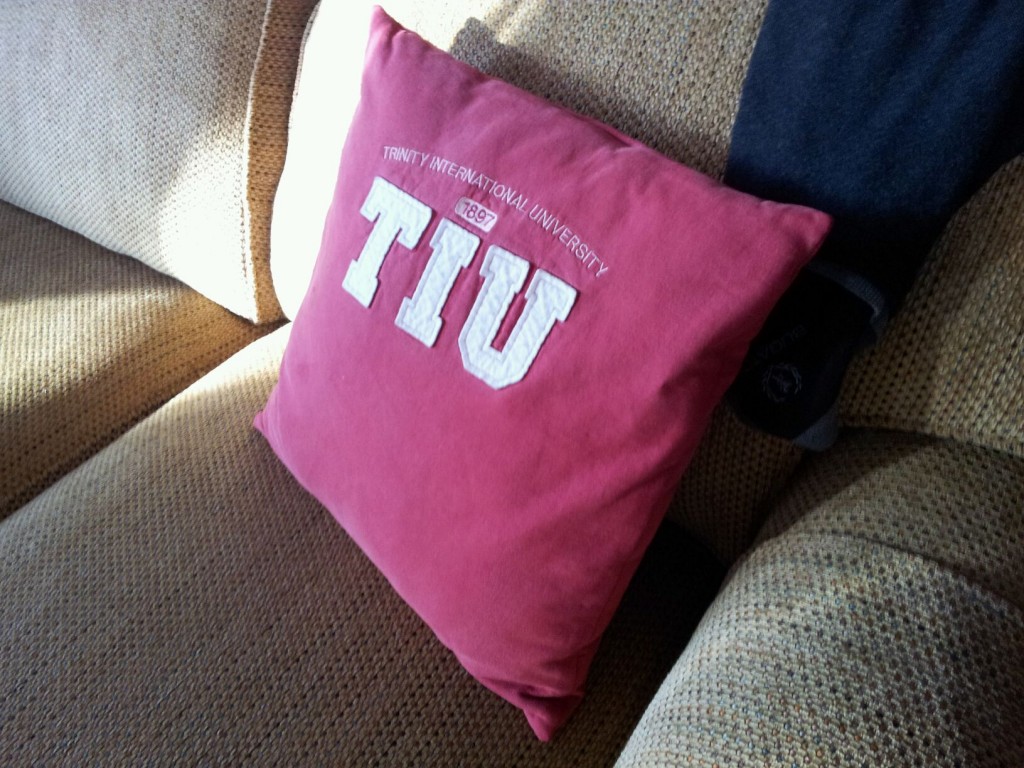
I get sentimental about things that other people would probably not even think twice about throwing away or donating. I have old ticket stubs, concert programs, newspaper clippings – those things I can put in a scrapbook. But I’ve been known to hoard be sentimental about clothes too, and only recently have I been purging all our closets. Sometimes there’s just that one article of clothing you want to keep. See this old collegiate sweatshirt…

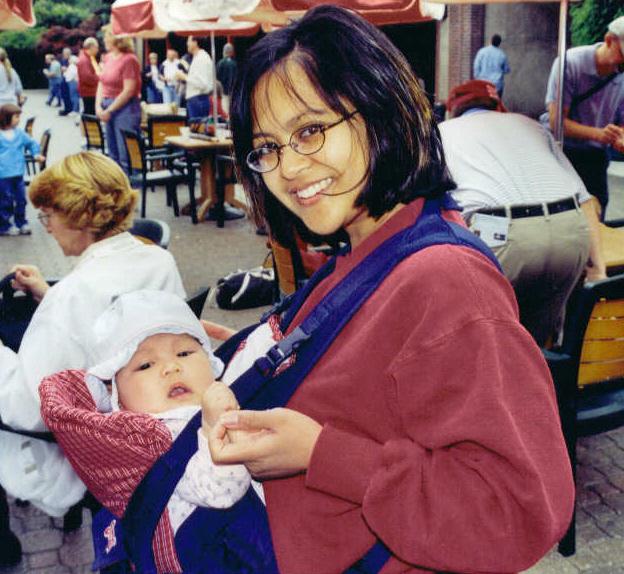
Julie Tiu in 2002

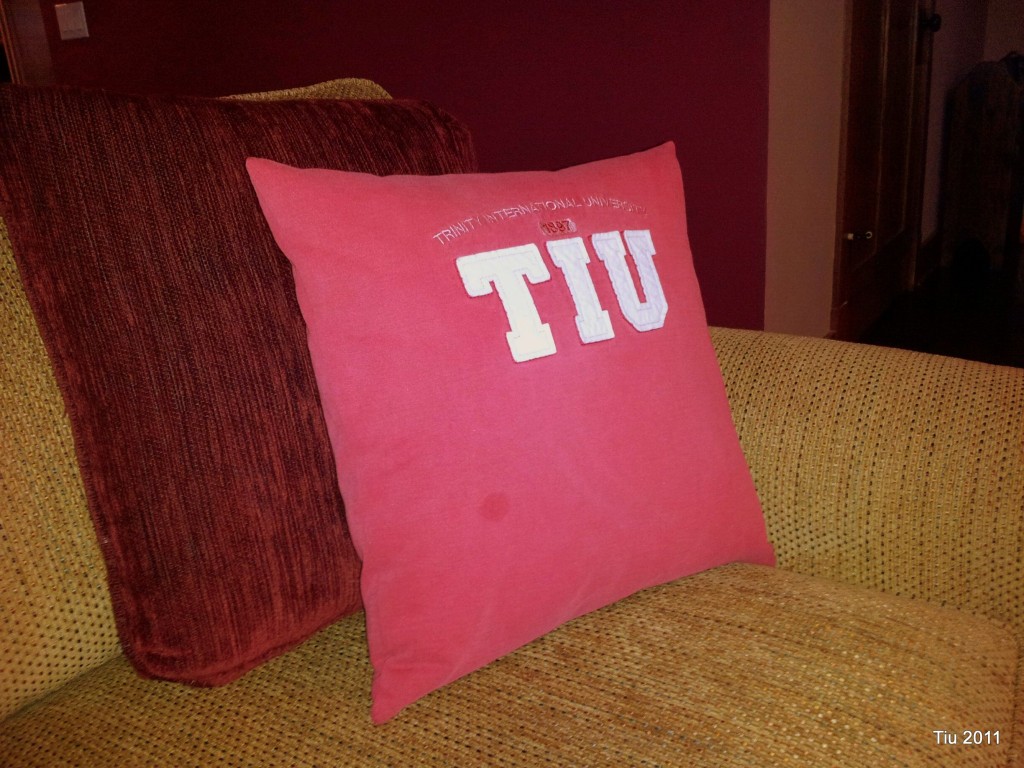
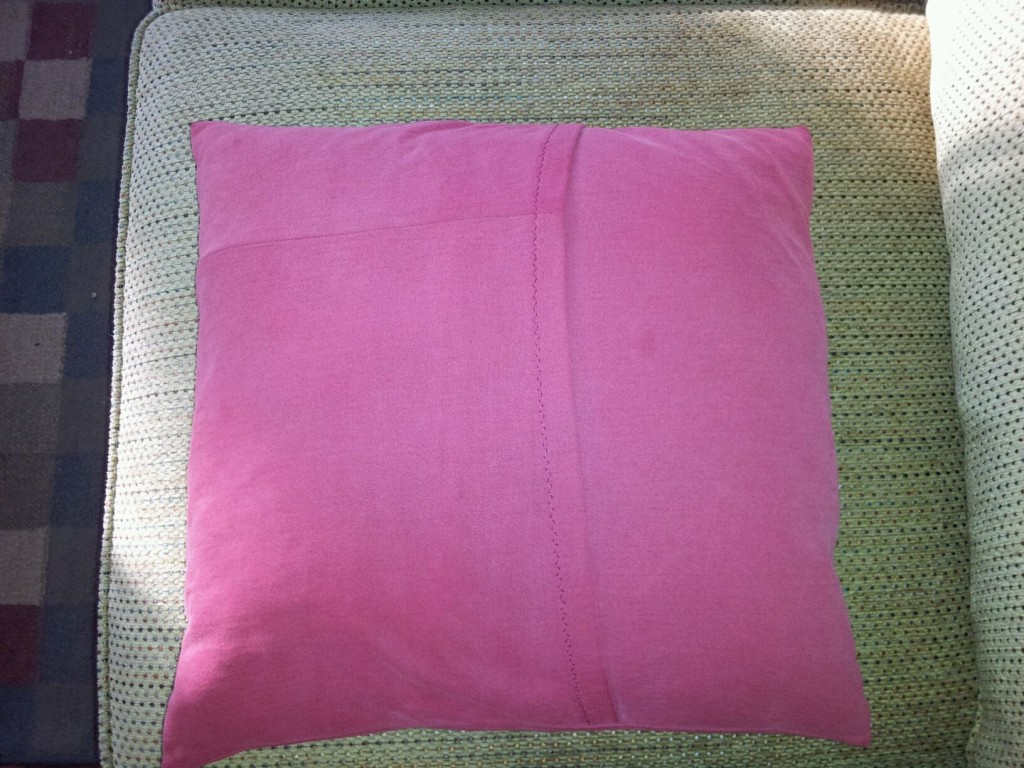
…Became this pillow. (I know, after 10 years, right?)

An upcycled sweatshirt made into an envelope pillow – meaning, you can slip the cover on and off. Very easy for washing. Could be a cute gift for Valentine’s Day, too.

Recycle Your Favorite Sweatshirt (I didn't even attend this school. Got the sweatshirt because it had my last name!)

And here’s how I did it.

  1. Take your clean sweatshirt of choice and lay it on a table or on the floor.
  2. I cut the sleeves off first. Then set aside.
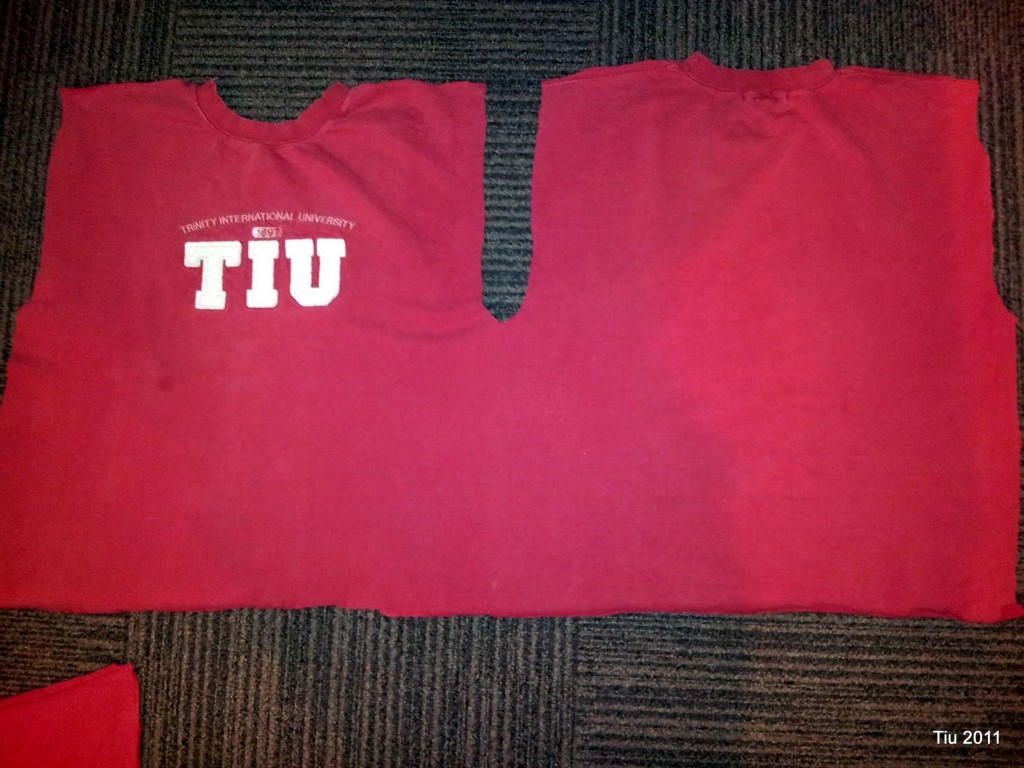
  3. Next cut along one of the side seams of your shirt and along the shoulder seams. This will open everything up. I did it this way to give the largest piece of continuous fabric.
  4. Cut off the bottom hem and collar (cuff material) also. At this point you may need to iron the shirt (highly recommended).

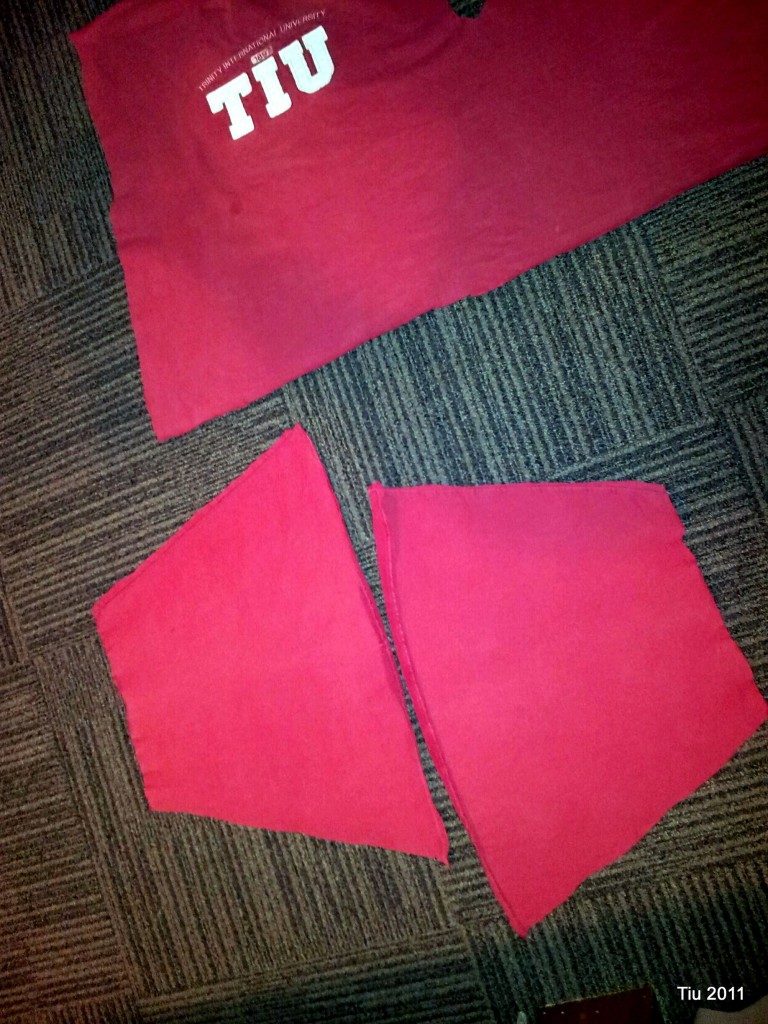
  5. You may need the sleeves for extra fabric. Cut off the cuffs and cut along either side of the seam.

    Sweatshirt sleeves cut open

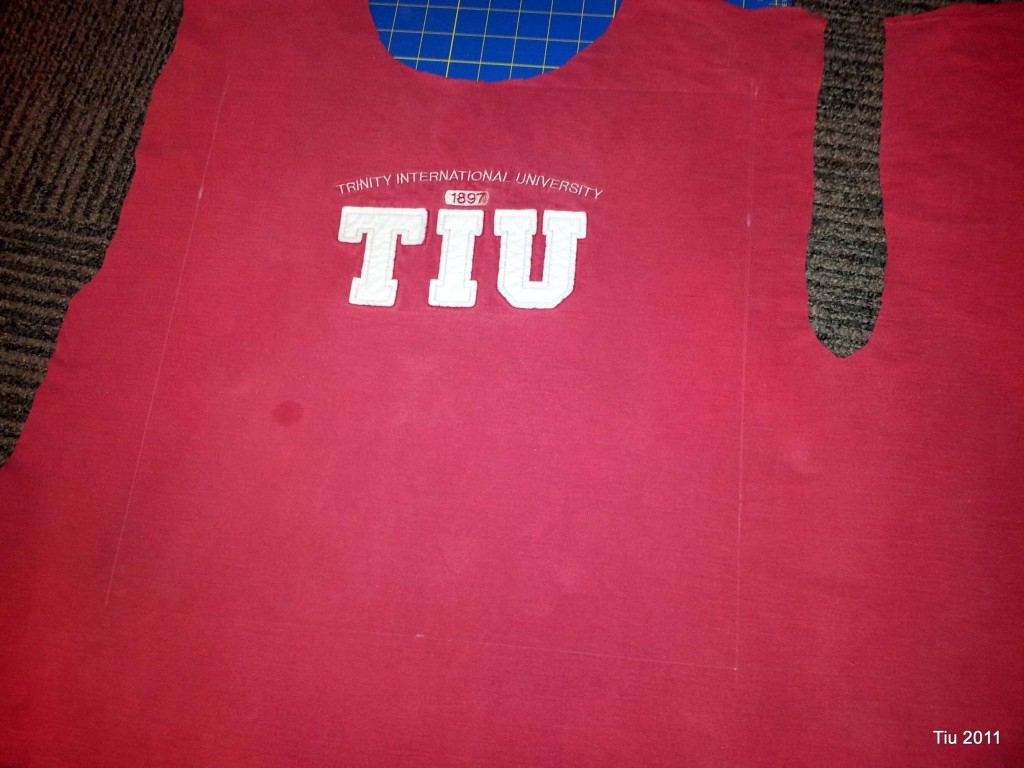
  6. For a 16 x 16 pillow, you will need three pieces of fabric: (1) 16-1/2″ x 16-1/2″ for the front, (2) 12-1/2″ x 16-1/2″ for the back. (See my fancy sketch below.) I needed to use the extra sleeve material for one of the back panels. Just piece together if you need to.
  7. Try to center your focal point. I didn’t have too much choice – just went as high as I could.

  8. Prepare the back pieces first. Fold along the length (16-1/2″) and press 1/2″, then fold 1/2″ again, pin and edgestitch. Do this to the other piece. Press both pieces. Note: I found the zig-zag stitch easier to do with the stretchy sweatshirt material.

  9. Lay the front piece down, right side up. Next lay one of the back pieces, wrong side up, matching the raw edge with your front piece. The finished edge should be somewhere in the center area. Lay the other back piece with its raw edge along the other side of the front piece. Now the finished edges of your back pieces should be overlapping one another.
  10. Stitch around the perimeter with a 1/2″ allowance. Backstitch as you start and finish. When complete, remove and clip your corners, and turn rightside out.
  11. Stuff your pillowcase!
So here’s the thing – you can adjust the size of your fabric for any size pillow by just adding 1/2″ to your finished size. The back pieces take a little math.

16″ x 16″ pillow – cut 16-1/2″ x 16-1/2″ (front) and 16-1/2″ x 11-1/4″ (two pieces for the back)

14″ x 14″ – cut 14-1/2″ x 14-1/2″ (front) and 14-1/2″ x 9-1/4″ (two pieces for the back)

12″ x 16″ pillow – cut 12-1/2″ x 16-1/2(front) and 12-1/2″ x 11-1/4″ (two pieces for the back)

12″ x 12″ pillow – cut 12-1/2″ x 12-1/2(front) and 12-1/2″ x 7-1/4″ (two pieces for the back)

30 Days of Creativity: Day 10 with Crepe Paper Flower Tutorial

Day 10: Create something today inspired by nature!

We had a few days of fantastic weather, but over the last few days, it’s been cold, damp and gloomy. April showers bring May flowers, right? Well, I thought I’d make my own with some party streamers from our stash of supplies. They’re easy and fairly quick to make!

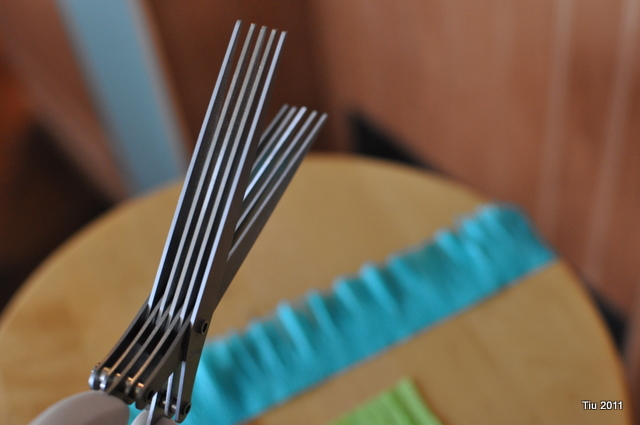
Supplies: Party streamers, pair of scissors and/or Martha Stewart fringe scissors

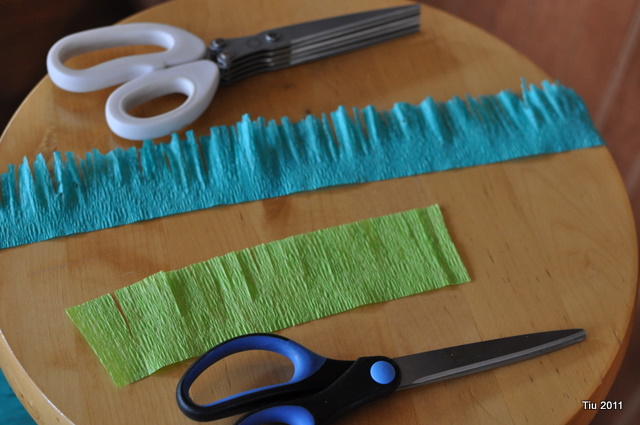
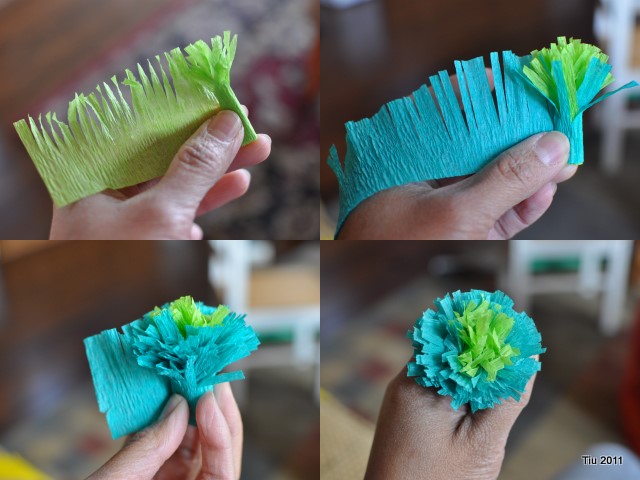
  1. Cut 6″ lengths of one color for the center of the flower, then cut 36″-40″ lengths for the main color of the flower.
  2. Using your fringe scissors or regular scissor, cut fringe about 2/3 of the streamer width. Crepe paper is delicate and difficult to work with. I found using regular scissors was quicker than the fringe scissors, but I like the texture of the fringe scissor cut better. If you cut the streamer from bottom up, you may have an easier time.
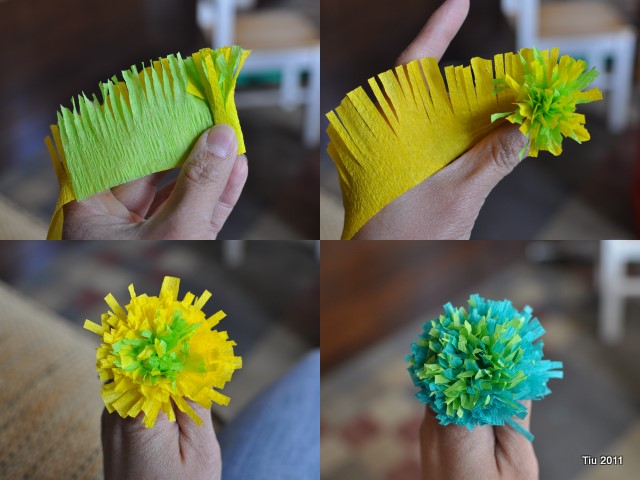
  3. After cutting the fringe, roll the inner section then add the outer section. Keep rolling until complete.

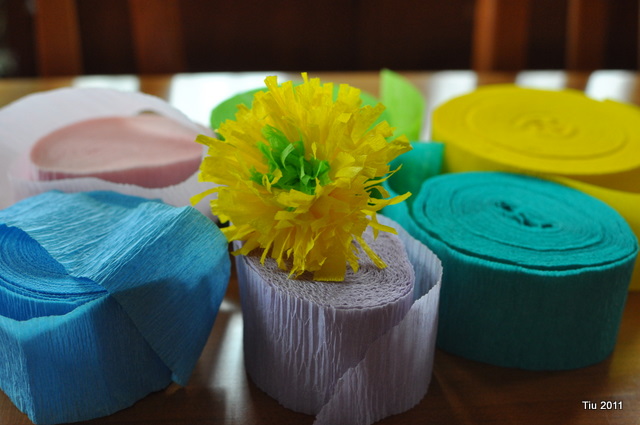
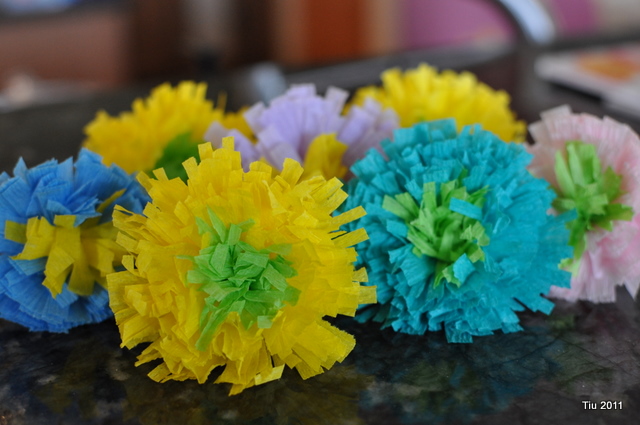
For a little variation, I like layering two colors.

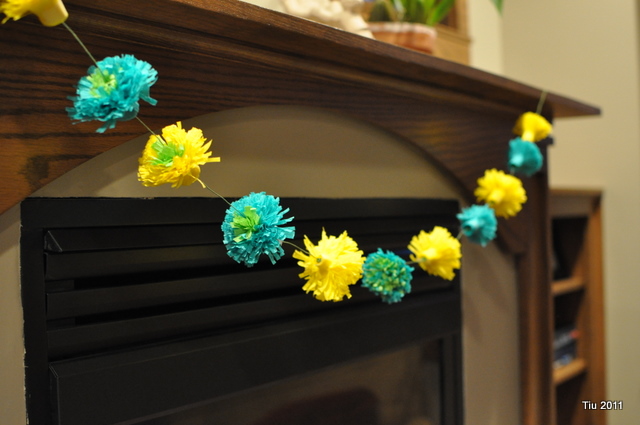
To finish them off, use floral tape or a little glue. You can either make into flowers with thick floral wire or even bamboo skewers. I strung them on some covered wire…

Happy crepe paper flowers from party streamers

Happy Spring!

Peace Day Tote Tutorial

My daughter loves the peace sign, ☮. So when I found this fabric at the local JoAnn Fabric store, I knew she’d like it. She asked if I could make it into a tote bag…uh, earlier this winter. *sigh* Fortunately, I made some time over the New Year weekend and was able to finish it.

What you need

1/2 yd cotton or canvas fabric – print
1/2 yd cotton fabric for lining
1/3 yd cotton fabric for handles
Tools: iron, ironing board, sewing machine (unless you’d like to sew by hand *grin*), large safety pin

What to cut

  1. Cut two rectangles, 12″ x 15″, out of the printed fabric
  2. Cut two rectangles, 12″ x 15″, out of the fabric for the lining.
  3. You’ll need (4) straps cut out of the handle fabric, cut 3″ x 34″.

Sew it up

  1. Put your printed fabric right sides together, pin, and sew up the sides at 1/2″ seam allowance. Press.
  2. Pin the bottom edge (12″ side), and sew 1/2″ seam along the pinned edge. Trim your corners at 45 degrees.
  3. Your tote should be looking tote-ish now, except inside out and the top edge is raw. At your ironing board, fold/flip back the top edge by one inch or so, so that the printed side is showing, press. Then tuck the raw edge in toward the fold. Press. You don’t have to edgestitch now.
  4. Repeat steps 1-3 with the fabric for the lining.
  5. For the straps: Pin two handle pieces, right sides together, and sew 1/2″ seam along the long sides. Press seams open and flat on both sides. Turn the straps right side out with the help of a large safety pin, or if you have a loop turner, that works well, too. Finish the other strap the same way. Press both pieces.

Put it together

  1. I attached the handles inside the bag. Take your printed bag, and turn it right side out. Press. Play around with the straps… Once you figure out where you want the handles, pin the bottom raw edge of your handle about 1-1/2″ below the top edge of the printed bag. Stitch in two locations to make sure the straps stay in place (see pictures?). Do this at each of the four ends.
  2. Now take your lining, turned inside out, and drop into the printed bag, so that the wrong sides of each bag are together. Your tote should look just about finished.
  3. Pin the bags together, lined up at the side seams. Be careful with the straps. If you have a free arm on your machine, this would be a good time to use it. Topstitch the bag 1/4″ from the top edge. This will attach the lining, secure the straps and finish the tote. Don’t forget to press to finish.

A Sparkly Wreath

I was inspired by the glittery garland wreaths in the Holiday issue of Martha Stewart Living magazine. My version is quick, easy and afforable: $3.50, courtesy of the bargain bins at Target. $1.00 for the garland, and $2.50 for the wreath. No need for glue guns or scissors, either!

At the store, I found red and green wreaths, and silver and gold garland. Choose the combination you prefer… I liked the green and gold which incidentally are my high school colors. (Shhh… my husband thinks I have a ridiculous amount of high school pride.) Red and gold would have been nice, too, for a bit of an Asian flair.

The How-To

  1. First, the wreath will be completely packed down. You will need to “fluff” or gently pull out the branches.
  2. Find the end of your garland and keep it on the cardboard (much easier this way).
  3. Wind the garland around the wreath, in between branches.
  4. When you reach the end, just tuck the end into the wire base or around a branch. It will be secure.
  5. Hang and enjoy!

This wreath is going on my son’s bedroom door since his big sister has a wreath on hers. I might use some ribbon and hang the wreath a little lower. Did I mention, they each have their own little tabletop Christmas trees in their rooms, too?

Related Posts with Thumbnails