Pillowcases – Another Project to Check Off

I finally finished these pillowcases, and taught myself how to do French seams from the Pretty quick pillowcase tutorial (& bonus french seam instructions) at Film in the Fridge. Think of the possibilities for the holidays?! I may be busy sewing for the next few months.

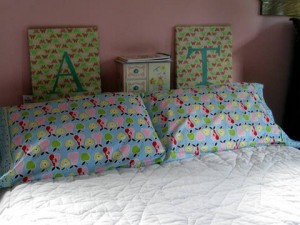
Notice anything? The design is upside down on the left hand pillow. Yes, lesson learned. Now I know what one of the tutorials meant by “good with non-directional prints”. I didn’t really stop to see how it was going to look. Abby didn’t seem to mind. She said, “That’s okay, Mom.” What a relief. Besides that, I turned the main fabric (apple print) 90 degrees contrary to what most of the tutorials showed. I don’t know if it matters. It’s just that if I didn’t, the apples would be sideways, and that’s not really what my daughter wanted.

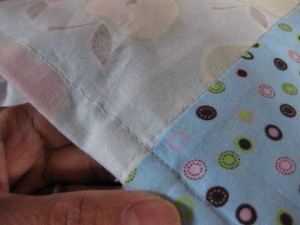
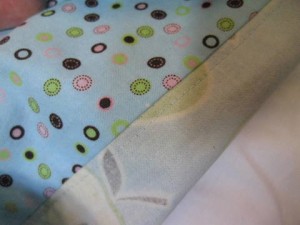
Here’s a detail of the cuff from the inside. Nice and clean.

Basically, what you see right-side out is normal. What you see when the pillowcase is turned inside-out is this: the French seam. No raw edges.

Looking to add something to your list of projects? Here are some more sites that I scouted:

Tutorial: Newspaper Seedling Pots and Cardboard Garden Tray

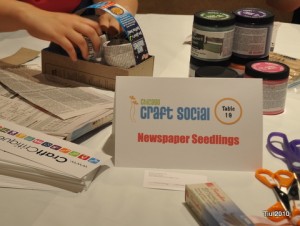
It was another awesome time at the Chicago Craft Social last Friday night! I’m writing about the event on Craft Critique, so here we’ll just focus on this cool, recycle/upcycle project.

(Update: The event review is posted on Craft Critique now.)

Leading this table was a lot of fun, and I promised some new crafty friends that I would have instructions posted on this very simple eco-friendly outdoorsy project. Though it may be a little late in the season, I might start some vegetable seedlings for late summer/early fall planting. What I love about the pots is that there’s no adhesive, and you can plant the whole thing in the ground once your seedlings are established.
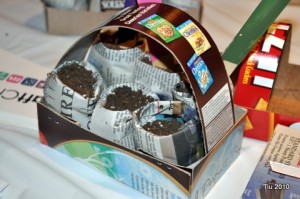
The newspaper seedling pots: newspaper and scissors

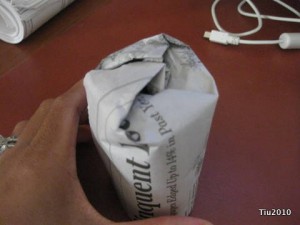
I didn’t use any forms or jars to form my pots, but there are certainly products out there that are sold at your local garden shop for not a lot of money. I took full sheets of newspaper and cut them in half, then half again (quarter-pages). Using two quarter sheets, roll them up like toilet paper roll size.
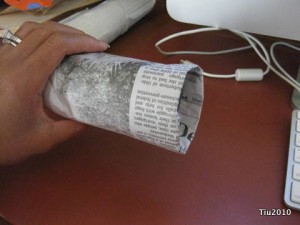
Fold one end of the tub into itself (about 1/4″ to 1/2″) and press. Repeat. Folding over a few times will give the pot some structure, a little collar of sorts.
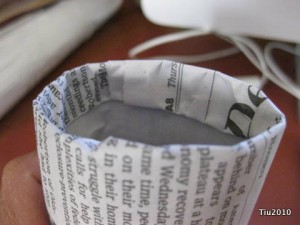
Now the tricky party: the bottom. I place the tube over my fingers like a puppet and just start folding the bottom into itself, as if I’m wrapping a cylindrical gift.
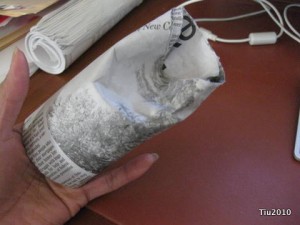
Eventually, you end up with a triangular little piece of paper, and that can get tucked in. Actually, I smash it onto the table to help get the folds to stay. No adhesives.
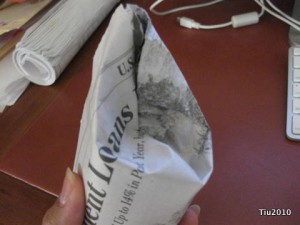
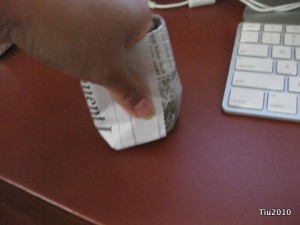
This isn’t going to look super neat, but I figure, after you’ve filled the pot with soil, and you’ve started watering your seedling, the paper is going to stick to itself after getting wet.
Now the tray: cardboard, cereal boxes, snack boxes, ruler, cutting mat, rotary cutter or utility knife, bone folder (optional)
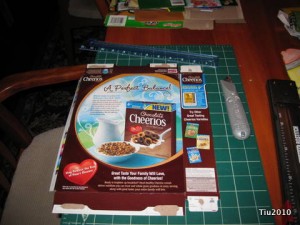
The tray was just something simple for crafters to carry their pots home, but think of the possibilities with kids and a little paint or stickers! You can use any cardboard box, like cereal and snack boxes. One box will make two trays. So, cut apart your box: front, back, two sides.

Take your large rectangular piece and measure 1-1/2″ to 2″ from each side – the width is up to you. Then using a straight edge, make a line from outside corner to “inside” corner. Score (not cut) on these lines.
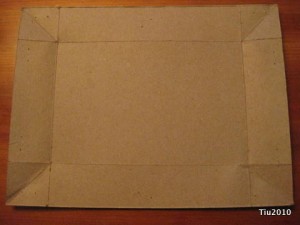
At this point, you should be able to fold the cardboard and start forming the tray. The diagonal lines can be “pushed” into the tray. This then gets stapled to the tray side (doesn’t matter which side).
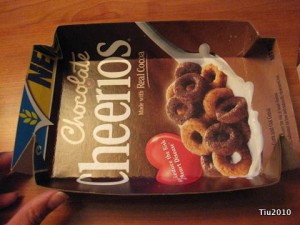
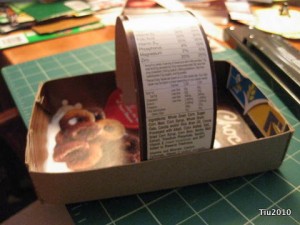
Use a box edge to create the handle… just staple onto the tray.
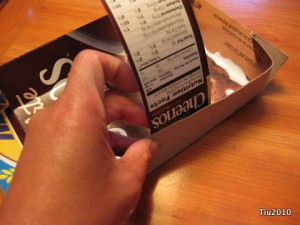
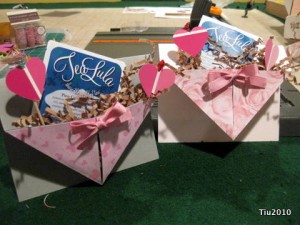
The tray below has a 1-1/2″ edge. The 2″ tray looks is shown at the beginning of this post and here at my friend’s blog, “Our Tiny Oak Park Bungalow“.
***

Looking for more crafting, my review on Xyron’s Creatopia machine is posted at Craft Critique (disclaimer). This machine is amazing! Check out all six articles, and there’s a great giveaway that ends on Saturday, June 26! Good luck!
Celebrating a Friend’s Engagement

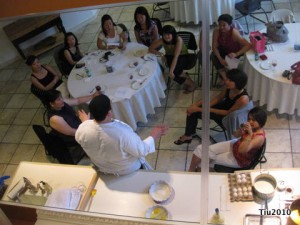
How could you not have fun with a bunch of girlfriends at a cooking class and then karaoke in a private room belting out hits from the 1980’s? There were plenty of treats for us at dinner, and unfortunately, I didn’t make time to bake up a batch of cookies to share. (I really wanted to.)

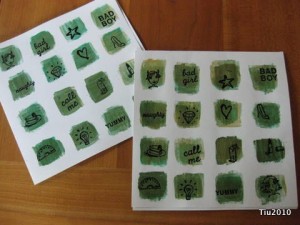
I did make this card for my friend.

Borrowing a line from a Las Vegas commercial, I wrote this in the card, “What happens at the bachelorette party, stays with the bachelorette party.” So with that, I won’t go much into the weekend details (no big debauchery, really), but I’ll say it was so much fun spending time with the ladies. I will share how to make the card!

What you need:

  • The Bad Girl’s stamp kit by Chronicle Books
  • 6″ x 6″ card – white cardstock
  • Two or three coordinating colors in acrylic paint – I used Lumiere paint to coordinate with the bride’s invitation. Feel free to experiment with other colors!
  • Black embossing powder
  • Miscellaneous supplies: paint brush, ink pad, and heat gun
  • I’m assuming there is general knowledge about embossing and rubber stamping… basic techniques can be found by searching for “rubber stamping basic embossing technique“.
  1. If you need guidelines, then use your ruler and lightly pencil out a grid, evenly dividing the card into 16 spaces. I did not do this… just eyeballed the spacing to give it a handcrafted feel.
  2. I then took drops of each color and placed on a foam plate (palette) to mix the colors a bit. This is all very free-range art; mix as much or as little as you want. I like it lightly mixed so you can still see different colors.
  3. Paint 16 squares on your card front, preferably free hand. The squares don’t have to be perfect. Let dry.
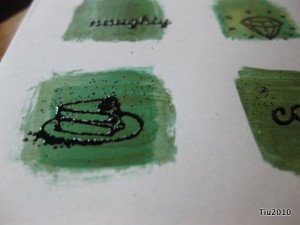
  4. When paint is dry, stamp your images within the square. Again, I went for a freehand look and did not align the images in a certain orientation. Off-center is fun and quirky!
  5. NOTE: I stamped four images and then dusted with embossing powder.
  6. Once your card is all dusted with embossing powder and you’ve tapped off the excess, turn up your heat gun and make some embossing magic!

Voila! It’s done and ready for your personal note for your bride-to-be pal.

Self-Binding Receiving Blanket

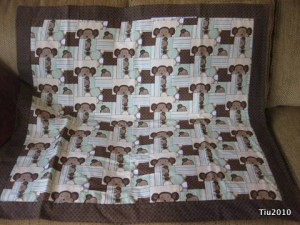
I’ve learned another trick – self-binding blanket! I didn’t know it would be as simple as it was. There are plenty of resources around, but I found these to be the most helpful.

Everyday Mom

Piece N Quilt

Getting ready for hosting family and friends to celebrate Abby’s first communion this weekend. I’ll be back next week with the reception, a bunch of recipes and crafts!

Happy Monday!

Baby Shower Card

It’s taken me this long to recover from Easter weekend. I ate too much. I exercised too little. The kids were delirious at the dinner table last Saturday night when we celebrated my uncle’s birthday at an Italian restaurant known for their incredibly generous portions. Then we had brunch Sunday morning after Easter mass. Glorious, isn’t it, especially when it’s good food? I felt okay up until Sunday night… when I put on my pj’s to sleep and felt like a blown-up beach ball about to burst at the seams. Sunday morning should’ve clued me in when I woke up and wasn’t hungry until 11:00 AM.

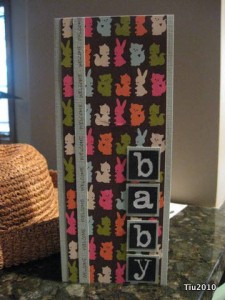
But, besides birthdays and Easter, it’s baby shower season! We have 11 pregnant friends, and they’re all delivering between May and August of this year. Quite the “Year of the Tiger“! And this card, no stamping needed!

  • 8-1/2″ x 11″ cardstock (Bazzill Basics: Hazel)
  • Four cardstock squares in a contrasting color 3/4″ x 3/4″ (I used black. Brown would have been nice.)
  • 3″ x 11″ piece of coordinating patterned paper (blue skies/so happy together by American Crafts)
  • Rub-on letters (close to 3/4″ tall)
  • Equipment: paper cutter, adhesive

1. Take your solid color cardstock, lay landscape and cut off about 1 centimeter. Save the strip. (Yes, I switched to metric.) Making the paper 27 cm wide makes it easier to measure evenly. Now cut 9 centimeters off. Save that scrap. With the remaining 18 cm, fold in half. The card should be 9 cm x 11″. This fits into a regular business size envelope.

2. From the large scrap, cut four 1″ x 1″ squares (a.k.a. inchies).

3. Use rub-on letters to spell “baby” on contrasting 3/4″ squares. Adhere to the 1″ squares.

4. Cut a 3″ x 11″ piece from the patterned paper. Center and adhere onto card front.

5. Place and adhere “baby” onto the cardfront.

6. Take the tiny strip of cardstock saved from Step 1 and glue that to the cardfront, also. In your own penmanship write the word “Welcome”. I repeated the word, separating it with a dot. (kind of like: welcome • welcome • welcome)

I’m thinking of featuring some bread recipes next week, but I might be a bit busy with Communion activities… only 10 more days!

Valentine’s Basket Card

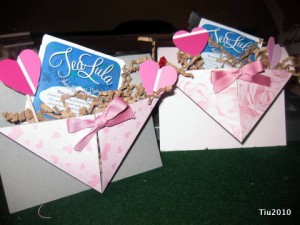
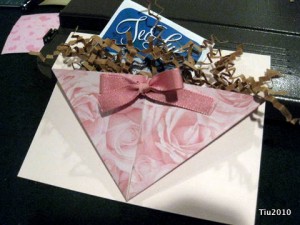
I made this card several years ago for a friends on their wedding anniversary and then again for Christmas. I thought Valentine’s Day might be a nice time to resurrect it. What better to hold a little teabag, candy or gift card? It’s also a nice way to recycle crinkly paper from gift baskets, and odd pieces of cut paper and ribbon! I suggest using a padded envelope or hand deliver your creation to your friend. Here’s my simple “basket” card that I’ll take you through.

For the card, you will need:

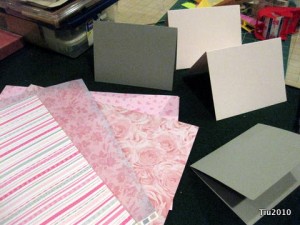
  • 4-1/4″ x 5-1/2″ piece of cardstock (half of 8-1/2″ x 11″ paper and folded)
  • 5-1/2″ x 2-3/4″ piece of coordinating printed paper
  • 9″ – 10″ ribbon
  • Miscellaneous: ruler, pencil, bone folder, gluestick or double-sided tape, hole punch

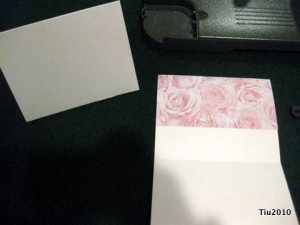
1.  Fold your cardstock in half if you haven’t already. Position the card so it is fully open. You will glue (or tape) your coordinated paper to the inside top half of the card. This might look strange, but hang on.

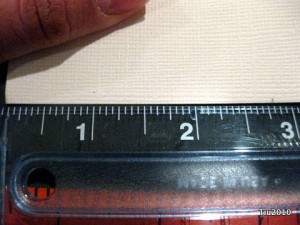
2. Close the card and on the bottom front face (just the other side of where you glued), mark a point at 2-3/4″ (exact center) from the edge. You may also want to mark 2-3/4″ up the two sides also, but this is not necessary. It’s the height of the printed paper.

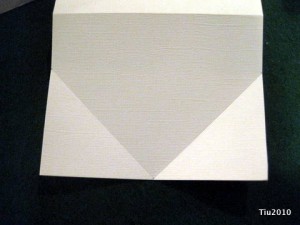
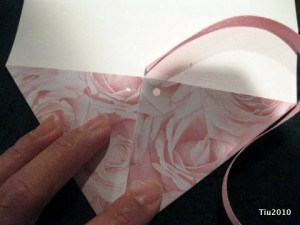
3. Take a bone folder or some blunt tool to score the paper from the bottom mid-point to the top edge of the printed paper (along the side of the card). You’ll have two right triangles that will become the “basket”.

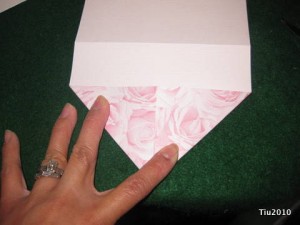
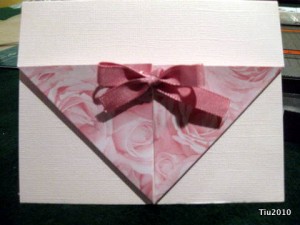
4. Fold the triangles up and use a bone folder to crease well. Almost done!

5. Punch holes at the top of the triangles for your ribbon and tie a pretty bow.

6. Use some leftover crinkly paper and place your favorite tea to share.

You’re done, good job! For some more fun, you could rubber stamp some cute designs all over the cardstock. Don’t forget that you’ll have a small amount of writing space inside the card since the front is folded over.

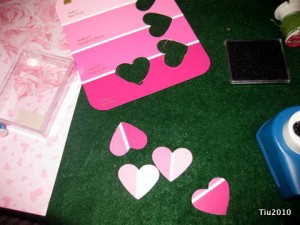
Here’s an extra little tidbit. You know those paint chips you get at the hardware store when you’re thinking you’re going to actually paint that ONE room… Use your paper punch and attach to some long toothpicks with glue or tape!

Hoping to have a few more Valentine’s Day resources for you tomorrow. Enjoy!

Related Posts with Thumbnails