Back to the Routine


New Year’s Eve and Day feel like blur now. Guests have traveled back home, and the house is empty. It’s been a party for almost two weeks! Kids are back in school, husband is back at work, and in a sense, so am I.

Random thoughts to start the year…

  • The garlic didn’t get in the ground before the cold snap. I wonder if I can just plant them in planters to have them outside?
  • As much as I complain about laundry, there’s something about washing all the linens and blankets from the holidays and folding dry, clean sheets, and putting away fluffy comforters and towels that makes me happy.
  • Anyone catch the start of the Oprah Winfrey Network?
  • I’m happy my fabric hoarding days are in the past… there are some fun projects to be had this year, and some projects yet to be finished from last year.
  • Lots of great things happening with Craft Critique and Niles Patch! I’m happy to be a part of it.
  • Not looking forward to taking all the Christmas decorations down. The house always looks so bare.
  • My son has drained all the make-believe playing out of me with his unlimited energy and love of superheroes. I have now been cast as Scarlet Witch, Batgirl and sometimes mom of Silver Surfer.

I am looking forward to continuing this journal and journey with all you virtual and real friends! Thanks to all the new Blog Frog friends, too!

Wordless Wednesday: A Day in the Life

Hanging Pictures – Part Two

After a little deliberation, I started my installation of our framed pictures. Hooray.

Then I stopped after one. Boo.

(Inhale…) My husband came home, looked, made a comment that made me think he seemed unsure of the placement, (the hallway isn’t that wide, and the pictures are 8×10 or larger), therefore I became unsure of my logic and decision-making in decorating, so I stopped. Whew, run-on sentence… yes. Now we’re/I’m reconsidering and replanning.

Maybe the frames will go in the dining room now. Everyone can enjoy the pictures, there’s plenty of room… I don’t know that I like the layout so much here. The drawback about the dining room is that there isn’t a lot of light. This could be a good thing too, because we don’t want a lot of direct light on the pictures. (Don’t want them to fade.) Wintertime there’s a ton of light reflecting off the snow. But, the hallway has directional lighting (recessed can lights) for framed art.

I’m trying another layout. Now there’s an empty space for which I don’t have a matching frame. There’s another wall at our living/family room. Maybe I’ll try that spot tomorrow. Can I just hire someone to do this? My patience is being tested, I know.

Hanging Family Pictures Collage Style

We’ve been trying to enjoy the fantastic weather here over the last couple of weeks, so as you might imagine, there hasn’t been much going on inside the house. This includes blogging, writing, house chores and the never-ending list of projects I want to start and those I want (or need) to get done… like fixing a few broken shelves in two closets and hanging up the family pictures.

Why do I find it so difficult to hang pictures? I guess if it’s one frame here, and one frame somewhere else, it’s a little easier, but here I’m trying to compose a nice grouping. Now it’s: how do I center the frames, which picture goes where, how much space do I leave in between the frames, how high do I mount them? I blame this on my type-A, perfectionist, engineering side. So, what to do?

I placed all the framed pictures on the floor and tried to figure out how it might look in different layouts. But, in the end, I broke out some sheets of paper and traced shapes.

I think I’ll be playing with the paper cut-outs for a little while.

Making Our Own Rotating Barrel Composter

Example barrel composter at class

** NOTE ** In an effort to get this posted quickly, I may not have all the dimensions, products or resources listed as I would like to. I’ll come back and update. I promise!

In trying to be more “green” at home, I finally finished putting our compost barrel together. Of all the recycling-earth friendly things we’ve started to do here, I’m most excited about this, but it probably shouldn’t have taken as long as it did. I started it in March at our local park district. (Embarrassed, yes.) Since I wasn’t able to stay for the whole class (1-1/2 hours), I jsut made sure I had all the pieces that were needed to finish and brought everything home. Of course, there was every intention to get it done on the first nice weekend, but that weekend went by, as did several others… and here we are today.

There have been a few inquiries about how to put it together. I was able to take a few pictures at class, which will hopefully be helpful with the instructions.

Materials needed

Legs

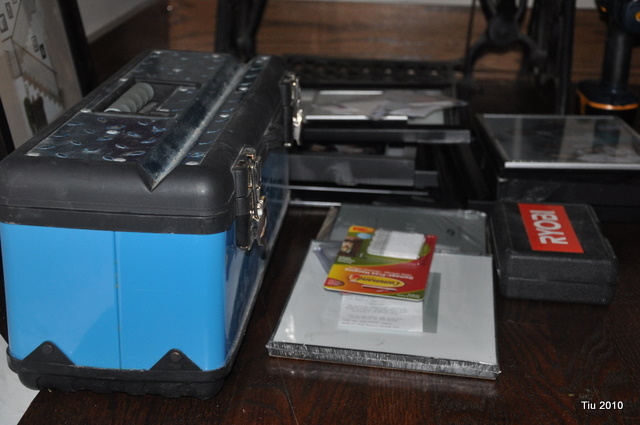
  • (2) Plastic sawhorse brackets (hardware included)
  • 4 pieces of 2×4 at 31″ to 32″ lengths each for legs
  • 2 pieces of 2×4 at 12″ each for pipe surface

Composter

  • (1) Food grade plastic barrel
  • (2) hinges
  • (2) barrel bolts
  • (2) pull handles
  • (1) 1-1/2″ diameter PVC pipe – 60″ length
  • (4) 1-1/4″ EMT/pipe brackets
  • several wire nuts to cap off screws

Equipment

  • Jigsaw
  • Hammer
  • Tape measure/ruler
  • Hole drill bit
  • Power drill (cordless is easier, but not necessary)
  • Drill bits
  • Permanent marker

Making the stands

This was essentially like making legs for a sawhorse except I didn’t place a long 2×4 across the legs. Instead I used two small pieces of 2×4. (See the pictures above and below of the finished barrel.)

Find the center of the 12″-2×4 and drill a hole to fit the bracket bolt. Center the sawhorse bracket on hole and hammer it down in place. Take the piece and place it on the sawhorse bracket. Take your assembly and put it on the ground upside down (ready to receive the legs). Insert leg pieces into the bracket/holders, hammer to secure, then place center support piece in the middle and tighten bolt. It may help to have someone steady the legs.

Preparing the barrel

On barrel ends, mark the centers. Drill a hole on both ends large enough for the 60″ PVC pipe.

Cutting the door

The door will be approximately 11″ x 11″. Your barrel may have seams (ribs or lines) that will be helpful for marking. From rib to rib on my barrel, I have 11 inches. I marked a square accordingly.

Before cutting the door, install the hinges and barrel bolts so that the door piece wouldn’t fall in after you cut it. To have the door open up like a trash chute, the barrel bolts are on top and the hinges are on the bottom. Place the pieces in position (no real measurements here) and traces locations and holes. Predrill all your holes with a small bit (5/16″ worked well) – it makes life so much easier!

At this point, take the jigsaw and cut ONLY at the hinge and bolt locations (4 cuts). Make sure your cuts go slightly past the hardware so you have somewhere for the jigsaw to start easily when you cut the rest of the square. Then install the hinges and bolts by hand making sure not to strip the screws (that’s actually me in the picture).

Cut out the rest of the square. After it’s finished, open the door to check if everything is cut correctly.

Install the two pull handles the same way, marking its location and predrilling holes. Basically, the pulls go on opposite sides of the barrel, above and below the door.

Using wire nuts, I cover all the screws on the inside.

Lastly, drill a number of random holes all around the barrel… but not through the door (plenty of air space around there).

Mounting the composter on the stands

Place your PVC pipe through the barrel. That’s the easy part.

It helps to have friends around for placing the barrel, but I was able to have my two kids hold the legs/stands upright and in place, while I maneuvered the barrel holding on to the pull handle.  Once you get the PVC pipe on the legs, take a couple of pipe brackets and secure to the 2×4. I had to angle the screws in a bit. They were slightly long, and would have gone through the 2×4 had I drilled straight down. As it is, you want to angle the screws in, to make sure the brackets are tight against the pipe when you secure it to the wood.

What to Compost

  • Coffee grounds
  • Tea leaves/bags
  • Eggshells
  • Fruit and vegetable scraps (I’ve been told that banana peels, orange peels and peaches have high levels of pesticides, so don’t compost them if you’re going to use your “black gold” to grow food.)
  • Shredded newspaper (for carbon)
  • Leaves, straw, hay, grass clippings

Do Not Compost

  • Deadly weeds
  • Diseased plants
  • Human or pet waste
  • Meat/fish scraps or bones
  • Oily/fatty food products
  • Dairy products
  • Chemically treated wood products

Trying to Bake Bread… again

Since we’ve been talking about food, what is it about fresh-baked bread that makes the house smell so good? There’s a grocery store two blocks away, and it’s just as easy for me to pick up their fresh-baked goods (they’re still warm, too). I think I’m pretty good at baking (quick breads, especially) but I’ve had no luck in the past with making anything that starts with yeast. Let me recap my epic failures.

About 8 years ago, I attempted to make a coffee cake. The “Rosy Red Coffee Cake” was a recipe from my “Great American Home Baking” binder cookbook. You know, the sort of cookbook that grows because you’re paying a few bucks a month and in return you receive myriads of recipe cards to fill your binder. I had such high expectations before I got married that I would try all the recipes. No such luck. But this recipe seemed so easy… yeast bread, cranberries, sugar, orange juice in a beautiful wreath. My wreath was all deflated, looked melted, and the bread itself… hard. Clearly, I must have killed the yeast.

About 4 years later, I tried to make cinnamon rolls from my aunt’s recipe. This recipe didn’t seem hard. I had a few years of quick bread recipes under my belt, so I thought, maybe my technique would be better this time. Pucks, hockey pucks, 12 of them.

Fast forward, April 2010. This time, this time I think I may have found a recipe I can count on. A recipe that has restored my faith in cooking with yeast… a No-Knead bread. (Aaaaah… the angels are singing for me.) You knead, I mean, NEED time – time for the dough to rise on its own. Don’t do this if you want your bread the same day. And where did I get this recipe? Actually, I saw Jim Lahey on Martha Stewart and heard him say “no knead bread”. I watched, and then thought, “Hmph, cool,” end of story. (Not like when I watched Good Eats with Alton Brown and he cut up a whole chicken, and did a southern fried chicken recipe. I ran to the store the next day, cut up my own chicken and made… fried chicken. Another story for another time.)

Actually, it was in the April 2010 Living magazine that they showed the no-knead bread (Pane Integrale) recipe and some step-by-step pictures. My one mistake: I used all-purpose flour instead of bread flour. In the magazine, they call for bread flour. In the television recipe, they call for either; I didn’t remember this. Everything else in the recipe was the same. I only realized I used AP flour after I had mixed everything and the dough was sitting to rise. Seriously, I thought, NOT AGAIN. I messed it up AGAIN! Well, let’s see how it turns out. Not to worry, though, because as you see from my pictures, I think everything turned out okay. Not a lot of fuss. I couldn’t have been happier about baking bread. It was really rustic, crusty on the outside and chewy on the inside. Lovely. I’ll try it again with bread flour next time.

Click here for some more of Jim Lahey’s recipes from the Martha show.

Related Posts with Thumbnails