Peace Day Tote Tutorial

My daughter loves the peace sign, ☮. So when I found this fabric at the local JoAnn Fabric store, I knew she’d like it. She asked if I could make it into a tote bag…uh, earlier this winter. *sigh* Fortunately, I made some time over the New Year weekend and was able to finish it.

What you need

1/2 yd cotton or canvas fabric – print
1/2 yd cotton fabric for lining
1/3 yd cotton fabric for handles
Tools: iron, ironing board, sewing machine (unless you’d like to sew by hand *grin*), large safety pin

What to cut

  1. Cut two rectangles, 12″ x 15″, out of the printed fabric
  2. Cut two rectangles, 12″ x 15″, out of the fabric for the lining.
  3. You’ll need (4) straps cut out of the handle fabric, cut 3″ x 34″.

Sew it up

  1. Put your printed fabric right sides together, pin, and sew up the sides at 1/2″ seam allowance. Press.
  2. Pin the bottom edge (12″ side), and sew 1/2″ seam along the pinned edge. Trim your corners at 45 degrees.
  3. Your tote should be looking tote-ish now, except inside out and the top edge is raw. At your ironing board, fold/flip back the top edge by one inch or so, so that the printed side is showing, press. Then tuck the raw edge in toward the fold. Press. You don’t have to edgestitch now.
  4. Repeat steps 1-3 with the fabric for the lining.
  5. For the straps: Pin two handle pieces, right sides together, and sew 1/2″ seam along the long sides. Press seams open and flat on both sides. Turn the straps right side out with the help of a large safety pin, or if you have a loop turner, that works well, too. Finish the other strap the same way. Press both pieces.

Put it together

  1. I attached the handles inside the bag. Take your printed bag, and turn it right side out. Press. Play around with the straps… Once you figure out where you want the handles, pin the bottom raw edge of your handle about 1-1/2″ below the top edge of the printed bag. Stitch in two locations to make sure the straps stay in place (see pictures?). Do this at each of the four ends.
  2. Now take your lining, turned inside out, and drop into the printed bag, so that the wrong sides of each bag are together. Your tote should look just about finished.
  3. Pin the bags together, lined up at the side seams. Be careful with the straps. If you have a free arm on your machine, this would be a good time to use it. Topstitch the bag 1/4″ from the top edge. This will attach the lining, secure the straps and finish the tote. Don’t forget to press to finish.
Making Our Own Rotating Barrel Composter

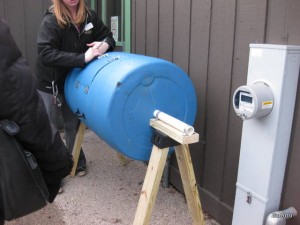
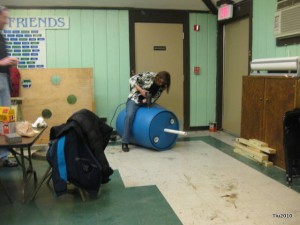
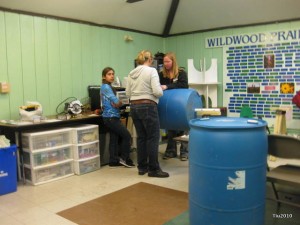
Example barrel composter at class

** NOTE ** In an effort to get this posted quickly, I may not have all the dimensions, products or resources listed as I would like to. I’ll come back and update. I promise!

In trying to be more “green” at home, I finally finished putting our compost barrel together. Of all the recycling-earth friendly things we’ve started to do here, I’m most excited about this, but it probably shouldn’t have taken as long as it did. I started it in March at our local park district. (Embarrassed, yes.) Since I wasn’t able to stay for the whole class (1-1/2 hours), I jsut made sure I had all the pieces that were needed to finish and brought everything home. Of course, there was every intention to get it done on the first nice weekend, but that weekend went by, as did several others… and here we are today.

There have been a few inquiries about how to put it together. I was able to take a few pictures at class, which will hopefully be helpful with the instructions.

Materials needed

Legs

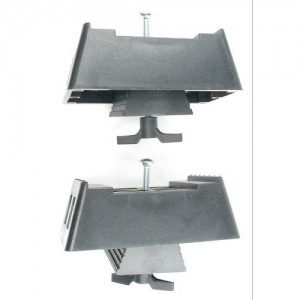
  • (2) Plastic sawhorse brackets (hardware included)
  • 4 pieces of 2×4 at 31″ to 32″ lengths each for legs
  • 2 pieces of 2×4 at 12″ each for pipe surface

Composter

  • (1) Food grade plastic barrel
  • (2) hinges
  • (2) barrel bolts
  • (2) pull handles
  • (1) 1-1/2″ diameter PVC pipe – 60″ length
  • (4) 1-1/4″ EMT/pipe brackets
  • several wire nuts to cap off screws

Equipment

  • Jigsaw
  • Hammer
  • Tape measure/ruler
  • Hole drill bit
  • Power drill (cordless is easier, but not necessary)
  • Drill bits
  • Permanent marker

Making the stands

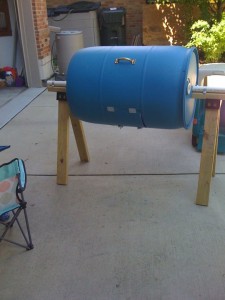
This was essentially like making legs for a sawhorse except I didn’t place a long 2×4 across the legs. Instead I used two small pieces of 2×4. (See the pictures above and below of the finished barrel.)

Find the center of the 12″-2×4 and drill a hole to fit the bracket bolt. Center the sawhorse bracket on hole and hammer it down in place. Take the piece and place it on the sawhorse bracket. Take your assembly and put it on the ground upside down (ready to receive the legs). Insert leg pieces into the bracket/holders, hammer to secure, then place center support piece in the middle and tighten bolt. It may help to have someone steady the legs.

Preparing the barrel

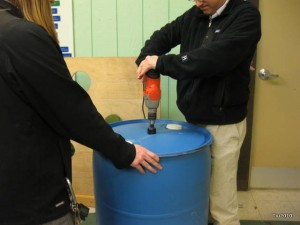
On barrel ends, mark the centers. Drill a hole on both ends large enough for the 60″ PVC pipe.

Cutting the door

The door will be approximately 11″ x 11″. Your barrel may have seams (ribs or lines) that will be helpful for marking. From rib to rib on my barrel, I have 11 inches. I marked a square accordingly.

Before cutting the door, install the hinges and barrel bolts so that the door piece wouldn’t fall in after you cut it. To have the door open up like a trash chute, the barrel bolts are on top and the hinges are on the bottom. Place the pieces in position (no real measurements here) and traces locations and holes. Predrill all your holes with a small bit (5/16″ worked well) – it makes life so much easier!

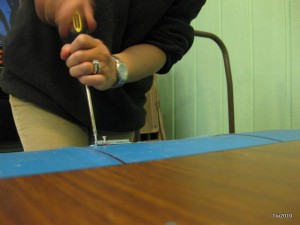
At this point, take the jigsaw and cut ONLY at the hinge and bolt locations (4 cuts). Make sure your cuts go slightly past the hardware so you have somewhere for the jigsaw to start easily when you cut the rest of the square. Then install the hinges and bolts by hand making sure not to strip the screws (that’s actually me in the picture).

Cut out the rest of the square. After it’s finished, open the door to check if everything is cut correctly.

Install the two pull handles the same way, marking its location and predrilling holes. Basically, the pulls go on opposite sides of the barrel, above and below the door.

Using wire nuts, I cover all the screws on the inside.

Lastly, drill a number of random holes all around the barrel… but not through the door (plenty of air space around there).

Mounting the composter on the stands

Place your PVC pipe through the barrel. That’s the easy part.

It helps to have friends around for placing the barrel, but I was able to have my two kids hold the legs/stands upright and in place, while I maneuvered the barrel holding on to the pull handle.  Once you get the PVC pipe on the legs, take a couple of pipe brackets and secure to the 2×4. I had to angle the screws in a bit. They were slightly long, and would have gone through the 2×4 had I drilled straight down. As it is, you want to angle the screws in, to make sure the brackets are tight against the pipe when you secure it to the wood.

What to Compost

  • Coffee grounds
  • Tea leaves/bags
  • Eggshells
  • Fruit and vegetable scraps (I’ve been told that banana peels, orange peels and peaches have high levels of pesticides, so don’t compost them if you’re going to use your “black gold” to grow food.)
  • Shredded newspaper (for carbon)
  • Leaves, straw, hay, grass clippings

Do Not Compost

  • Deadly weeds
  • Diseased plants
  • Human or pet waste
  • Meat/fish scraps or bones
  • Oily/fatty food products
  • Dairy products
  • Chemically treated wood products

Celebrating a Friend’s Engagement

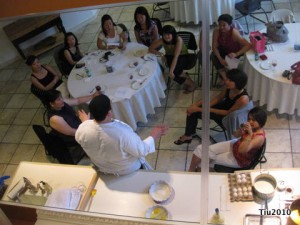
How could you not have fun with a bunch of girlfriends at a cooking class and then karaoke in a private room belting out hits from the 1980’s? There were plenty of treats for us at dinner, and unfortunately, I didn’t make time to bake up a batch of cookies to share. (I really wanted to.)

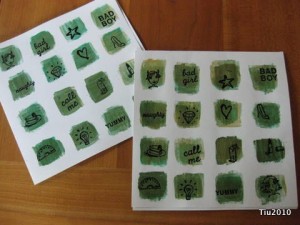
I did make this card for my friend.

Borrowing a line from a Las Vegas commercial, I wrote this in the card, “What happens at the bachelorette party, stays with the bachelorette party.” So with that, I won’t go much into the weekend details (no big debauchery, really), but I’ll say it was so much fun spending time with the ladies. I will share how to make the card!

What you need:

  • The Bad Girl’s stamp kit by Chronicle Books
  • 6″ x 6″ card – white cardstock
  • Two or three coordinating colors in acrylic paint – I used Lumiere paint to coordinate with the bride’s invitation. Feel free to experiment with other colors!
  • Black embossing powder
  • Miscellaneous supplies: paint brush, ink pad, and heat gun
  • I’m assuming there is general knowledge about embossing and rubber stamping… basic techniques can be found by searching for “rubber stamping basic embossing technique“.
  1. If you need guidelines, then use your ruler and lightly pencil out a grid, evenly dividing the card into 16 spaces. I did not do this… just eyeballed the spacing to give it a handcrafted feel.
  2. I then took drops of each color and placed on a foam plate (palette) to mix the colors a bit. This is all very free-range art; mix as much or as little as you want. I like it lightly mixed so you can still see different colors.
  3. Paint 16 squares on your card front, preferably free hand. The squares don’t have to be perfect. Let dry.
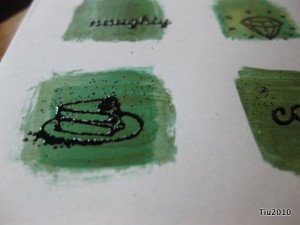
  4. When paint is dry, stamp your images within the square. Again, I went for a freehand look and did not align the images in a certain orientation. Off-center is fun and quirky!
  5. NOTE: I stamped four images and then dusted with embossing powder.
  6. Once your card is all dusted with embossing powder and you’ve tapped off the excess, turn up your heat gun and make some embossing magic!

Voila! It’s done and ready for your personal note for your bride-to-be pal.

What I’ve Learned Having Houseguests

Now that the holidays are over and I’ve recovered somewhat, I tend to review our hosting strategies, successes and misses. Every year we have at least 1-3 guests stay with us for any given length of time. It could be an overnight stay or a couple of weeks. Don’t know about other people, but I get worked up. I just want to make sure that our guests feel welcome and comfortable, that they enjoy their stay and would want to come back.

We have a slight challenge of not having a dedicated guest room, but here’s how we get around that: the basement. It becomes a semi-private suite. In the case of my awesome brother-in-law, he’ll room in my kid’s room, or with my kids. No problem. However, I can’t necessarily assume that everyone will be as accommodating.

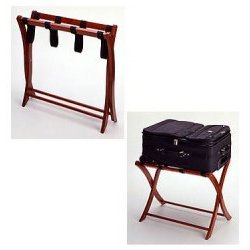
My must haves: No matter what the state my house is in, I will prep good pillows, a good air mattress (we have two), towels, sheets, clock, storage cubes doubled as nightstand, hangers, and coat rack. Don’t have yet but would like: luggage rack.

Entertaining: Here, I luck out again with pretty easy going relatives. My in-laws did most of the shuttling around last Fall with our guests. But, it’s helpful to have schedules and sight-tour brochures handy. Seriously, I even picked up at our library a few copies of “family-friendly” publications that have local things-to-do and set that on the bedside table for our guests.

Meal times: I’ll ask about favorite snacks and more importantly, kids favorites, if I’m not exactly sure what my guests are into. Putting together a dinner/meal schedule was also a super timesaver. It was more like a guideline, if anything, but sure helped with grocery lists. We had plenty of drinks on hand too.

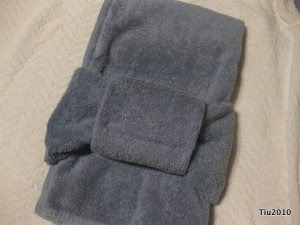
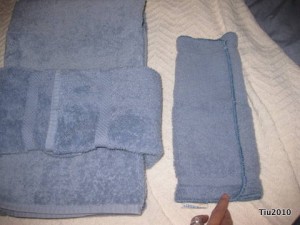
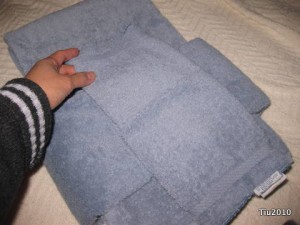
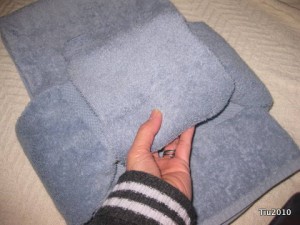
Here’s my favorite way of setting up my towels on the bed for a cute “welcome”. One of my best friends taught me this a long time ago when I stayed at her home for a few days. Sorry, you might only get this the first time you come over, after that, you’re like family and I don’t sweat it out so much.

Abby took video footage of me putting it together (our first video tutorial), but the file was too big to upload! This will have to do.

**Update** I figured out how to add video:

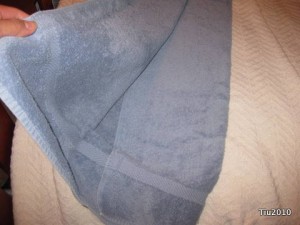
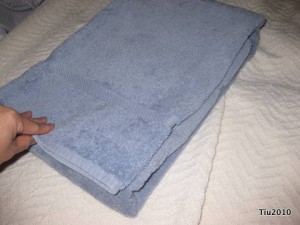
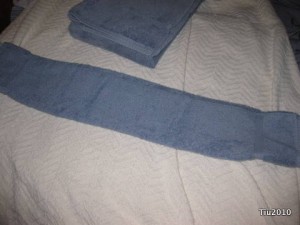
1) Take the bath towel and fold into thirds along the long direction.

2) Fold into thirds the other way (short direction).

3) Take the hand towel and fold into thirds along the long direction.

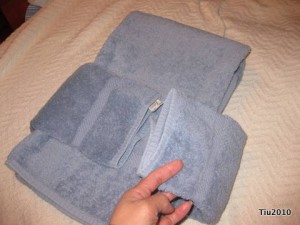
4) Now wrap the hand towel around the bath towel.

5) Take the wash cloth, fold into thirds, then wrap around the hand towel to hide the ends and create a “bow” appearance.

Voila! Hotel-ish towels for your guests… enjoy!

Recycled Cardboard Box Notebooks

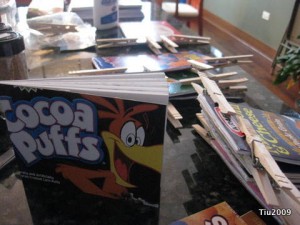
Recycled Cereal and Product Boxes

This is too much fun and too easy. I love making little gifts for little friends. These recycled cereal box (snack box, pasta box) notebook is just too cute. They’re all drying right now in my kitchen because my basement crafting table is completely cluttered with other projects in progress. (This is why I think I have crafting A.D.D. but that’s for another time.)

So… I was cutting and breaking down all these boxes and saving them in a container (not cluttered). I’m sure my husband thought I was nuts, becoming a hoarder. (See honey, I’m using them!!) I took all the scrap paper I was using for computer printer paper (like backs of school notes, school homework, junk mail with blank sides, etc.) and cut them down to the sizes I needed. I tried to stay with either half sheets (5-1/2″ x 8-1/2″) or quarter-size (4-1/4″ x 5-1/2″).

My dilemma was figuring out how I wanted to bind the books. I actually tried handsewing one book. There are tons of how-to’s online (like here or here), but in the end, it just didn’t look the way I wanted it to. I could have (COULD HAVE) just gone to the office copy place to have them bind the books with a comb, but I really wanted to stick with an all-recycled type of project and, dare I say, I’m frugal. Here’s how I chose to bind.

Just pick your covers, take your sheets of paper and clamp together. I kept these to 25-30 sheets each so clothespins are perfect. White glue is an amazing thing. Just squeeze some down the side you want as a spine, let dry a little, and then do a second application. The book is practically done at this point, and that’s where I am in the picture. What I have left to do is to make a nice, skinny spine cover with solid colored paper like craft paper or maybe even brown paper bag? We’ll see what I have in my paper bin.

Happy recycling.

Christmas Card Display idea

Christmas Card Display Idea

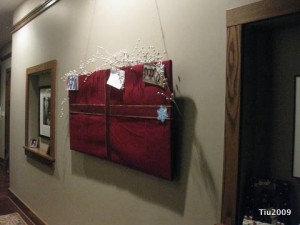
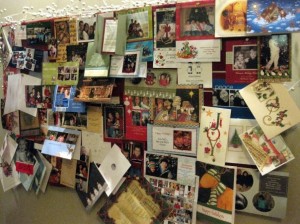
Maybe you tape cards to the back of the door. Maybe you string them up along the top of the wall, or maybe line the cards up along your fireplace mantle. Here is a fun way to display your holiday greeting cards if you want to try something new.

Supplies: 2 x 4 ceiling tile, fabric, ribbon, light duty staple gun, picture screw hooks, heavy twine or rope, push pins

Make sure you have enough fabric to cover your board. Place your fabric on the floor, right side down, and then the ceiling tile, also right side down. Wrap the fabric around the edges, and staple to the board. Turn right side up, and place ribbon horizontally and vertically to make board look like a present. I also stapled these to the board.  On the back side, I screwed hooks into the board a few inches in from the edges and then strung twine through them to create a hanger. I loved how it turned out last year.

Christmas Card Display Idea

Christmas 2008 Card Gallery

Related Posts with Thumbnails